# Graphic template editor
When entering the **Graphic Template Editor**, you will see two options.\
You can choose between using the new editor or the classic editor.\
We recommend using the new editor.
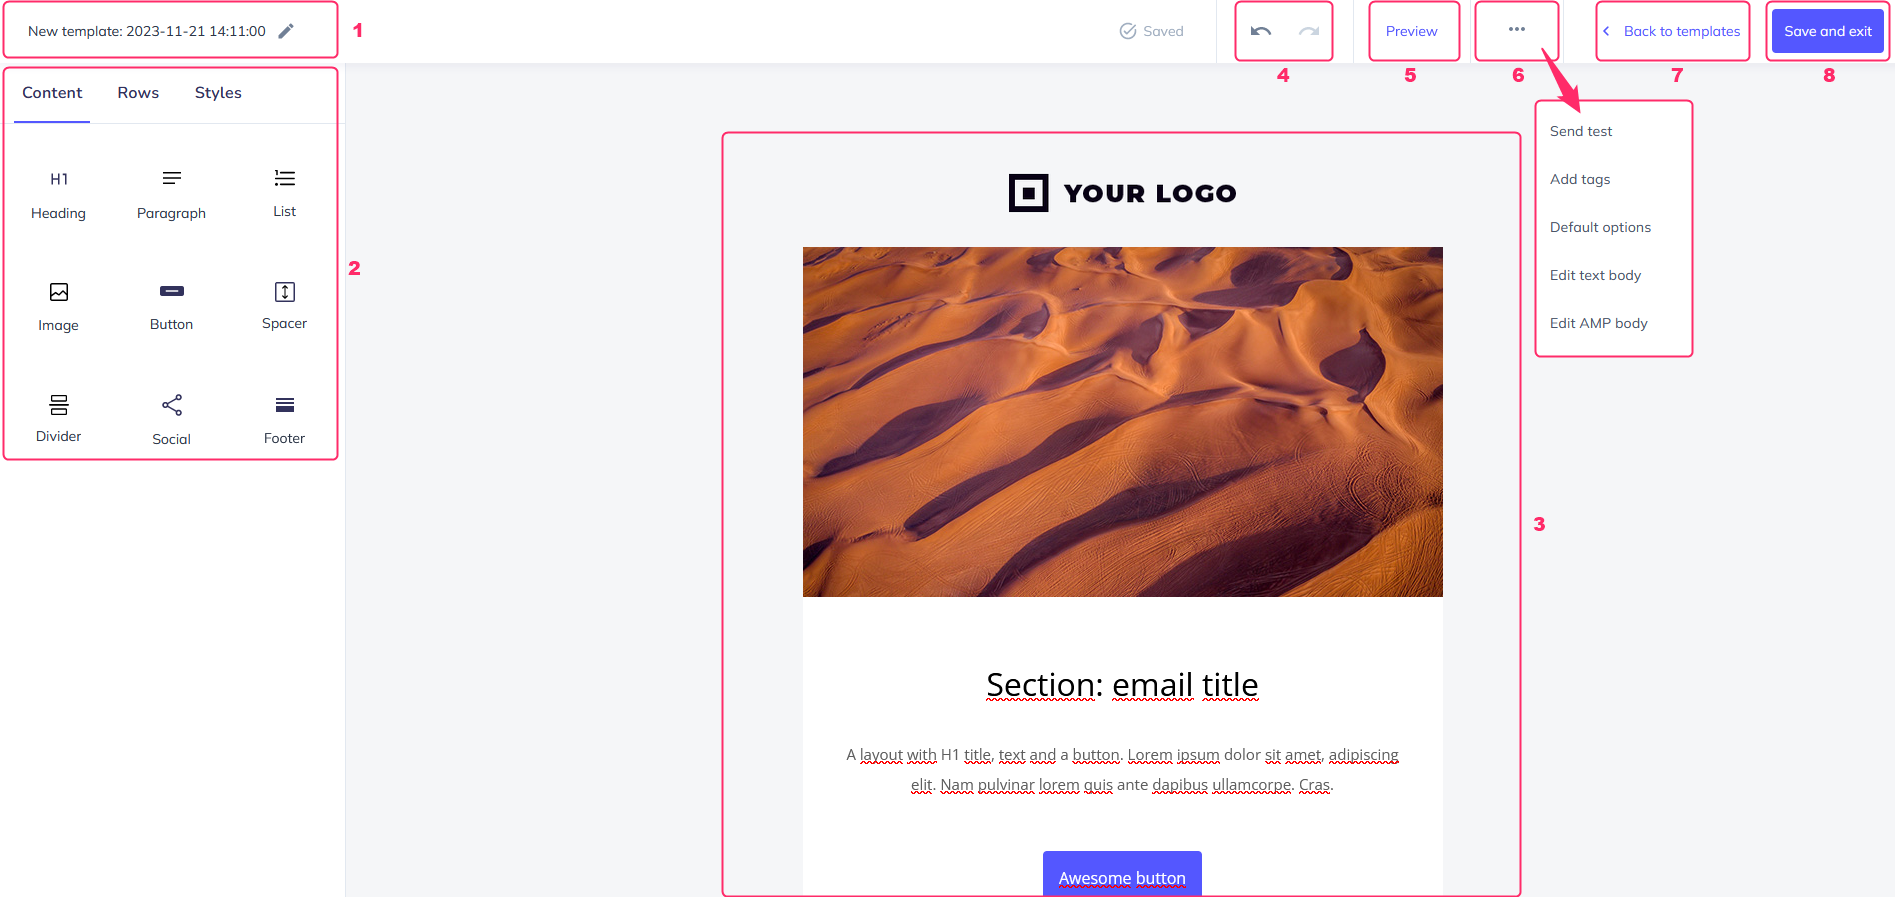
The template editor consists of the following areas:
1. Template name.
2. Objects box to design your template.
3. Model of your created template.
4. Buttons to undo or redo a change.
5. **Preview** will show a preview of the template.
6. The button with three dots will open a menu with several options:
* **Send test:** used to send a test with the template being edited.
* **Add tags:** you can add tags to the template.
* **Default options:** you can set a default **Sender** and **Subject** to use with this template.
* **Edit text body:** you can create a default message body if you don't define one when using this template in a campaign.
* **Edit AMP body:** you can create a default AMP if you don't define one when using this template in a campaign.
7. **Back to templates** will return to the previous menu, and the editing of your template will be saved automatically.
8. With the **Save and exit** button, you will save the changes and go back to the previous screen, where you will see all your templates.
---
# Agent Instructions: Querying This Documentation
If you need additional information that is not directly available in this page, you can query the documentation dynamically by asking a question.
Perform an HTTP GET request on the current page URL with the `ask` query parameter:
```
GET https://help.sitioshispanos.com/menu-principal/guias/email-marketing/como-crear-plantillas-de-mail/editor-grafico-de-plantillas.md?ask=
```
The question should be specific, self-contained, and written in natural language.
The response will contain a direct answer to the question and relevant excerpts and sources from the documentation.
Use this mechanism when the answer is not explicitly present in the current page, you need clarification or additional context, or you want to retrieve related documentation sections.