How do I add a record to the DNS Zone?
If you already have a DNS Zone created and need to add a new record, follow these steps:
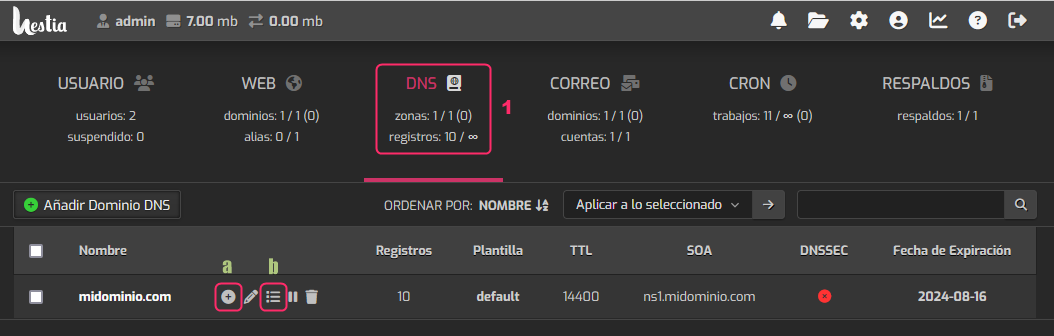
- First, go to the DNS area.
- In the domain you want to modify, you will find two ways to add a new record:
The icon a will allow you to add a new record directly.
The icon b will allow you to view the DNS Zone and from there create a new record.
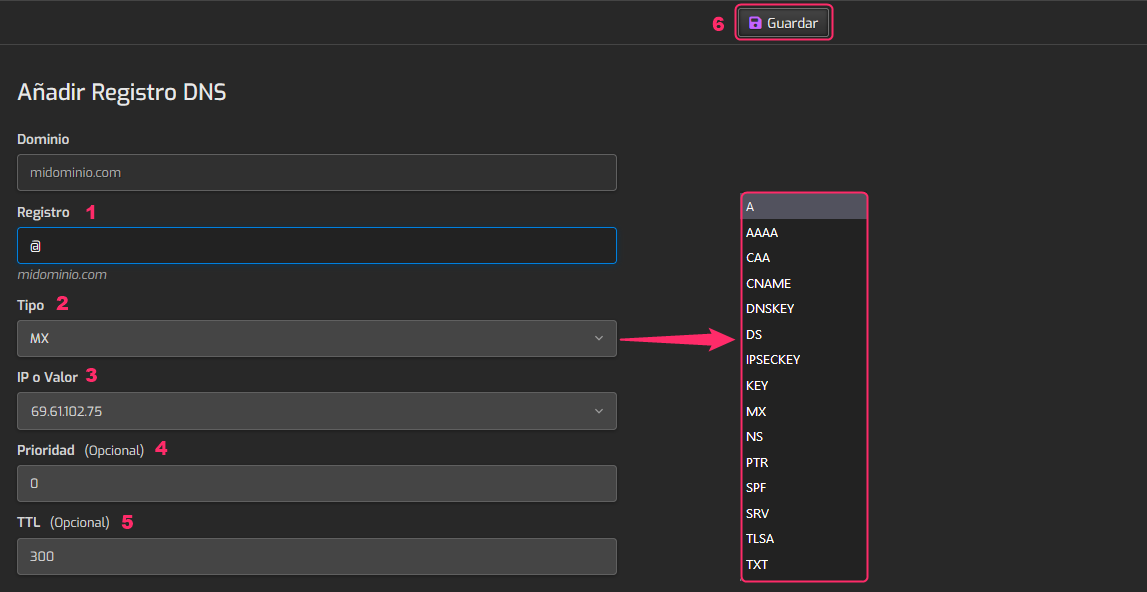
If you enter from the icon ‘a’ you will see the following screen, where you can create the new record:
- In Record write the subdomain you need or you can leave @, which is synonymous with the main domain of the DNS Zone.
- In Type choose the type of record you need (A, MX, TXT, etc).
- In IP or value you will have to write the IP address or domain where this record will point.
- In Priority, if the record type allows it, you can define the value. It is normally used in MX records.
- In TTL you can define the time it will take for the record to check again for possible changes in the DNS Zone.
- When you have the record configured save the changes with the Save button.
If you enter from the icon ‘b’ you will see the domain’s DNS Zone. From the Add record button you can add the new record.