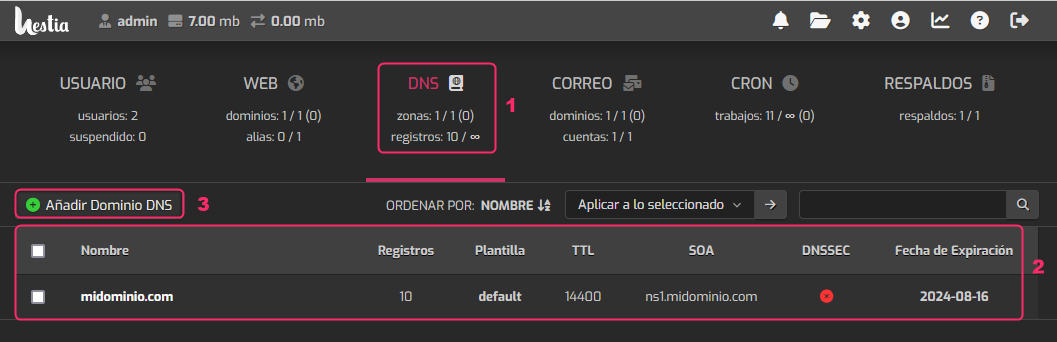
To create a DNS Zone follow these steps:
- Go to the DNS area.
- You will see the list of DNS Zones already created. In this case, one was created for midominio.com.
- Press the Add DNS Domain button to add a new DNS zone for a domain.
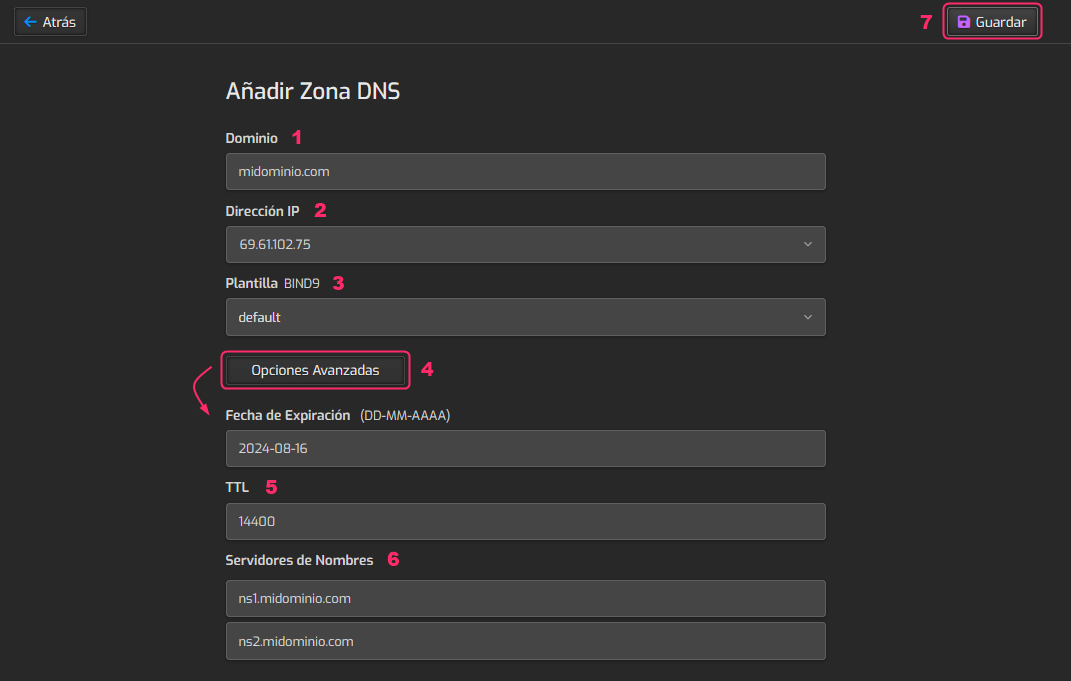
The data the system will ask for is as follows:
- First, enter the domain for the DNS Zone.
- The IP address is that of your server.
- The template should be set to default.
- You could save the DNS zone with the Save button in step 7, but clicking Advanced Options will reveal additional options that may be useful.
- The TTL can be changed to a lower value, such as 600 or 300.
- At this point you can define the domain’s DNS for the DNS Zone.
- When you have everything configured save the changes with the Save button.