How do I create mailboxes?
To create mailboxes you need to have a domain created with the capacity to create the mailboxes.\ \ If you already created a hosting account, one of the options during its creation was Mail Support. \ This will automatically generate the domain so you can create mailboxes.
To create mailboxes follow these steps:
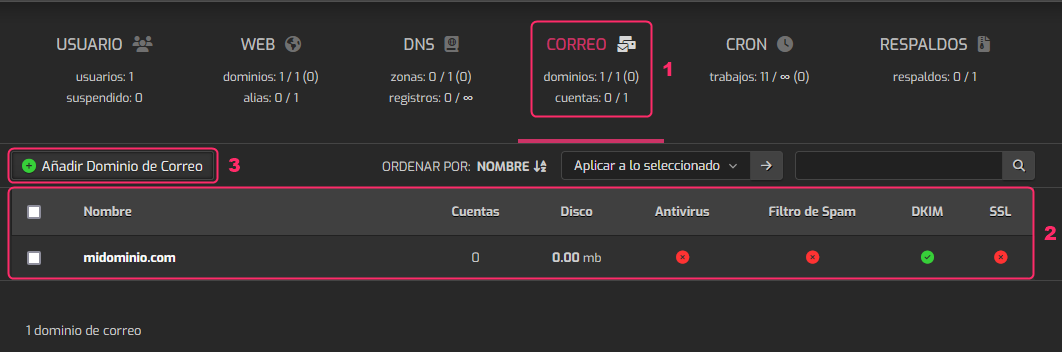
- Go to the MAIL area of the top main menu.
- You should see a domain in the list, with the number of mailboxes created and its particular information.
- If you don’t see any domain you will need to create one by pressing the Add Mail Domain button.
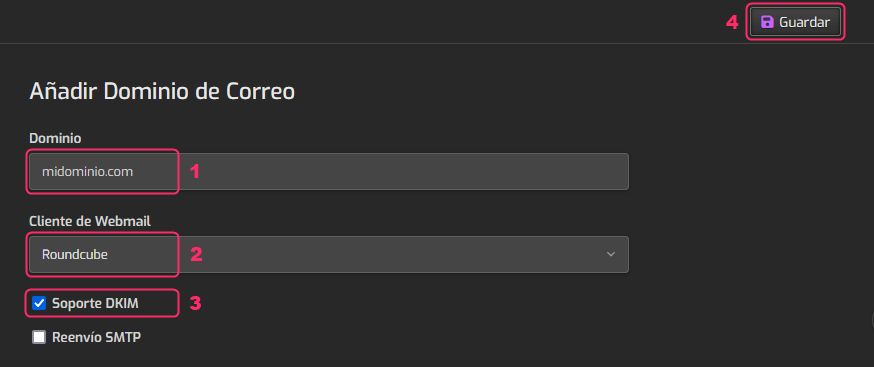
The data the system will ask you for will be:
- The domain with which you will create the mailboxes.
- The Webmail client with which you can check the mailboxes from your browser. We recommend Roundcube.
- Enable the DKIM Support option to have mail authentication that complies with anti-spam policies.
- Save the changes with the Save button.
Once you have the domain created you will see information such as the number of mailboxes already created, the total disk space used and you will also see a floating menu with the following options:
a - With this button you can create new mailboxes.\ b - With this button you can access the Webmail.\ c - You can edit the account settings with this button.\ d - You can edit the domain’s DNS Zone with this option.\ e - With this option you can suspend the domain. All created mailboxes will stop working.\ f - You can delete the domain with this option. This will delete all associated mailboxes.

Now that you have the domain created, follow these steps to create the mailboxes:
- In the floating menu options of the domain enter the green icon, option a in the picture above.
The data to configure are the following:
- First you will see the domain with which you will create the mailboxes.
- Below you will have to write the name of the new mailbox.
- Write below the password for the mailbox.
- From the Advanced Options button you can configure some additional options that we will see later.
- You can configure a secondary mailbox where you will receive the new password if you reset it.
- In the box on the right you will see the data to configure the mailbox in an external mail client or to access the Webmail.
- Finally, press the Save button to save the changes.
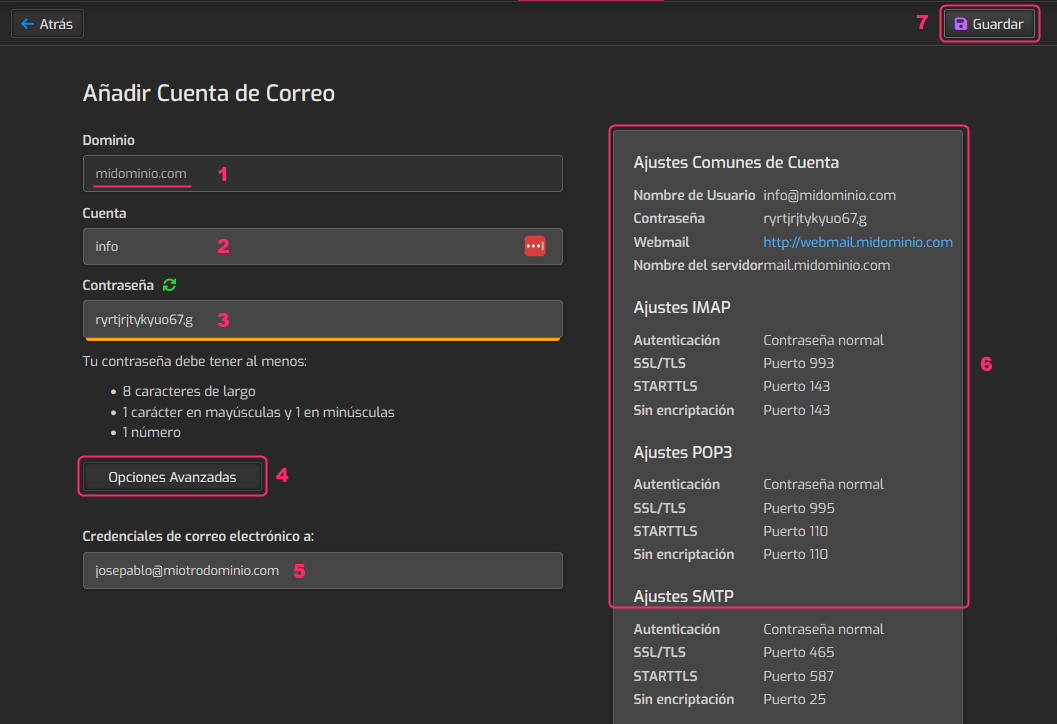
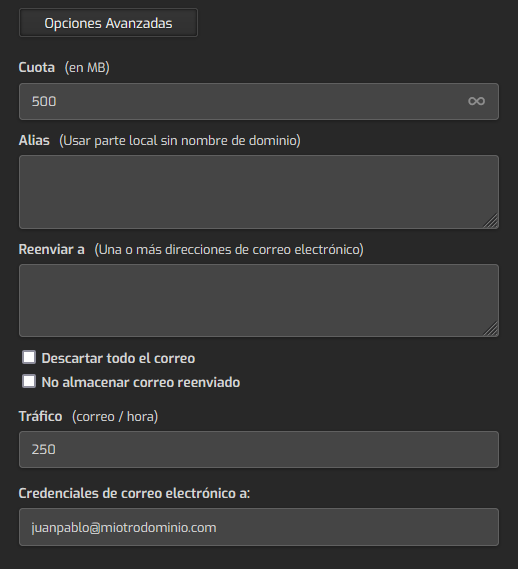
The most useful options you will find in the Advanced Options button are these:
- In the first option you can define the maximum space the mailbox can occupy.
- The Alias will allow you to generate a mailbox that will receive all the mails that arrive to the created primary mailbox.\ This is similar to a redirect but does not require the Alias mailbox to be created.
- This option is similar to the Alias, but all mails will be forwarded to a secondary mailbox that must be created. It can be a mailbox of the same domain or external to your server.
- Traffic defines the mails per hour that the mailbox can send.\ This limit is important to avoid spam. A value between 100 and 250 is recommended.
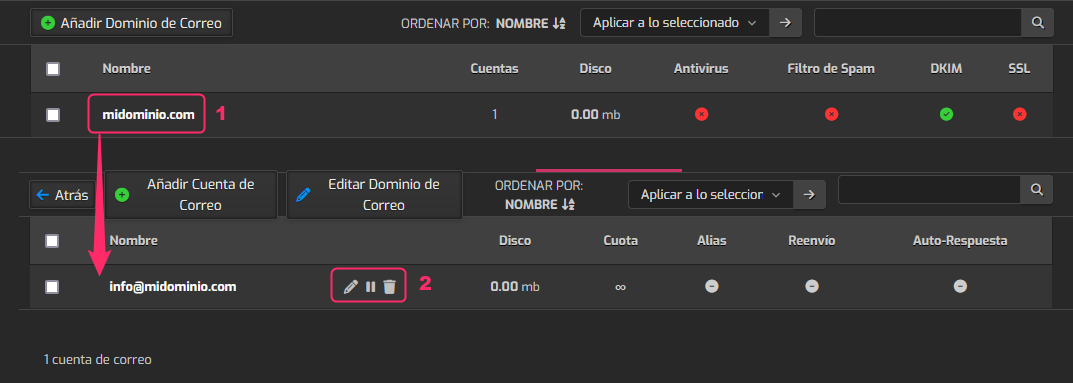
In the end you will have the domain created and the mailboxes created. You will see them as follows:
- You will first see the domain with which you created the mailboxes. If you click on the domain it will take you to the list of created mailboxes:
- To the right of each mailbox you will see its particular data and a floating menu where you can edit its parameters, suspend the mailbox or delete it.