How to configure the Catch All mailbox?
Below we will show you how to configure the Catch All mailbox.
When an email is sent to an @your-domain account that does not exist, instead of returning that email to the sender, the mail server can “catch” it and forward it to a real mailbox. This is very useful to avoid losing messages when the person who sent them mistyped your email address.
The mailbox that receives these “lost” emails is called the Catch All or Default mailbox.
Accessing the Catch All or Default Mailbox tool:
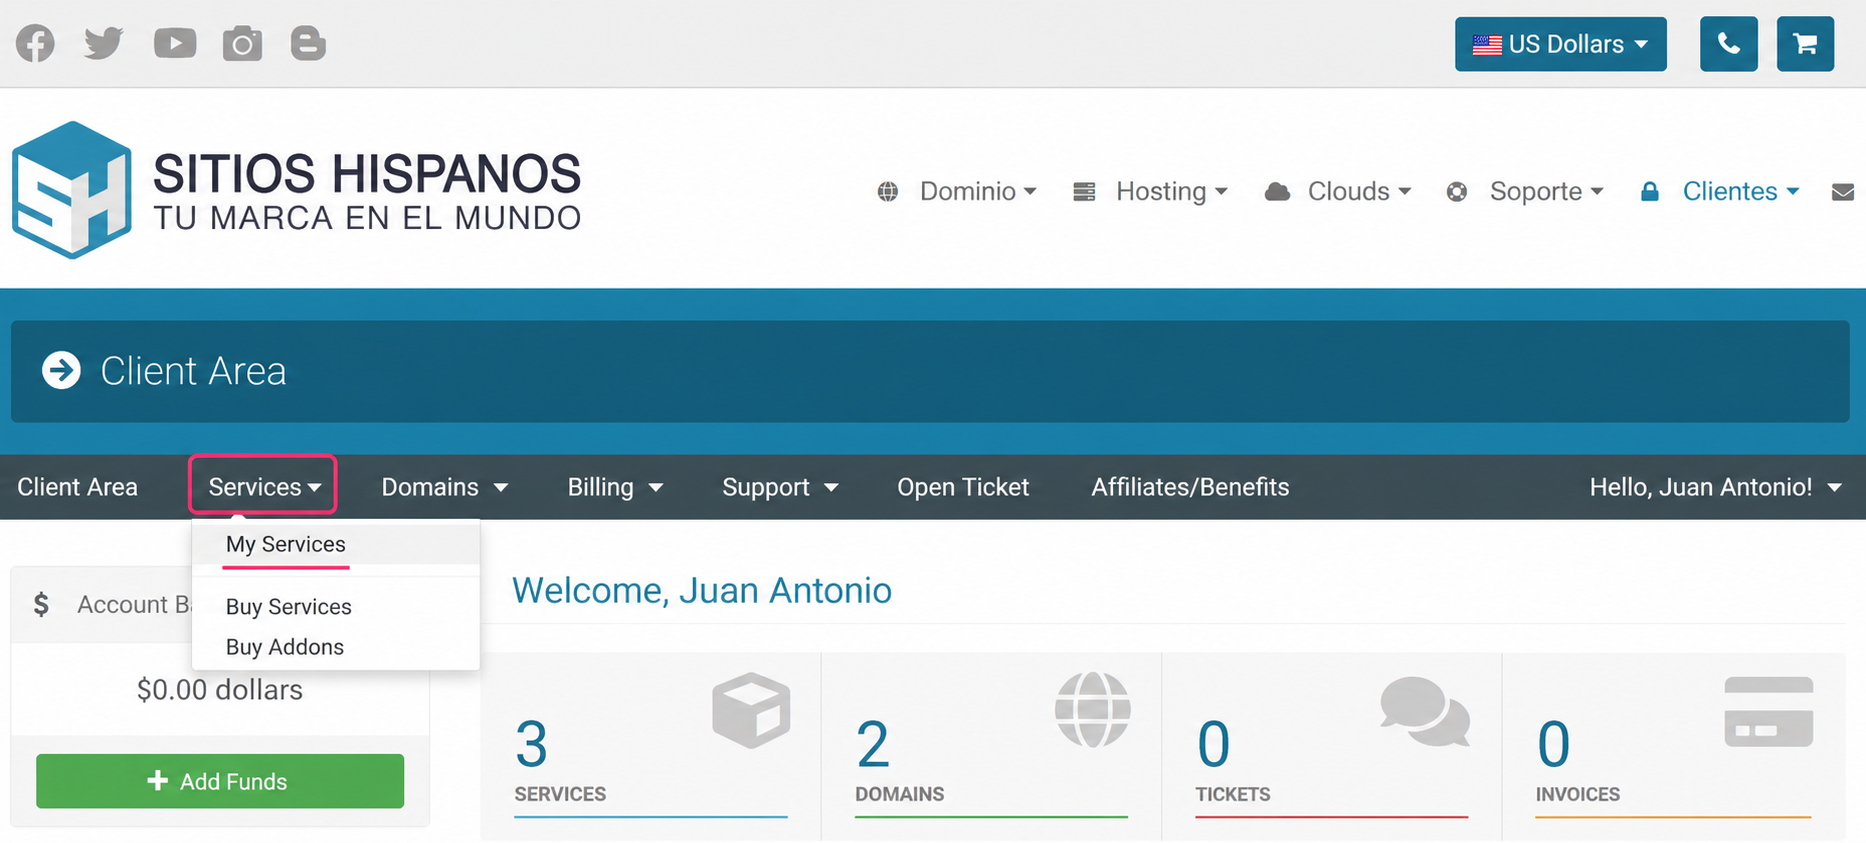
- Go to your Client Area and click Services, then My Services.
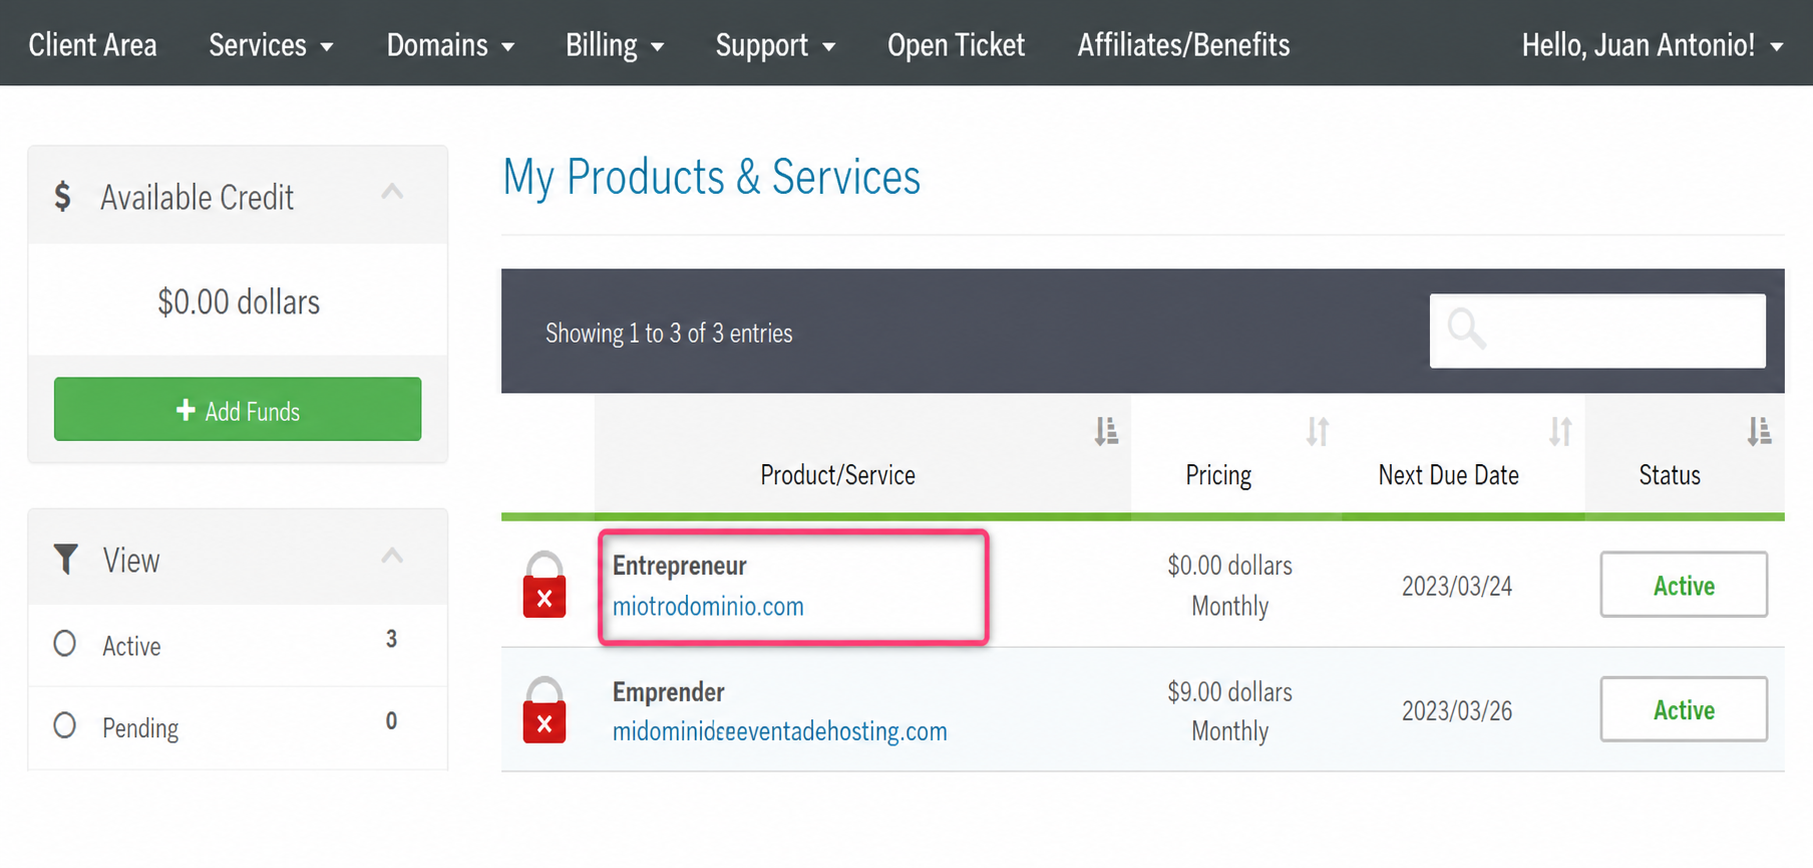
- From the list of hosting plans you have, select the one you want to configure the Catch All or Default mailbox for.
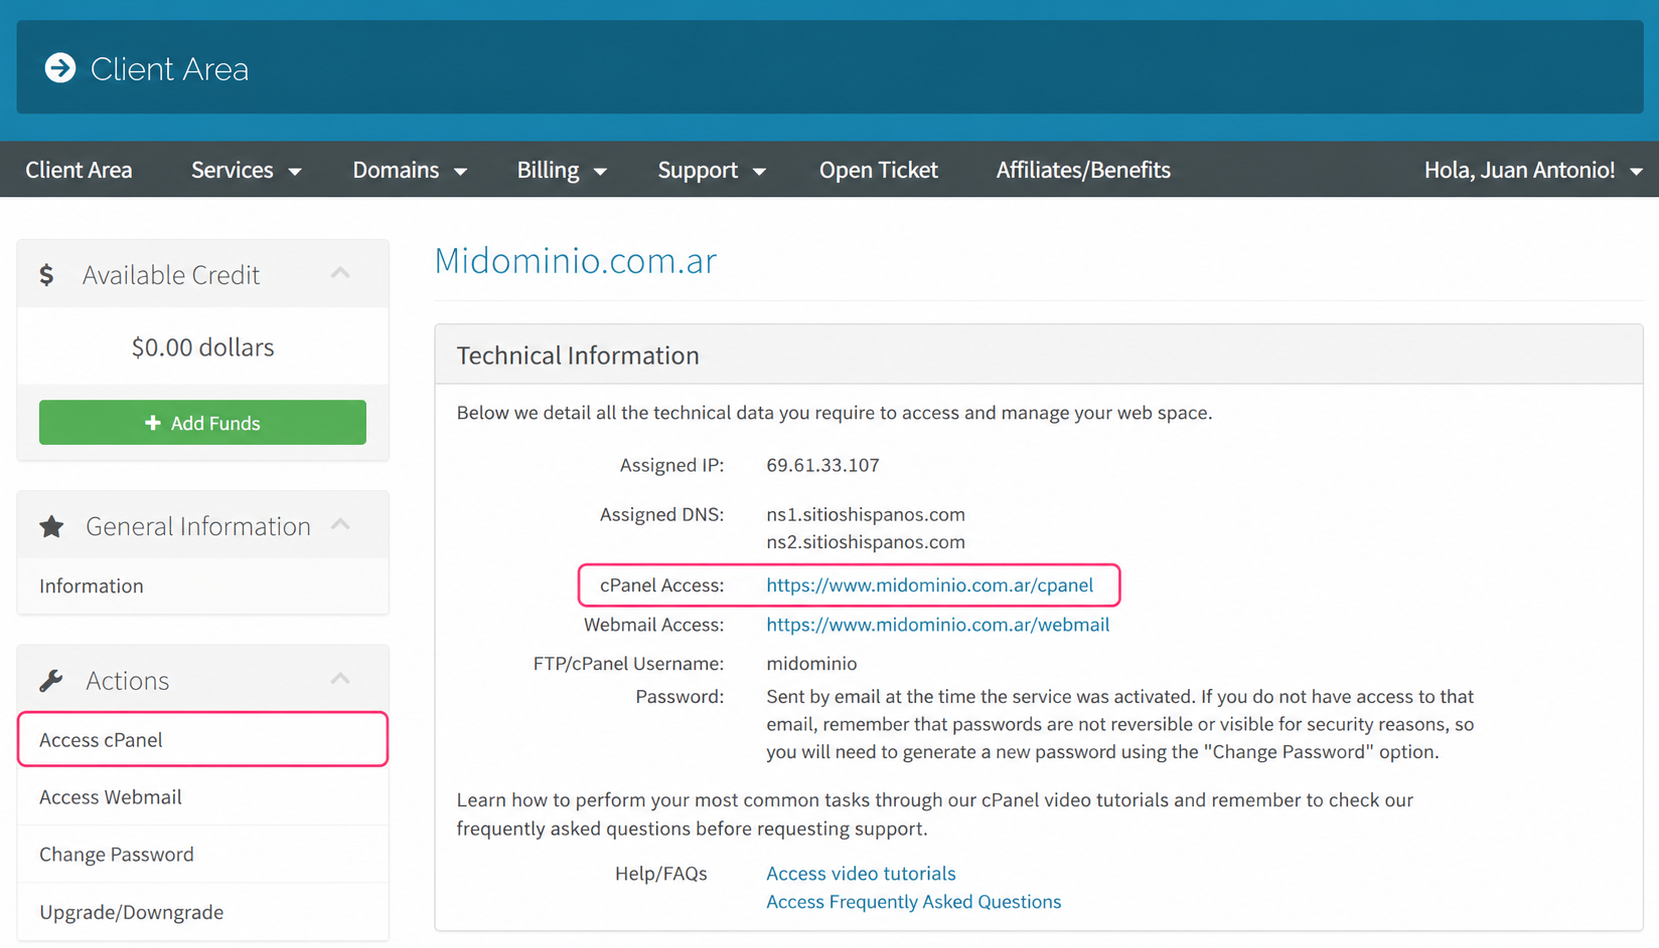
- On the new screen you’ll see, in the Actions box on the left, the option to access the cPanel control panel.
You will also see, in the central Technical Information box, the direct link to the panel from your browser.
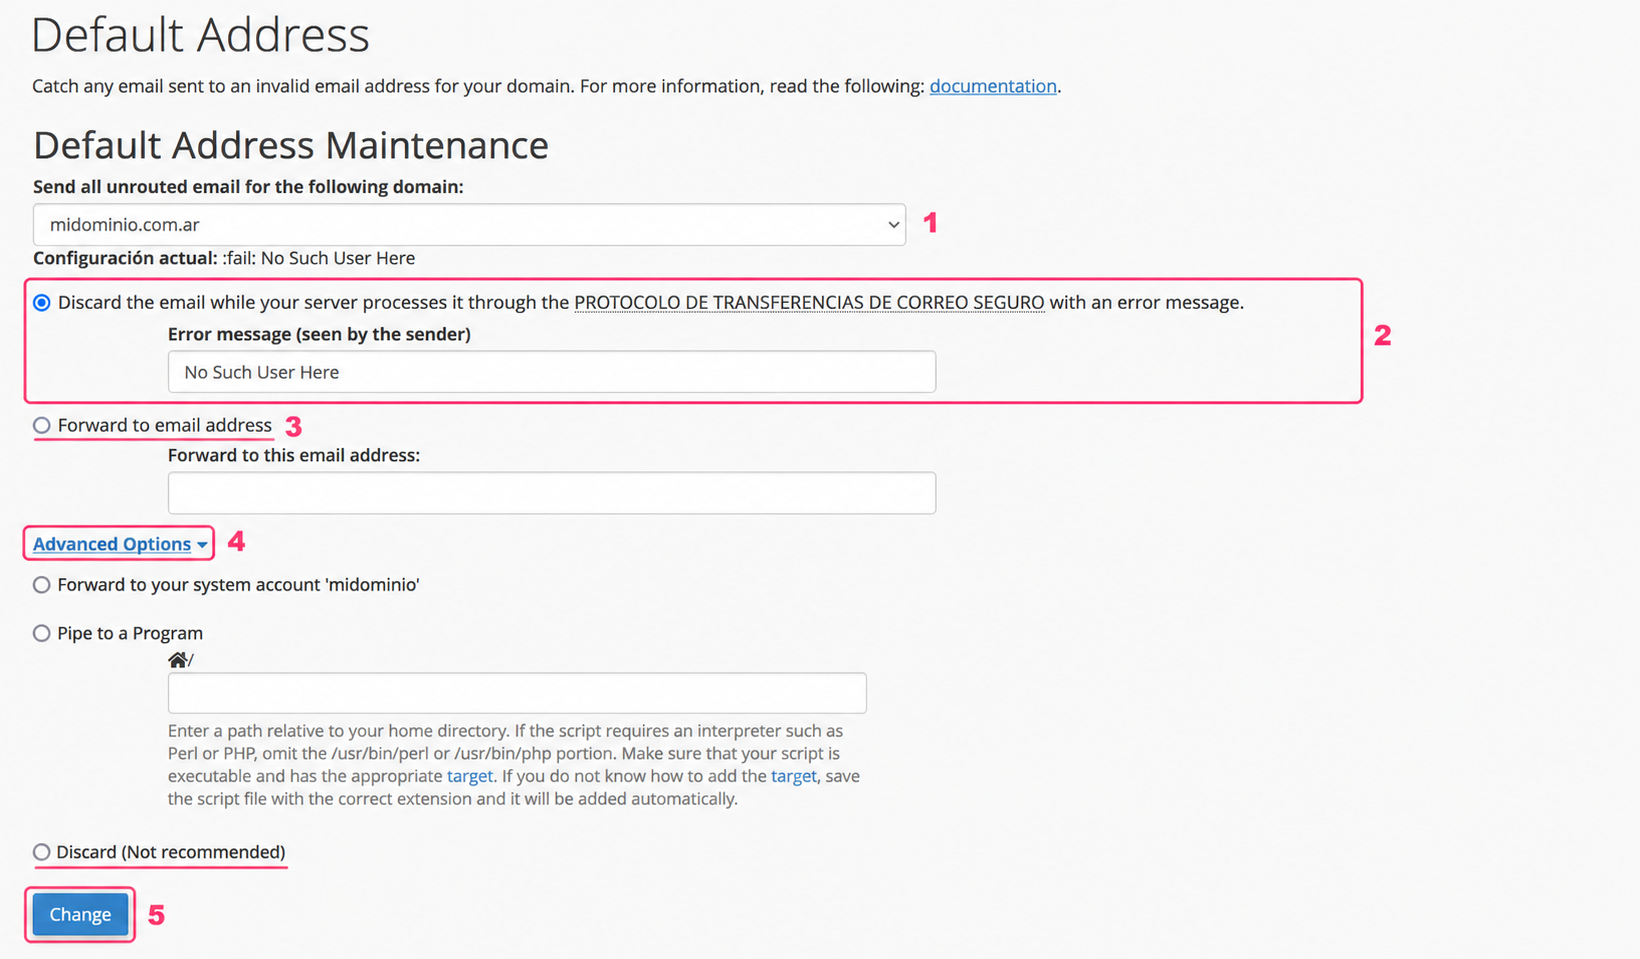
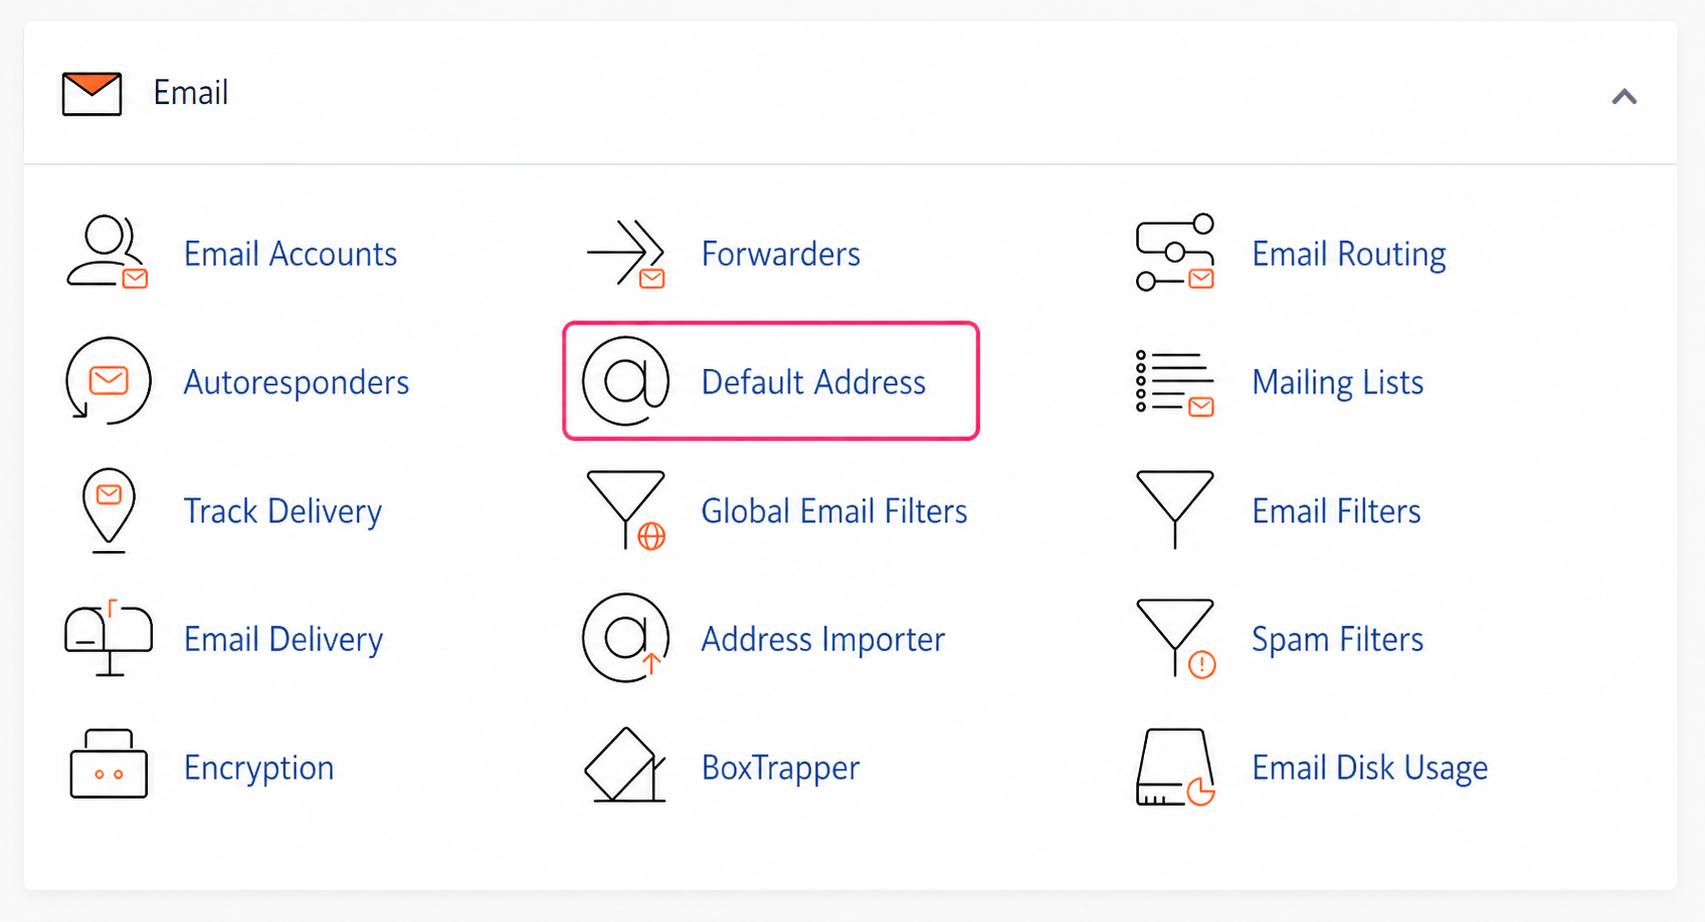
- Once in the cPanel control panel, enter the Default Address in the Email box.
- On the default mailbox configuration screen you can choose different options to redirect emails sent to non-existent mailboxes.
These are the settings:
- First, you’ll see the domain selector for which you will configure the Catch All mailbox.
- Below, the most recommended option to configure the Catch All mailbox. This option will delete the received mail and send the sender a message that you can configure in the text box.
- The Forward to email address option will forward the received mail to a specified mailbox. This option is not recommended as it could generate spam and affect your domain’s sending reputation.
- Expanding Advanced Options you’ll see an option called Discard that will simply delete the received message.
- Once you have configured this tool to your liking, save the changes with the Change button.