How to create and configure Databases in Plesk?
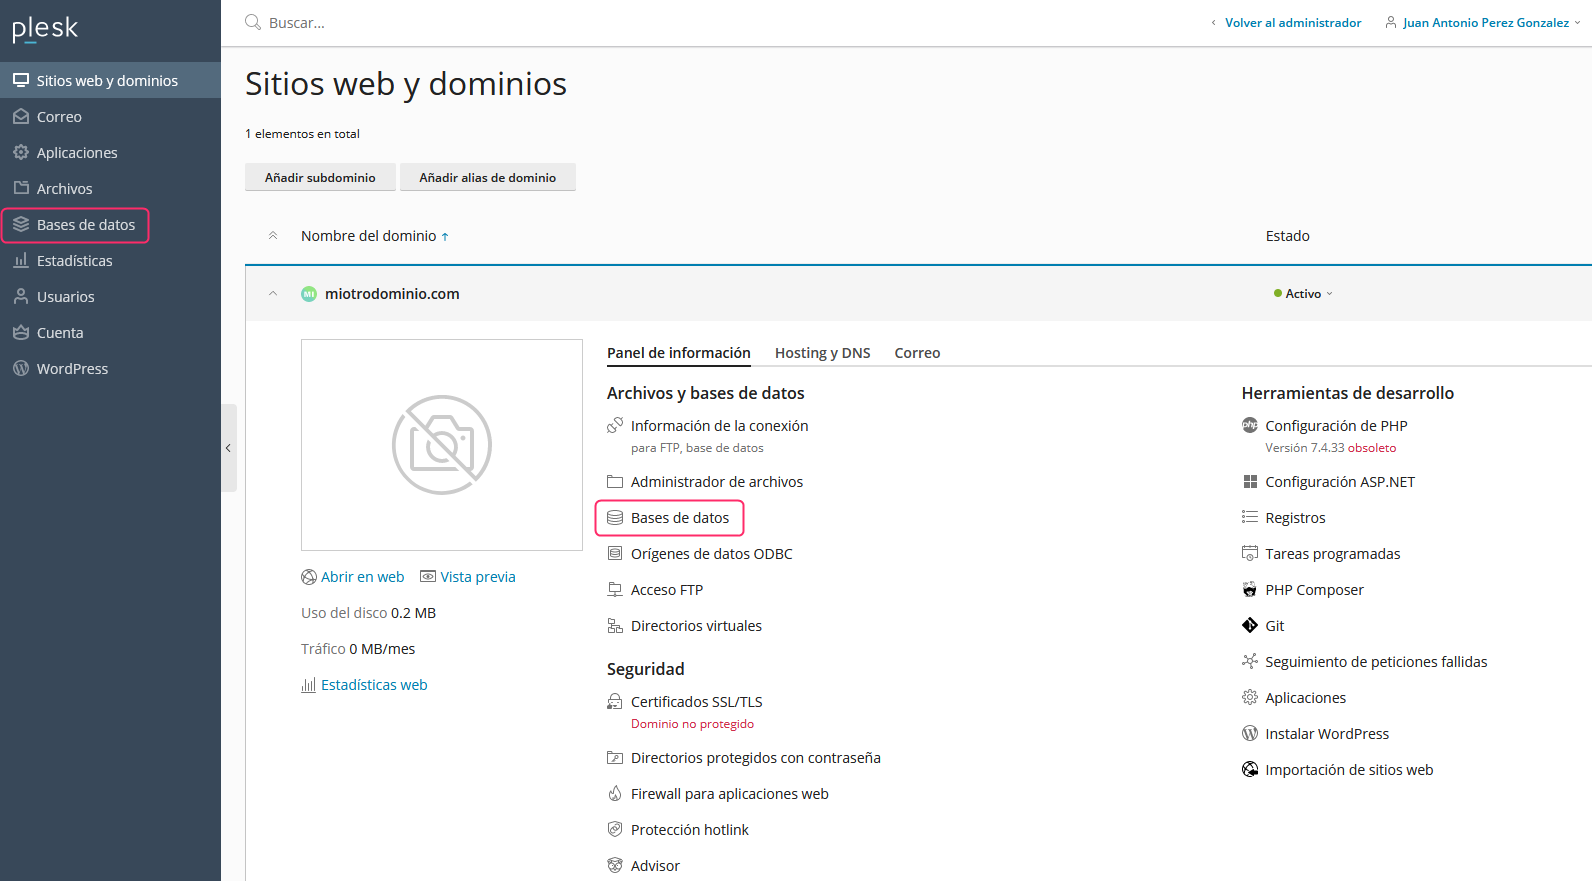
1) To create databases you can access the Databases area from the left menu, option Databases, or from the same option in the central menu of the Information panel tab.
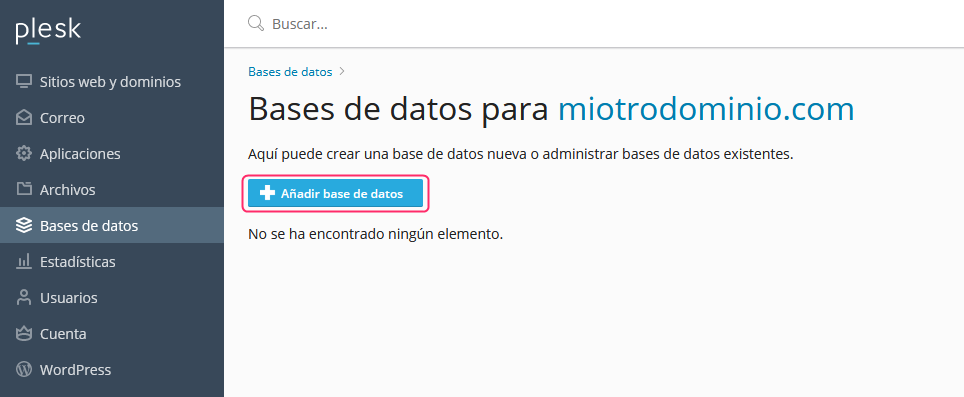
2) If you have databases created you will see them on this screen. With the Add Database button you can create a new database.
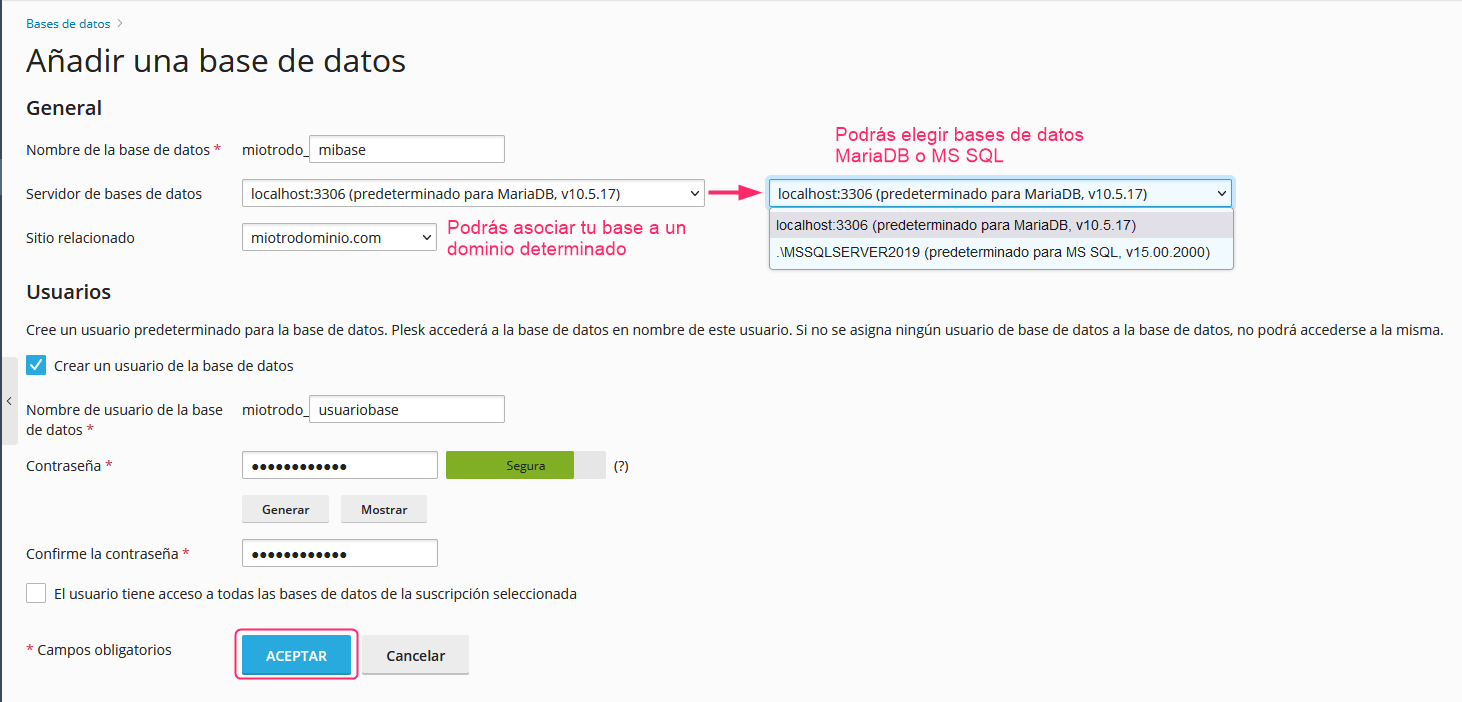
3) The form to create the database will ask for the database name and will allow you to choose between a MariaDB (mySQL type) database or MS SQL for Windows environments.
From Related site, you can associate the created database with your account or leave it unassociated.
Then it will ask you for the details of the user who will connect to the database and whether you want to grant them access to all created databases.
With the OK button you will save the database.
4) After creating your database you will return to the screen from step 2, where you will now see information and the options for your new database.
There are several options and data on this screen:
- Database name, with Plesk user prefix.
- Association with the specified hosting account (if you have more than one domain or website).
- Connection details and database type.
- Users associated with the database. You can change their password and privileges by clicking on their name.
- Number of tables the database has and how much space it uses.
- Access to phpMyAdmin. A web database editor.
- Tool to export the database.
- Option to delete the database.
- This option will show you the details to connect to the database from an external program.
- Tool to import a previously exported database.
- Allows you to copy or clone the database.
- This tool will check the database and repair any errors it finds.

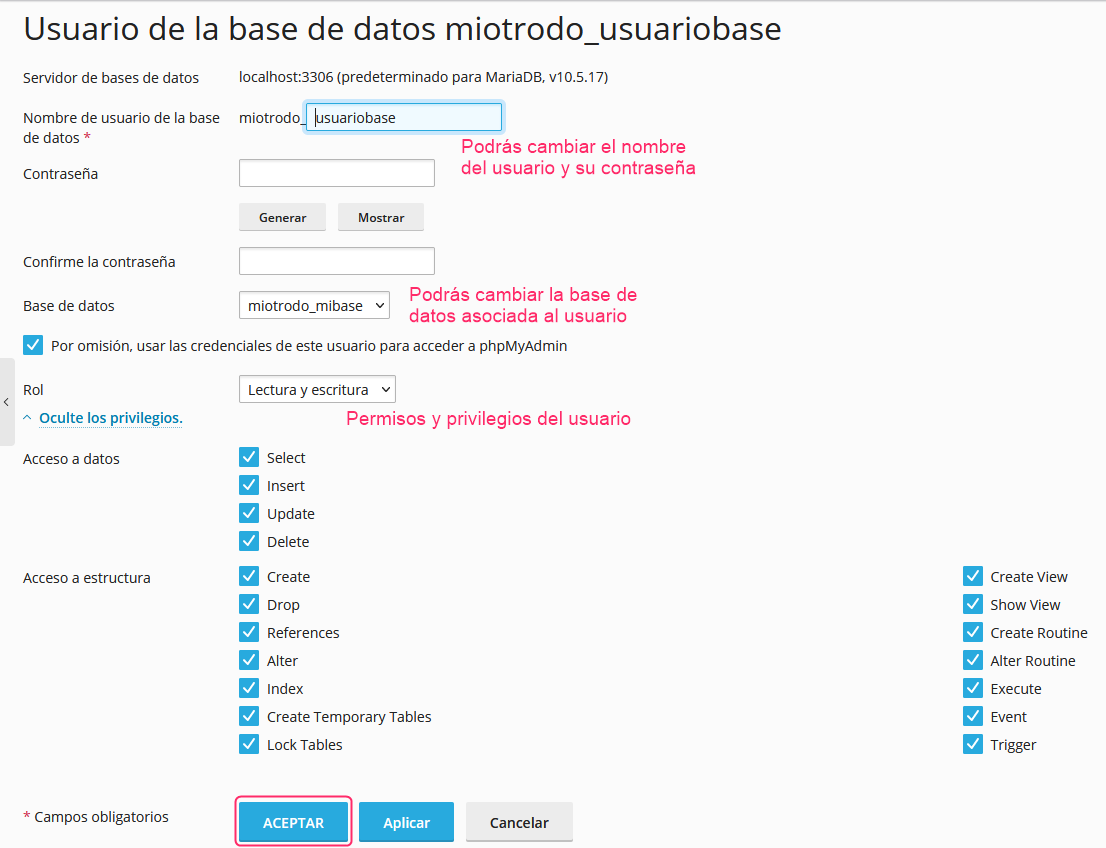
In point 4 we show you the user associated to the database. By clicking on their name you can edit their details and access privileges. You will see this screen:
5) That’s all, you will have created a database, associated it with a user and linked it to a hosting plan.