

How to view my domain as HTTPS in my browser in cPanel?
This guide assumes that the SSL Certificate has already been installed on the hosting account.
If you have not yet activated the SSL Certificate on your account, you can do so by following the steps in this guide: How to install an SSL Certificate in cPanel?
If you have already installed the SSL Certificate, it is recommended that your domain always shows the secure version (https) in the browser. This automatic redirection to https can be done in two ways:
- From your account control panel.
- By editing the htaccess file in the site’s main directory.
Redirecting to HTTPS from the cPanel Control Panel:
- Log in to your control panel and then go to Domains.
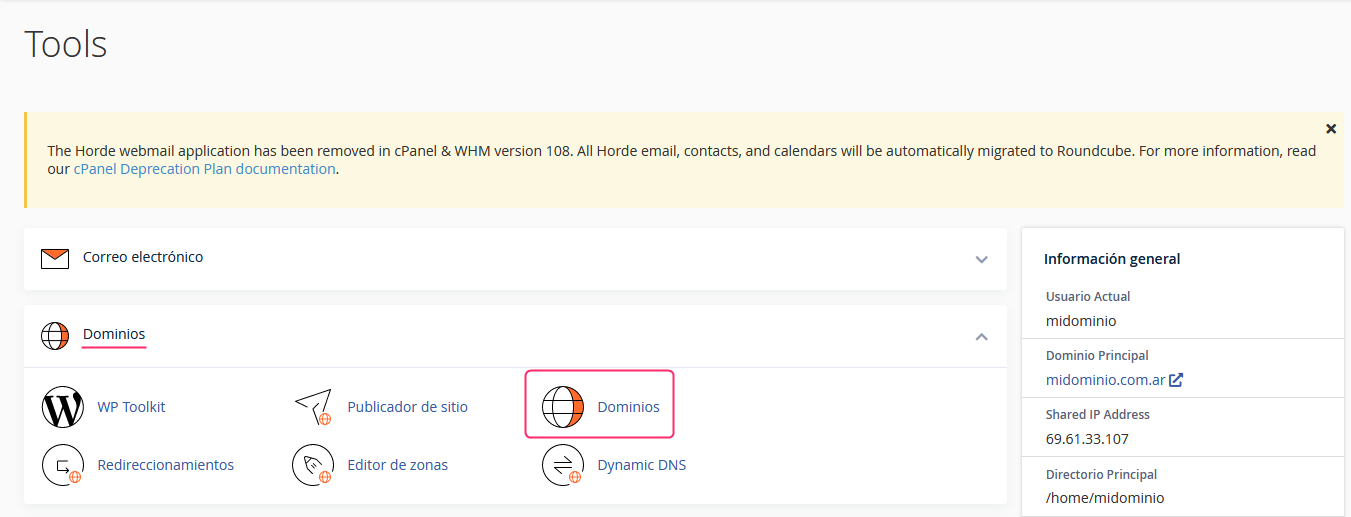
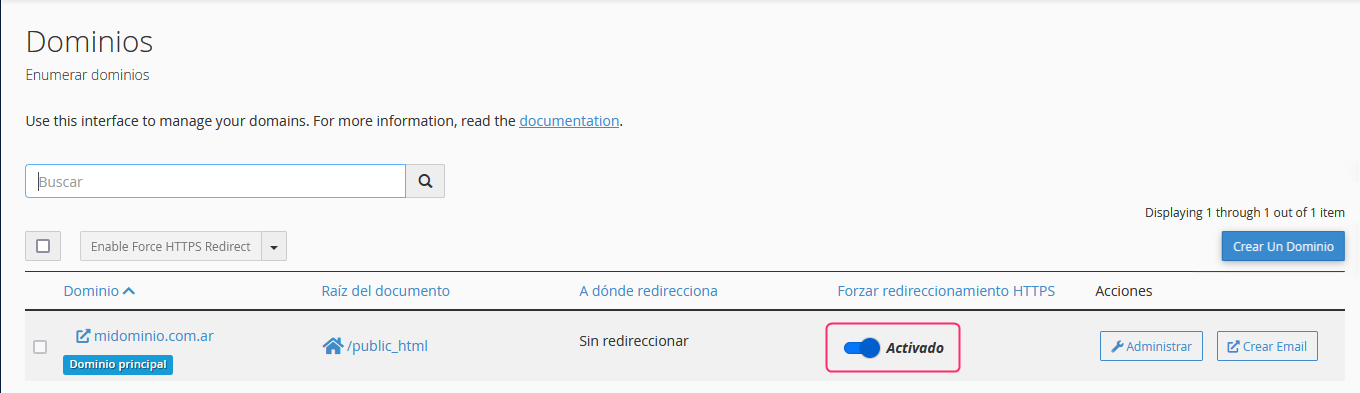
- On the new screen, you’ll see the domains associated with your hosting account.
By toggling the switch for “Force HTTPS Redirect”, the domain will always be displayed in the secure https mode.
Redirecting to HTTPS from the htaccess file:
It may happen that the method from the control panel does not work for some reason.
Another possible method to generate an automatic redirection to https is adding a line to the htaccess file that you will find in the /public_html directory or the main directory of your website.
The code you will need to add, usually at the top of the file, is this:
RewriteEngine On
RewriteCond %{HTTPS} off
RewriteRule ^(.*)$ https://%{HTTP_HOST}%{REQUEST_URI} [L,R=301]
To edit the htaccess file you can use the File Manager of your control panel or an FTP Client. Below you will see how to access the htaccess file from both methods.
Access from the File Manager:
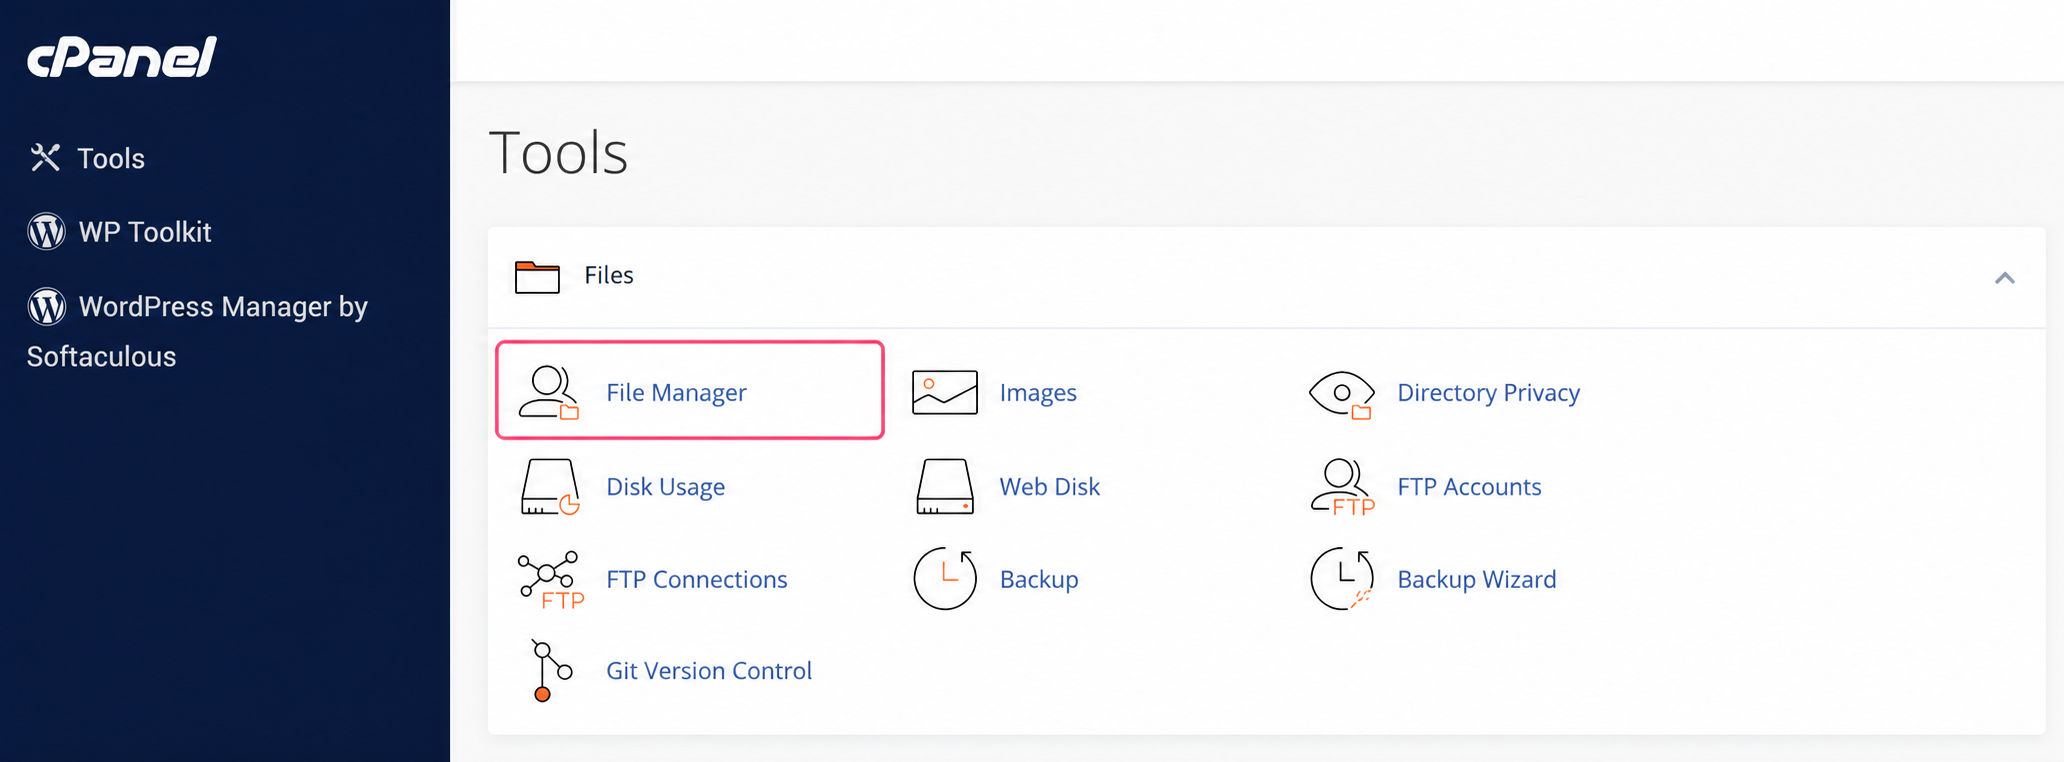
- Within the cPanel control panel, go to File Manager.
- In your account directories, look for the public_html directory or the main directory where your website is installed.
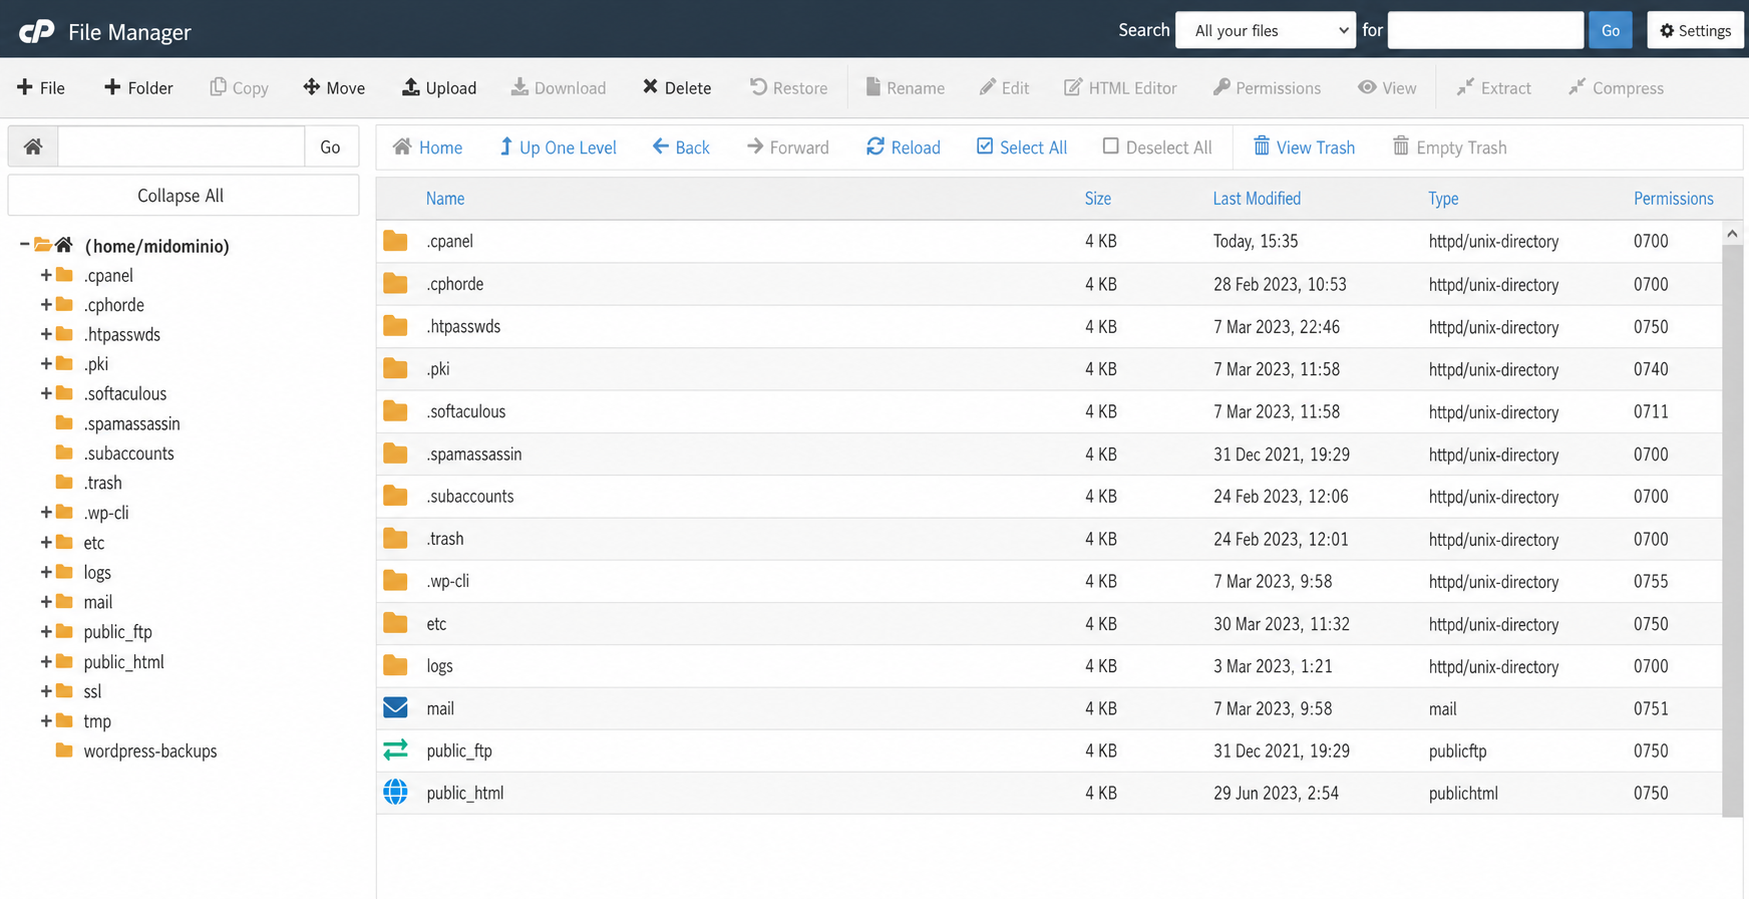
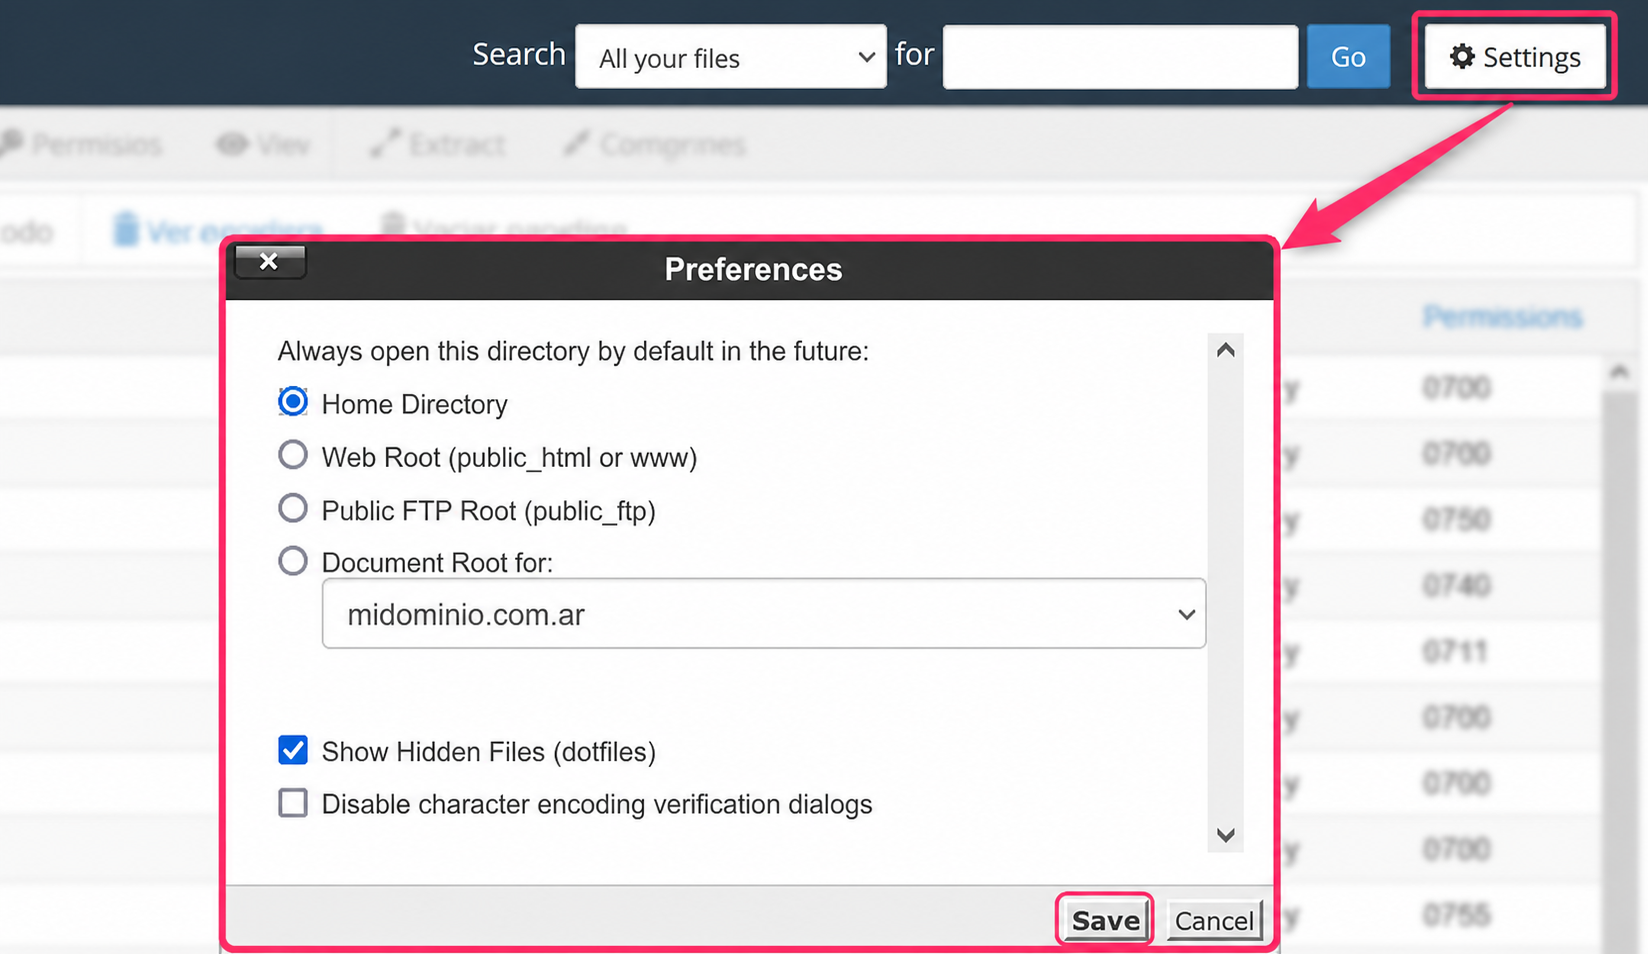
- Remember to enable the option to view hidden files or you won’t see the htaccess file.
You can do this by pressing the Settings button and then enabling the Show Hidden Files option. Finally, save the changes with the Save button.
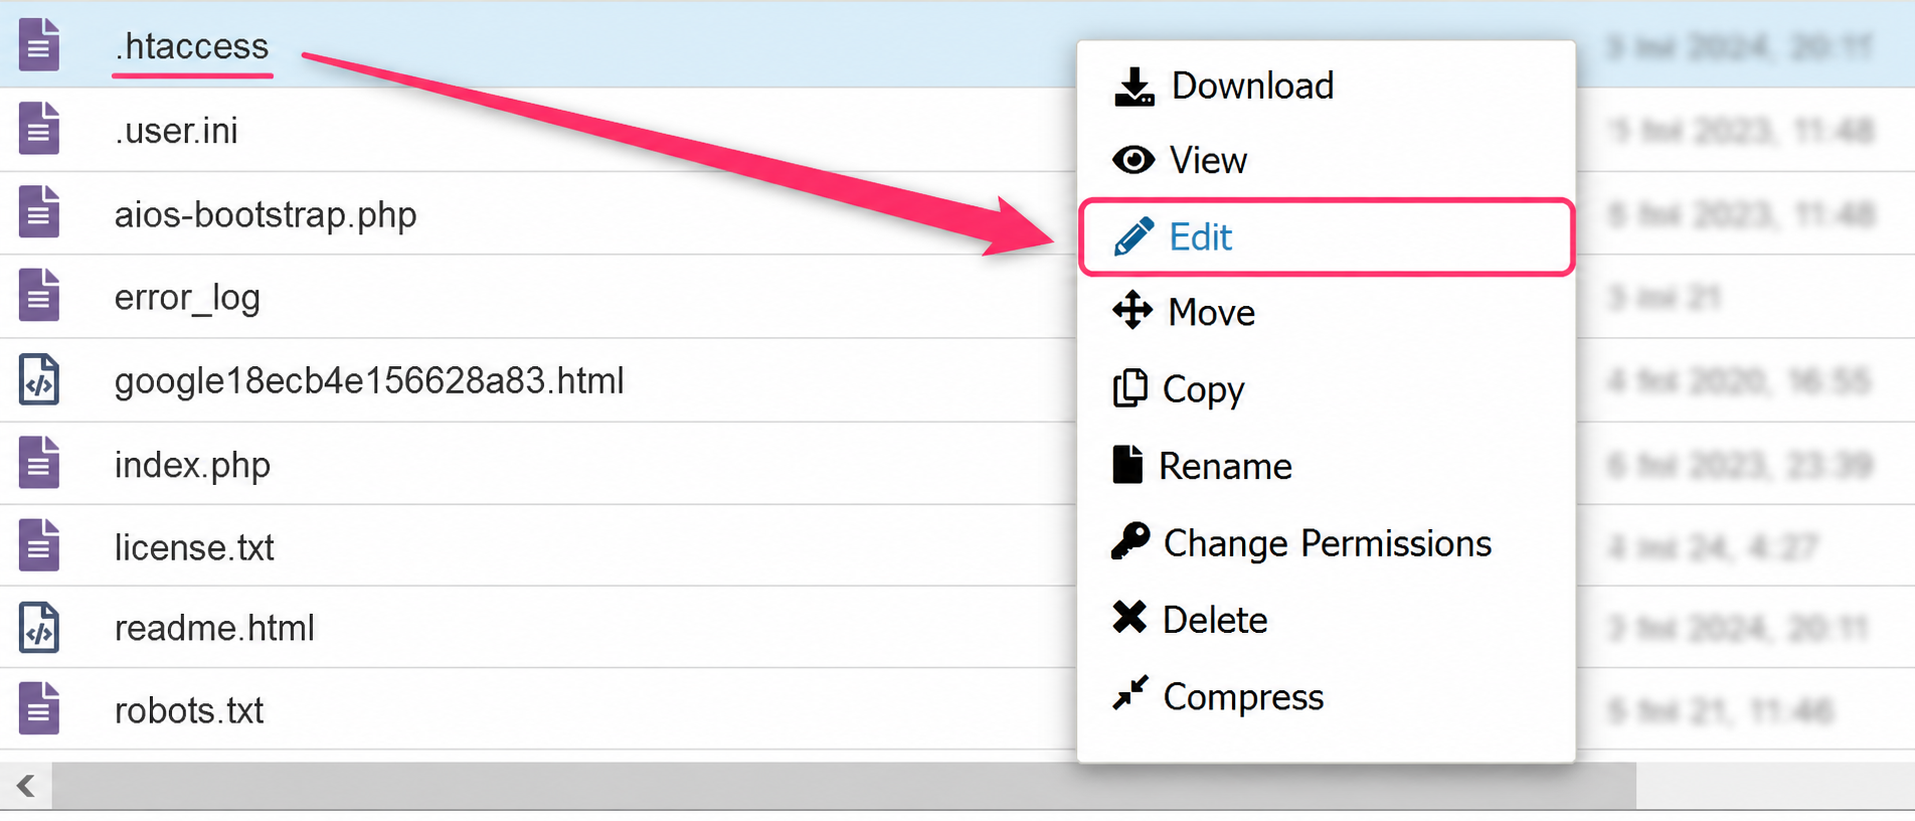
- When you find the htaccess file in your main directory, right-click the file and select Edit from the menu.
- In this file’s code, at the top, you should add the lines below:
RewriteEngine On
RewriteCond %{HTTPS} off
RewriteRule ^(.*)$ https://%{HTTP_HOST}%{REQUEST_URI} [L,R=301]
- That’s it. You should see your domain in secure https mode in your browser.
Access from an FTP Client:
Editing this file is very similar to what is shown with the File Manager, except that, in this case, you will use the file manager of your FTP Client. The link below will show you how to connect via FTP to edit the htaccess file.