

How do I create my own DNS on .ar domains?
Besides using our DNS, you can also create custom DNS with a domain of your own. Once created, you can delegate these DNS on your domains.
Below we show you how to do it for .ar domains registered at nic.ar.
Steps to create DNS on .ar domains:
- Log in to nic.ar with your username and password.
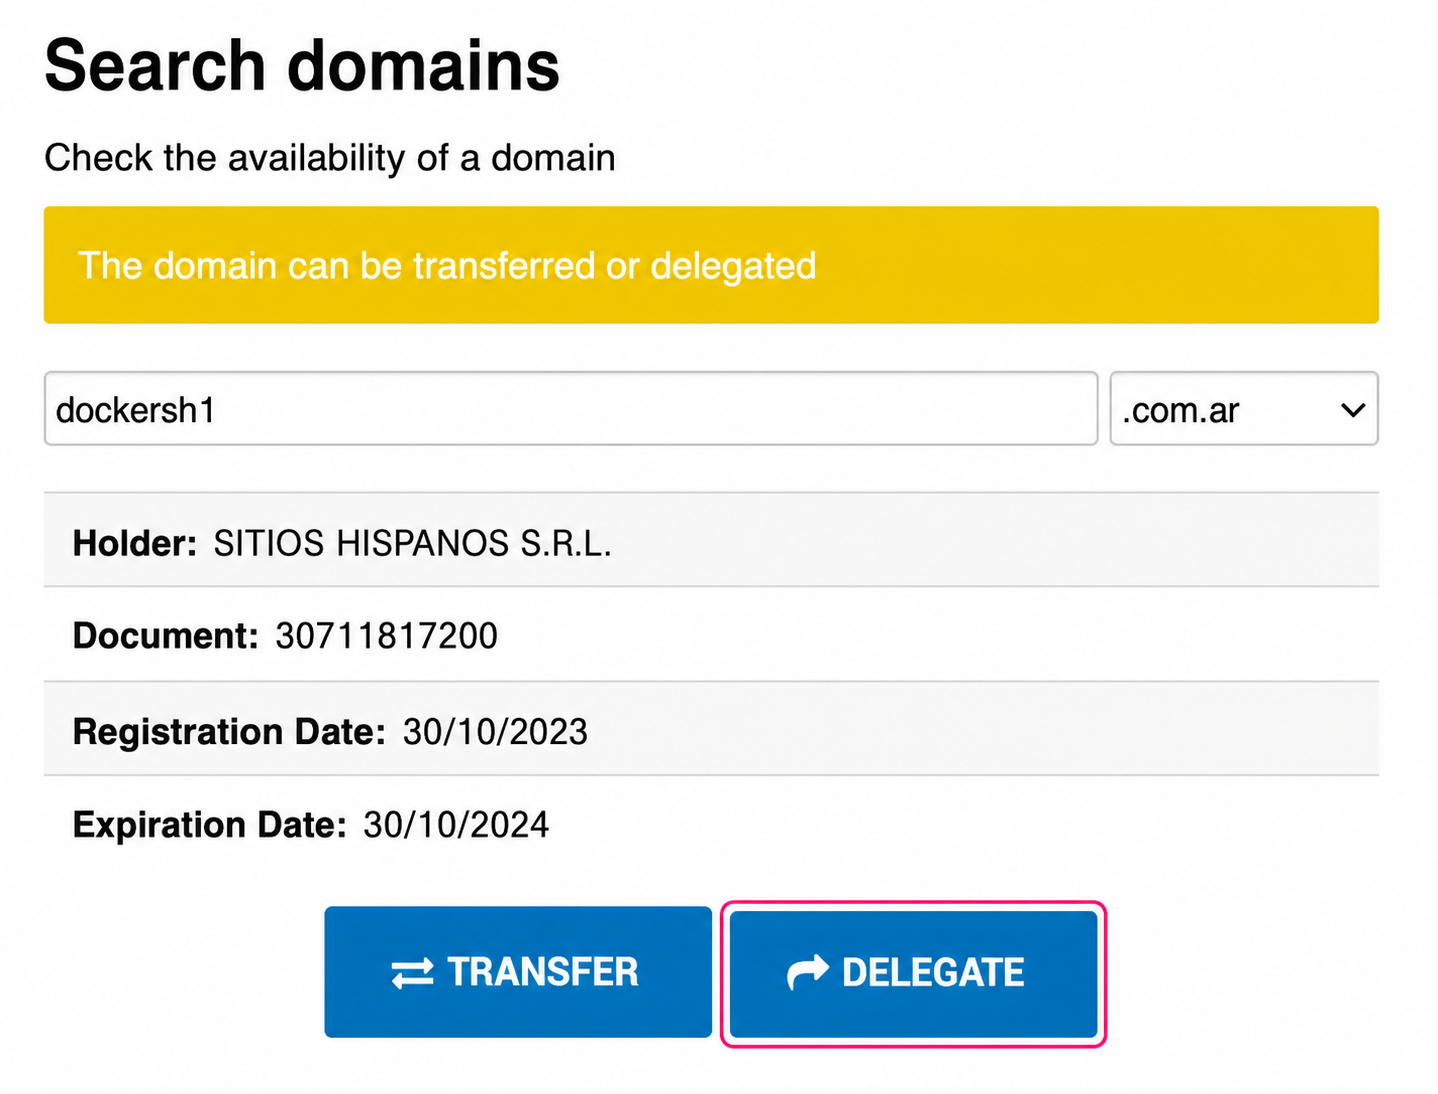
Look for your domain and press the “DELEGATE” button.
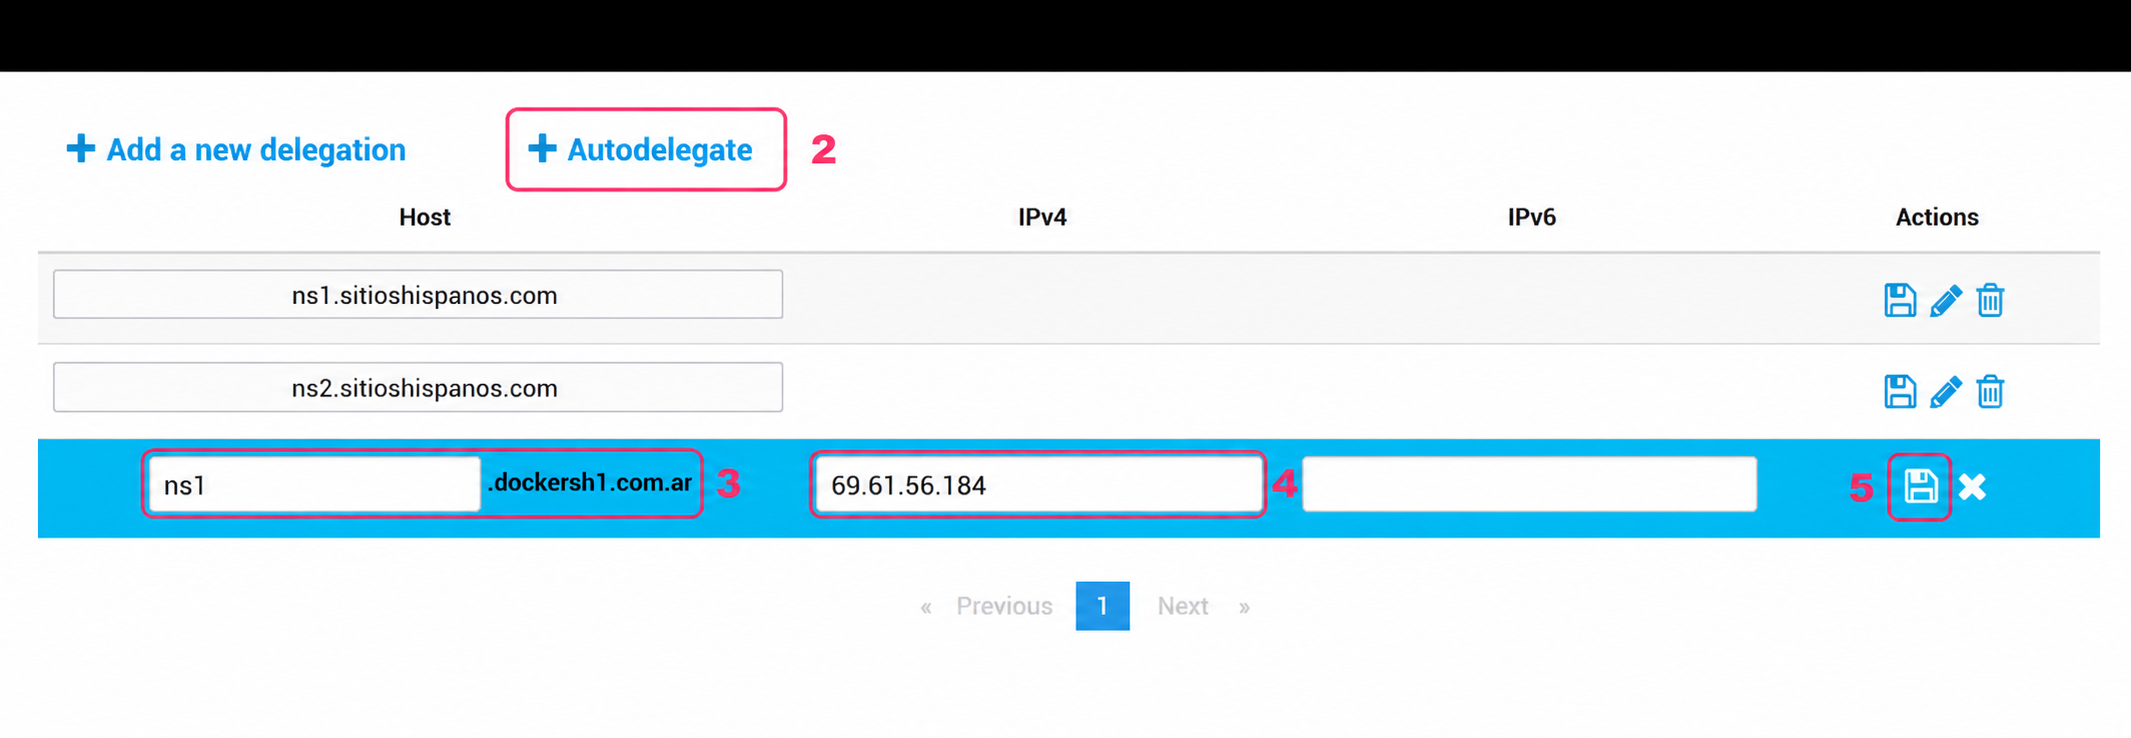
- On the DNS delegation screen, click “Self-delegate”.
The configuration options for your DNS will open. - Create the name of the first DNS using your domain.
In our example we will create: ns1.dockersh1.com.ar. - Enter the IP address of the server the DNS must point to.
- If your DNS will point to a cloud server, use its IP.
- If they will point to a shared hosting server, request the IP from technical support. - Press the floppy disk button on the right to save.
- Repeat steps 2 to 4 to create a second DNS.
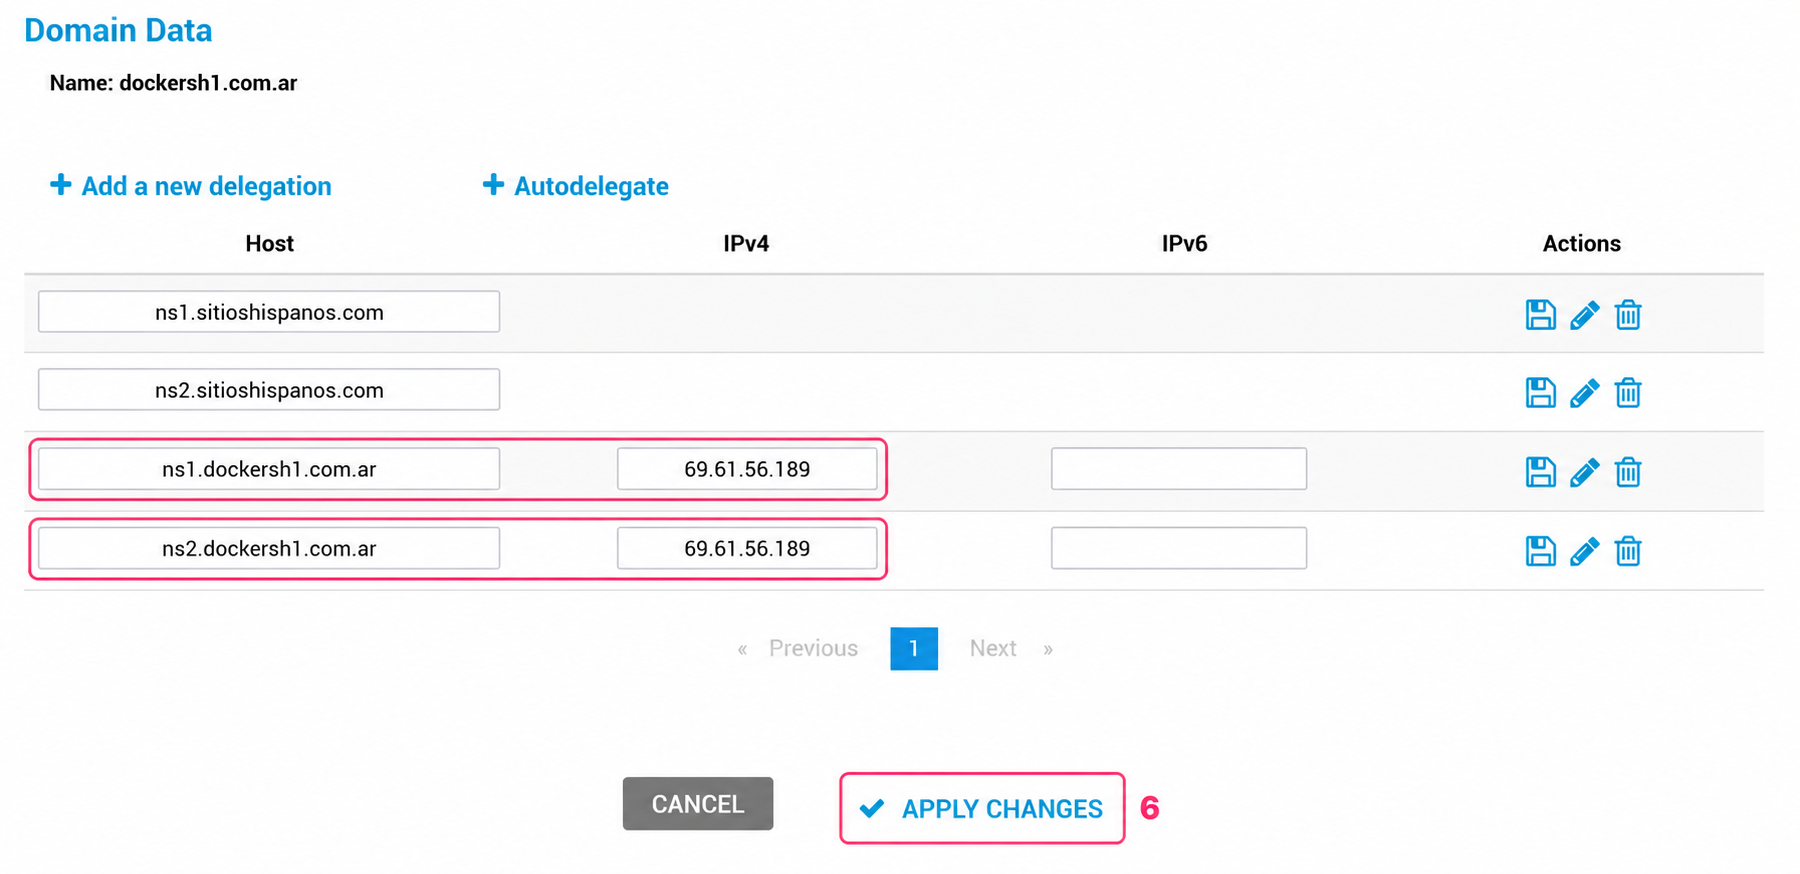
Following our example we will create: ns2.dockersh1.com.ar.
- Check that both DNS appear on the delegation screen with their respective IPs.
Press “APPLY CHANGES” to save your DNS.
That is all. Once the DNS are created, follow the next guide to delegate your DNS on your domain.
how-to-change-dns-on-nic.ar.md