

How to create Subdomains, Aliases and Addon Domains in Plesk?
Creating a Subdomain
A Subdomain is a subdivision of a website within the same domain. Subdomains are usually used to separate functions of a complex website.
For example, midominio.com could display a main website with product offers, while compras.midominio.com would display the shopping cart to process an order.
Follow these steps to create a Subdomain:
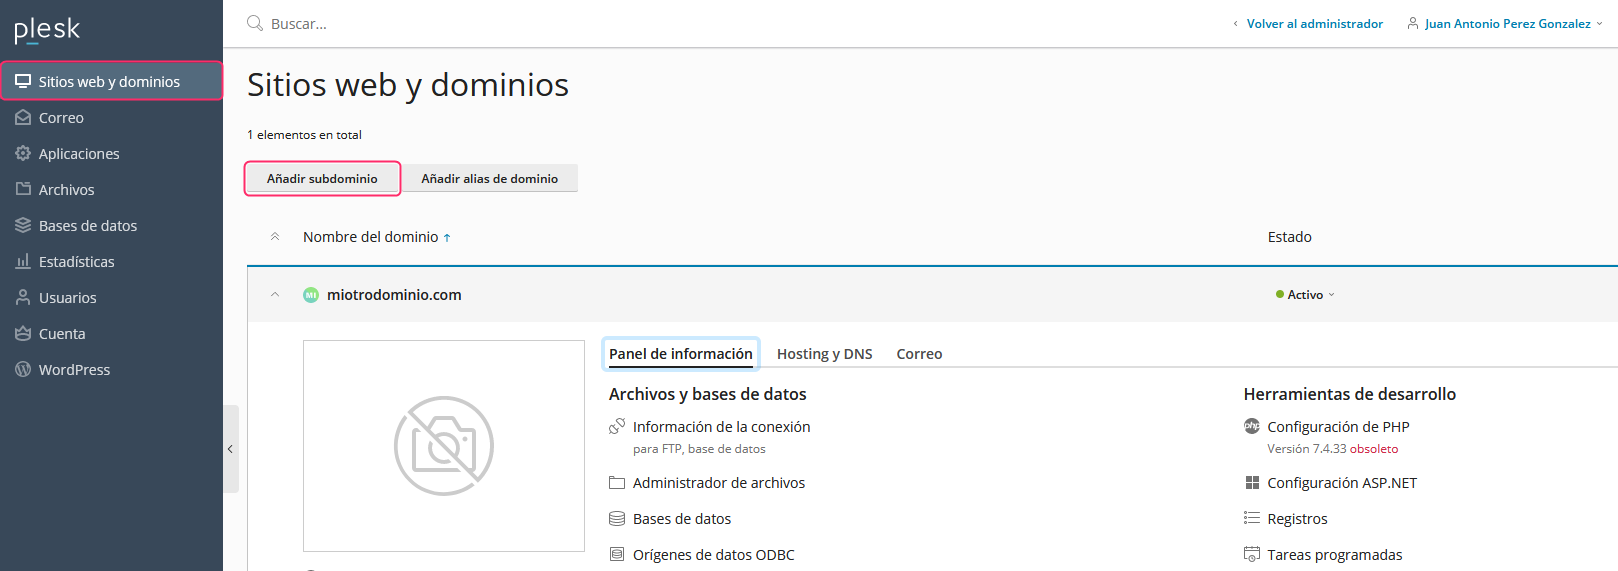
- To create a Subdomain go to Add Subdomain. This option is inside Websites & Domains, in the left menu.
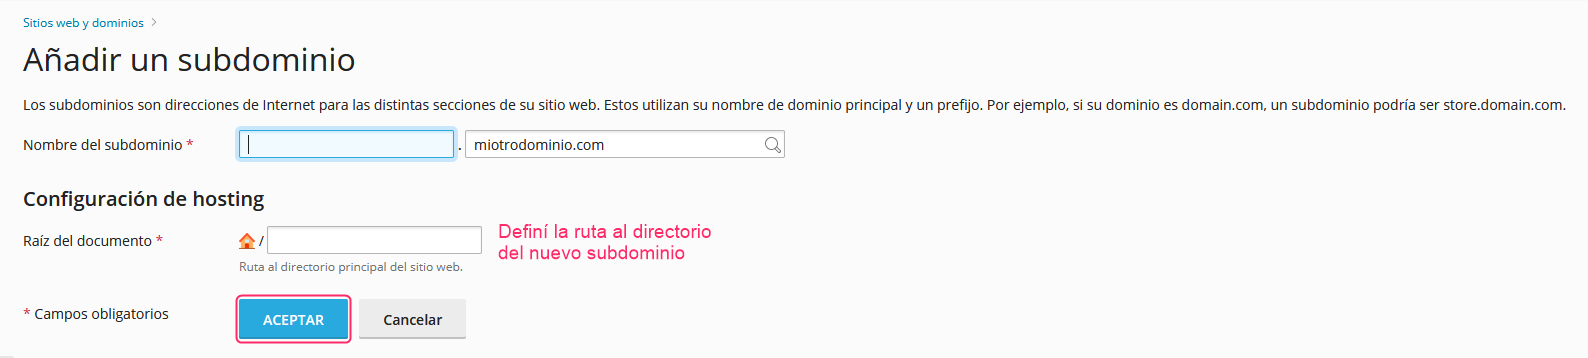
- You will need to enter the subdomain name and define the path where the directory will be created to which you will upload the files that the new subdomain will display.
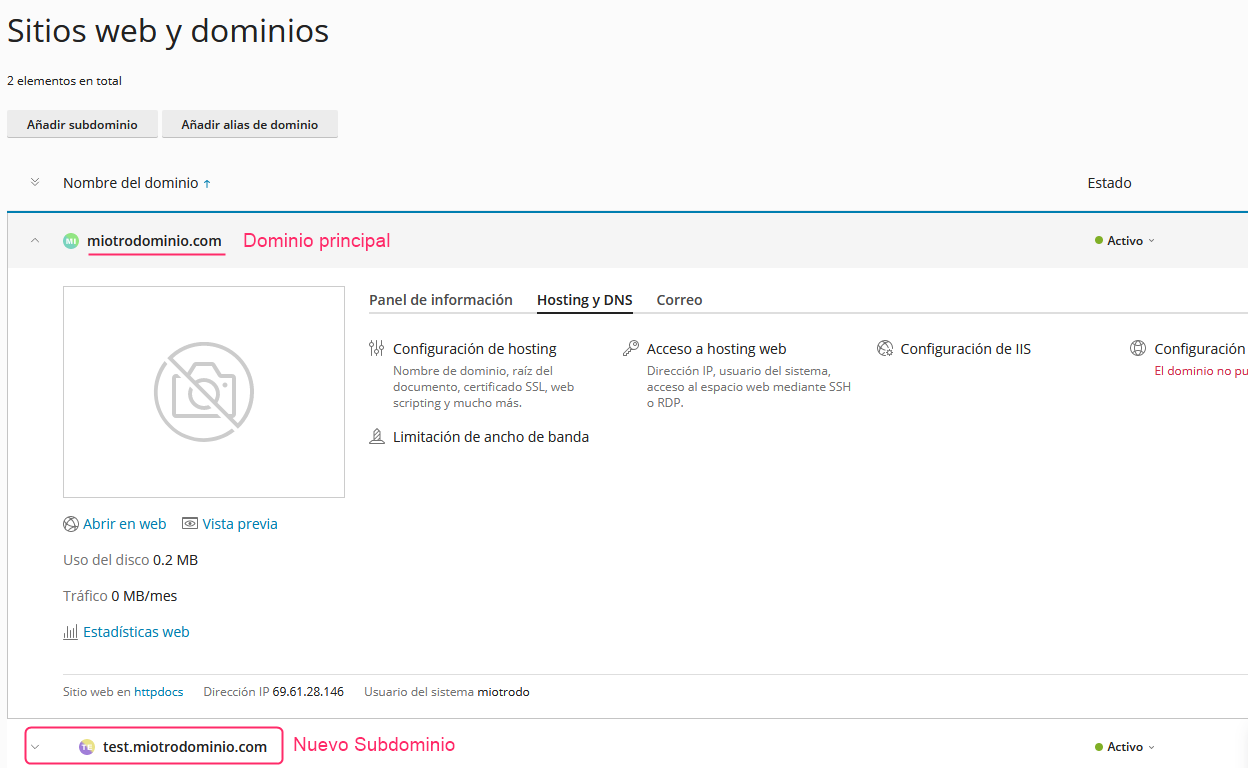
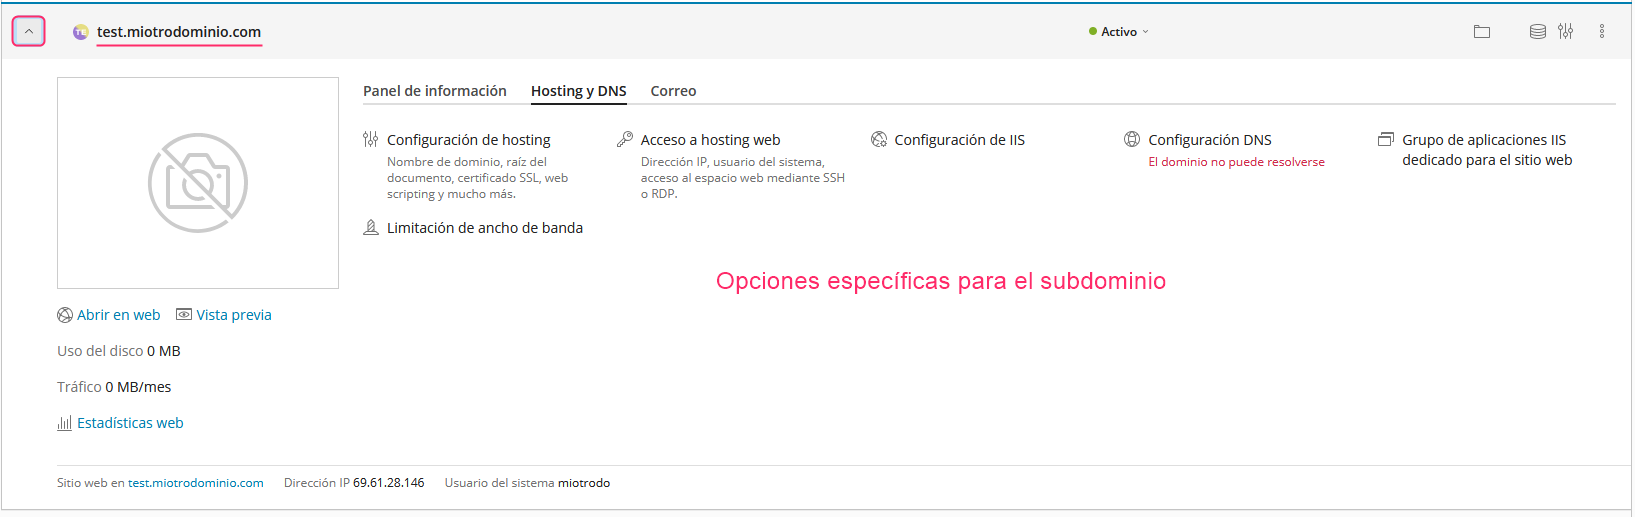
- When you create a subdomain you will see your main domain with its options and below it the new subdomain created in Websites & Domains. You can expand it to see its specific options.
The new subdomain will show the same options as your main domain so you can modify it as needed.
Creating an Alias
A domain Alias will display the same website as your account’s main domain. Additionally, it will allow you to create email accounts with the new domain.
Follow these steps to create an Alias:
- To create an Alias go to Add Domain Alias. This option is inside Websites & Domains, in the left menu.
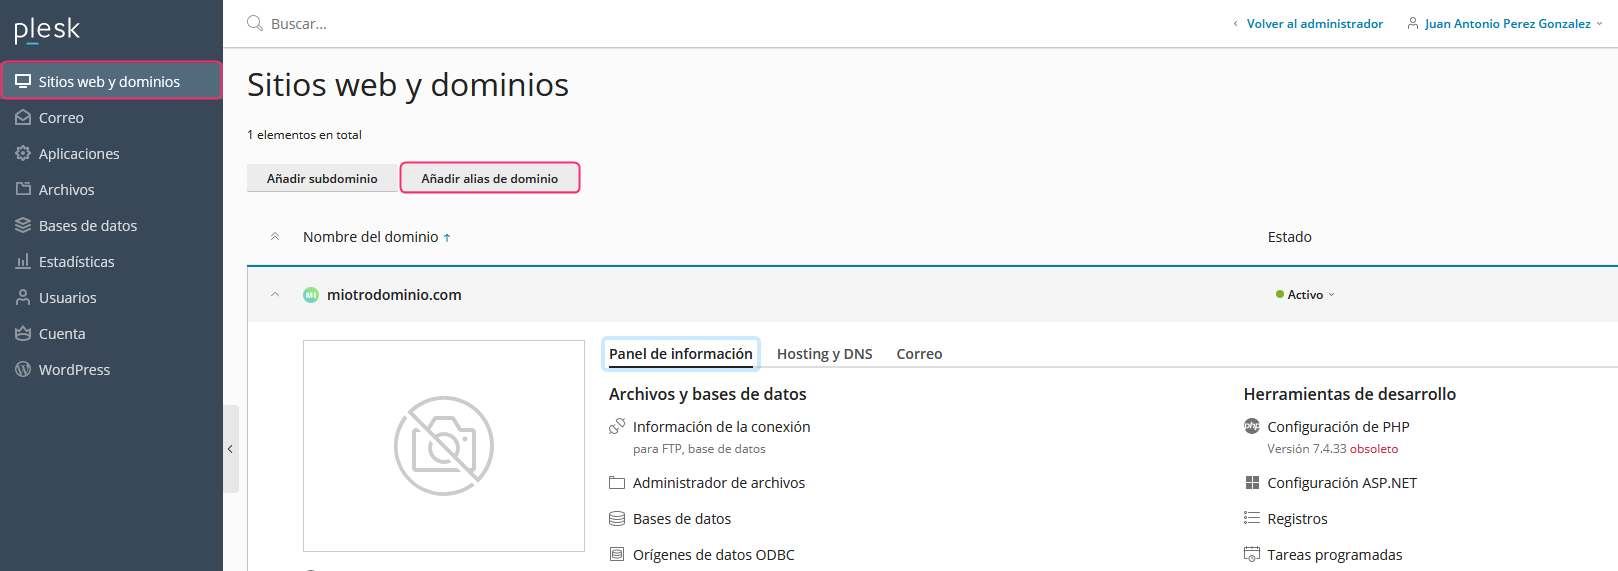
- The new screen will ask for the alias domain name and will present some options. They are all active by default, but you can choose to uncheck Mail service. This option will allow you to create email accounts with the alias domain.
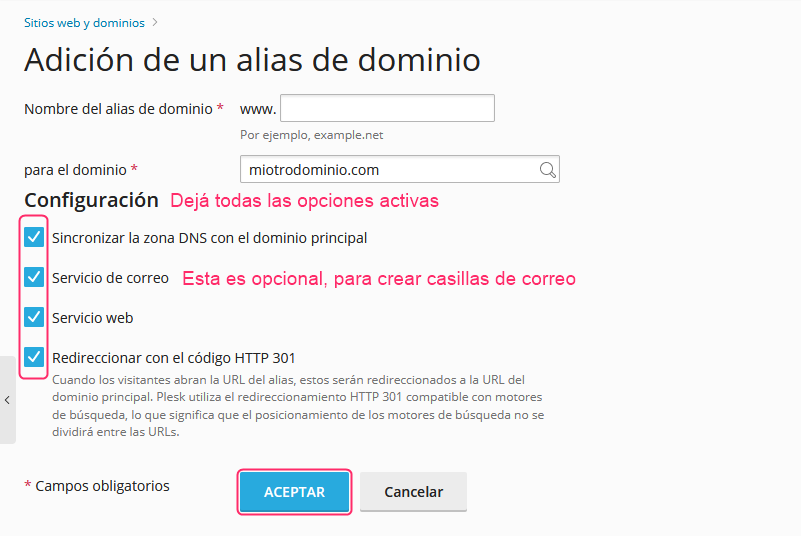
- That’s it! You will have created an Alias to your main domain. From now on, in fields where your main domain appears, you will be able to choose between it and the new alias domain to generate the desired configuration.
Creating an Addon Domain
An Addon Domain will display a different, separate website from your account’s main domain. Additionally, it will allow you to create email accounts with the new domain.
Follow these steps to create an Addon Domain:
- In the options under Websites & Domains, which you will find in the left menu, press the Add Domain button.
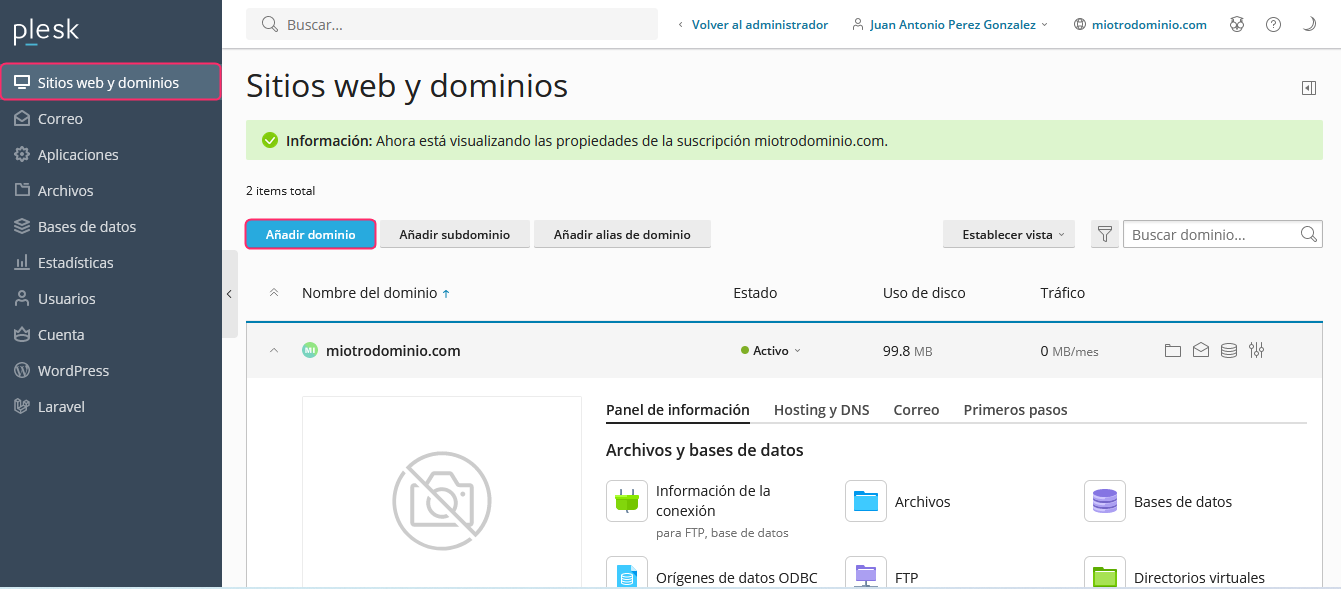
- A menu will open on the left where you can choose how to create this new Addon Domain.
For example, you can create a blank website, upload a website via FTP, create a WordPress site, etc.
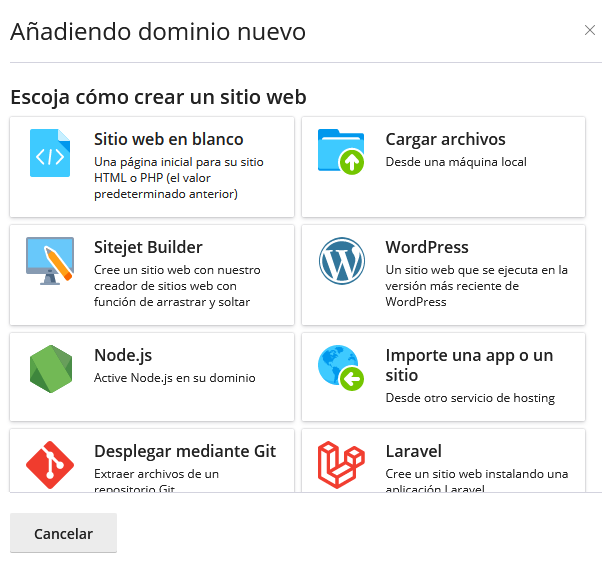
- Each of the previous options will expand into steps to create the Addon Domain. Let’s look at the options for an empty Addon Domain:
1. First, you must choose whether the domain is already registered or not.
2. Next, enter the domain for the Addon Domain.
3. Web space is the main account to which the Addon Domain will be associated.
4. This option is very important. To host a website choose the Website hosting option. The other options will allow you to use the new domain as a redirect or to create email accounts without their own website.
5. You must leave these two options active.
6. Open the Hosting Settings menu to see more options.
7. At this point you must choose the directory where the new website will be created.
8. In this step you can choose whether the website will be shown with or without www automatically.
9. Once you have everything completed press the Add Domain button to finish.
.jpg)