

How to configure my email account in Gmail?
Below we will show you how to configure an email inbox in the Gmail mail client.
- Sign in to gmail.com with your credentials. In the top right corner, click the gear icon and press See all settings.

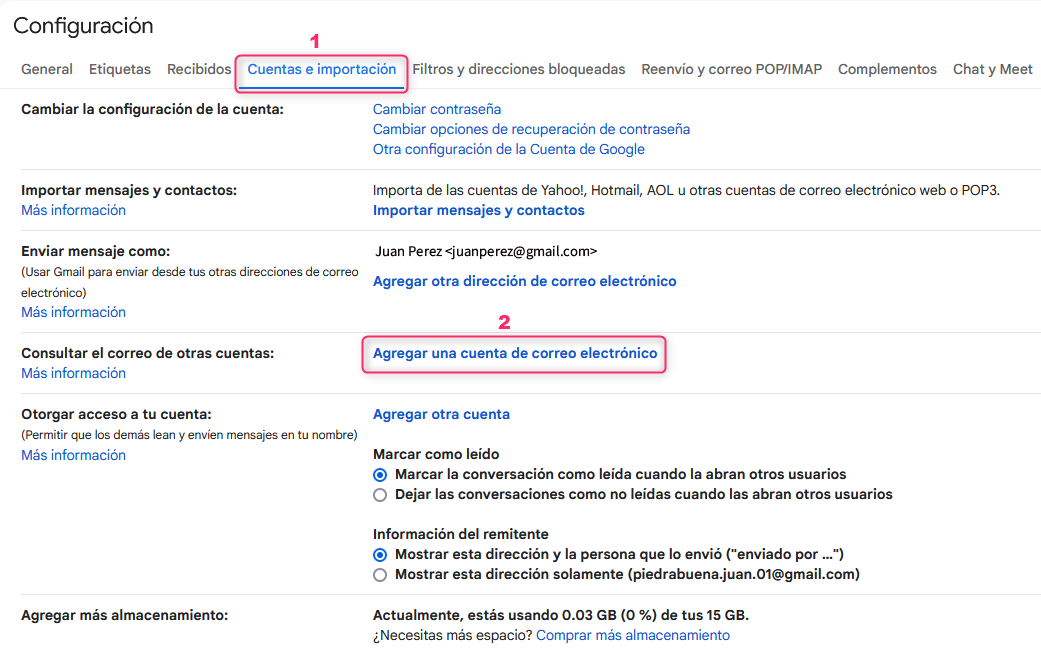
- In the new screen, click the Accounts and Import tab, then look for the Check mail from other accounts section and go to Add a mail account.
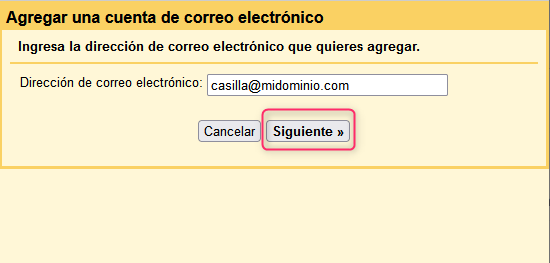
- On the new screen enter the email address to add and press Next
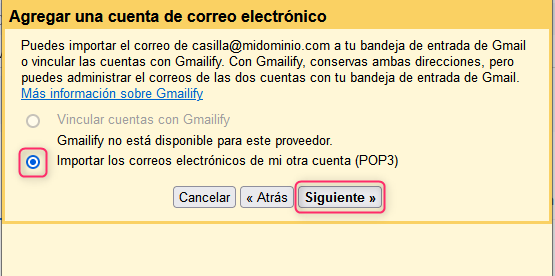
- Select Import emails from my other account (POP3) and then press the Next button.
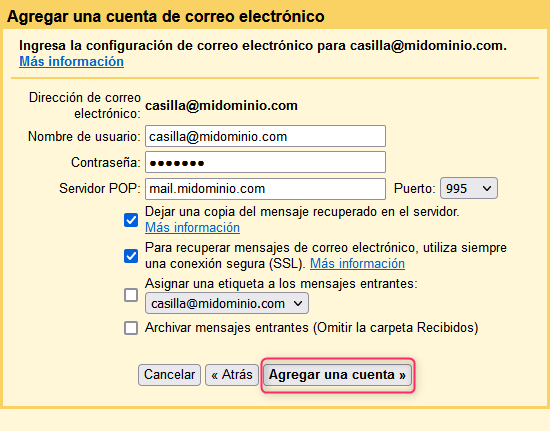
- Fill in your account details as shown in the image, adding your domain where appropriate. With this, you will have added your new account to Gmail.
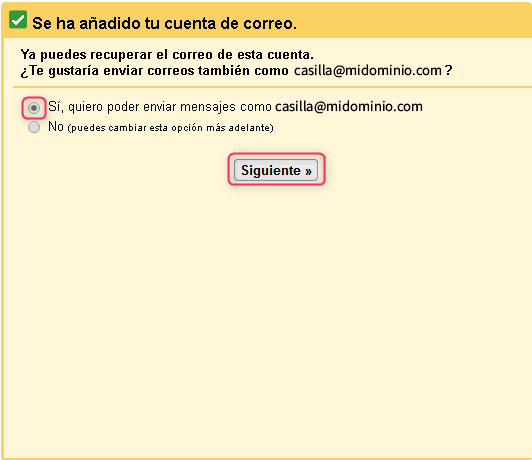
- Now choose whether you want to use your new account to send emails. If so, select the first option and then press the Next button.
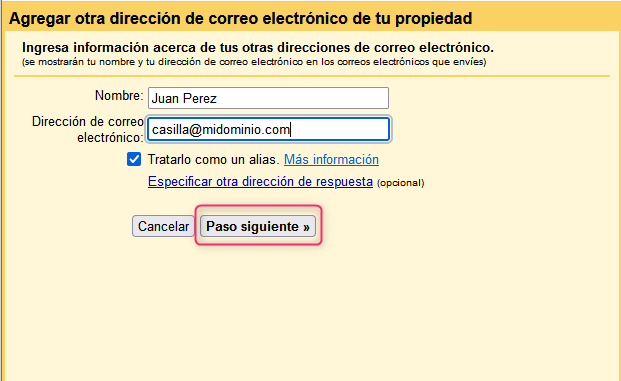
- On the new screen enter the name you want to display when sending your messages and press the Next Step button.
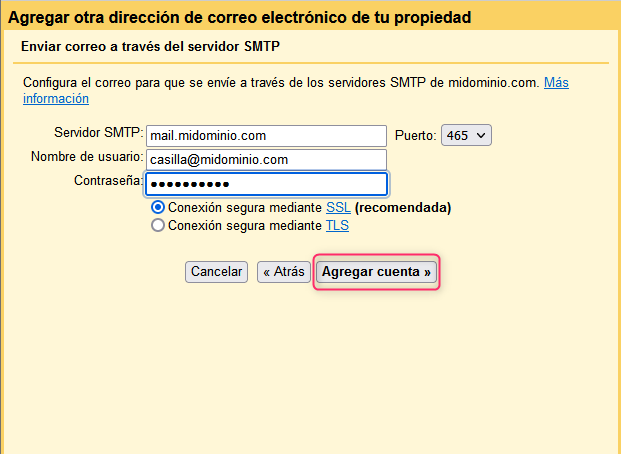
- Fill in the SMTP server details for sending mail as shown in the image. Replace with your domain where appropriate.
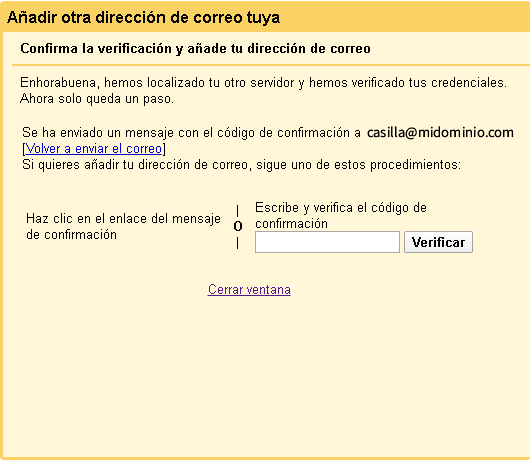
- After the entered data is verified, you will receive an email with a confirmation code to finish adding the account. You can choose two methods:
- Click the link in the confirmation message
- Enter and verify the confirmation code. Enter the code and press the Verify button.
After completing these final steps, your account will be enabled to send mail in Gmail.