

How to create users for hosting accounts in HestiaCP?
The procedure to create users is as follows:
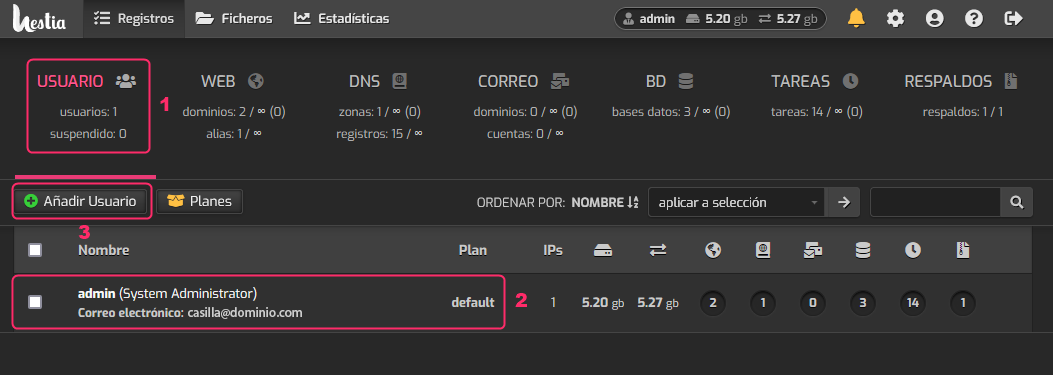
- Located in the USER box, we will see the list of users created in the lower list.
- In this case we are seeing the admin user created by default. On the right it will show the services that are created (mailboxes, databases, websites, etc).
- Pressing the Add User button will create the user that will control the hosting account.
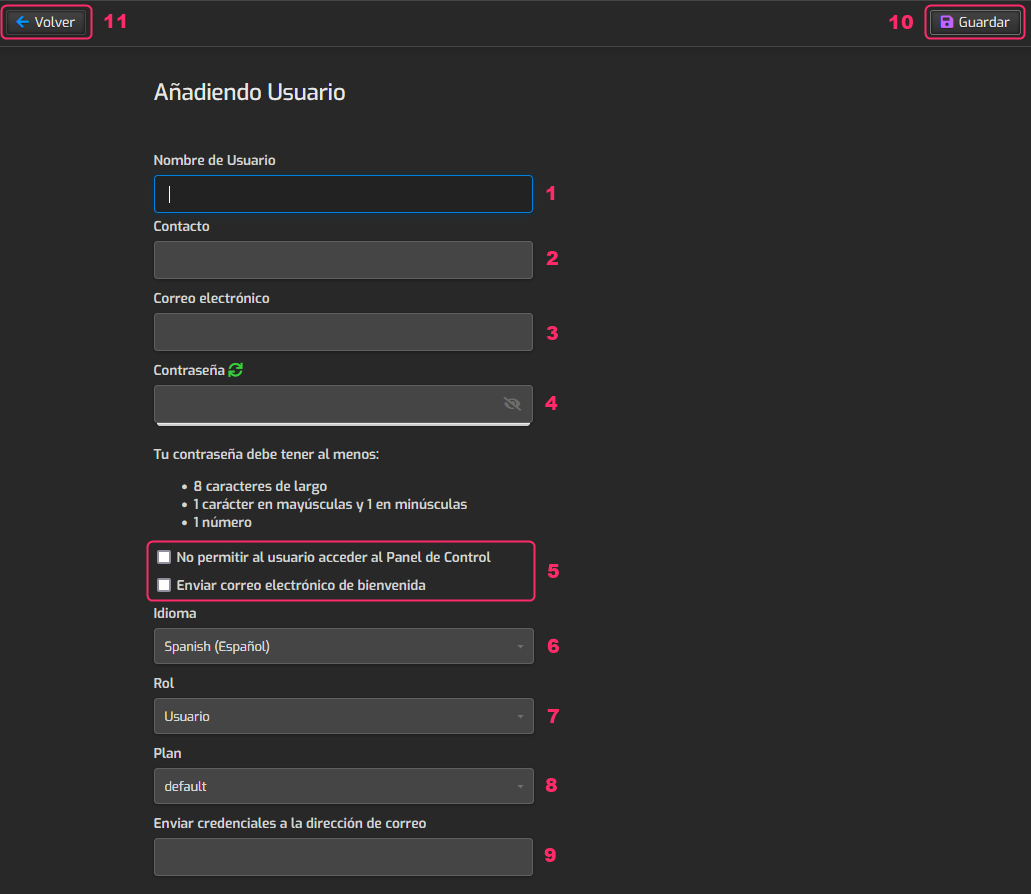
We will see the user creation screen with several fields to complete:
- Enter the username.
- Enter a contact field (it can be different from the email address).
- Enter the email address that will receive information about this user and its accounts.
- Enter a password following the minimum requirements.
- We must choose whether the user will be able to access the control panel of a hosting account or if it will be accessed with the main admin user.
The other option will send us the email with the data we are creating now. - Configure the language with which this user will see the control panel.
- In Role we choose whether the user will have full access, like the admin user, or not. This is similar to giving a user root access.
- Choose the hosting plan that this user will have. These plans can be created by following these steps:
how-to-create-plans-for-hosting-accounts-in-hestiacp.md - This option will allow us to receive, at our configured email address, any password change that is generated.
- At the top right we’ll see the button to save the changes.
- And we’ll see the Back button to cancel the user creation.
Now that you have a user created you will need to create the Hosting Plan, where you will define the services that will be available.
Follow these steps to create the Hosting Plan:
how-to-create-plans-for-hosting-accounts-in-hestiacp.md
Then, you will be able to create Hosting Accounts under this user:
Follow these steps to create a Hosting Account:
how-to-create-a-hosting-account-in-hestiacp.md