

What is PHPMailer and what is it for?
On some servers the PHP function mail() is not available.
This function is increasingly often disabled on servers as a security measure.
It is usually disabled to protect against SPAM, Mail Spoofing and Proxy Mail Servers.
If any of the hosted websites is compromised by a malicious user, the mentioned risks are avoided by disabling this function.
The PHPMailer library
The PHPMailer library allows us, among other features, to establish an SMTP connection with a mail server. This SMTP server will be the one that actually sends our email.
The project’s official website on GitHub contains the documentation with installation and configuration options.
The link to GitHub is: https://github.com/PHPMailer/PHPMailer.
Installing PHPMailer
- Download PHPMailer from https://github.com/PHPMailer/PHPMailer.
Press the green Code button and then click Download ZIP in the Clone box.
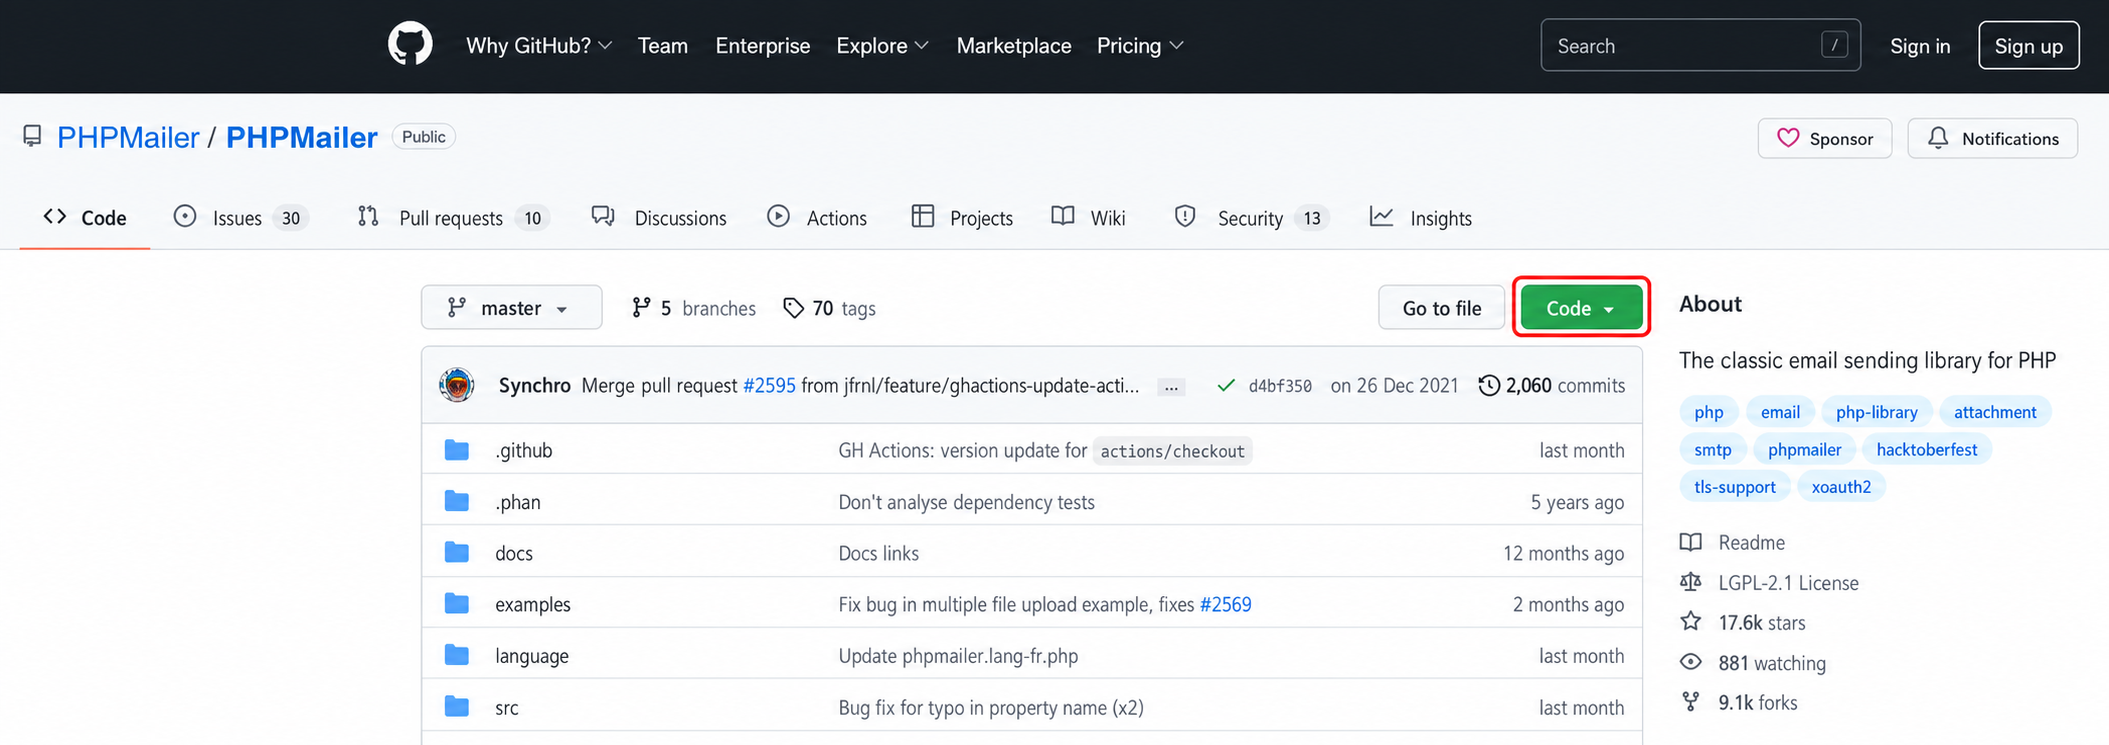
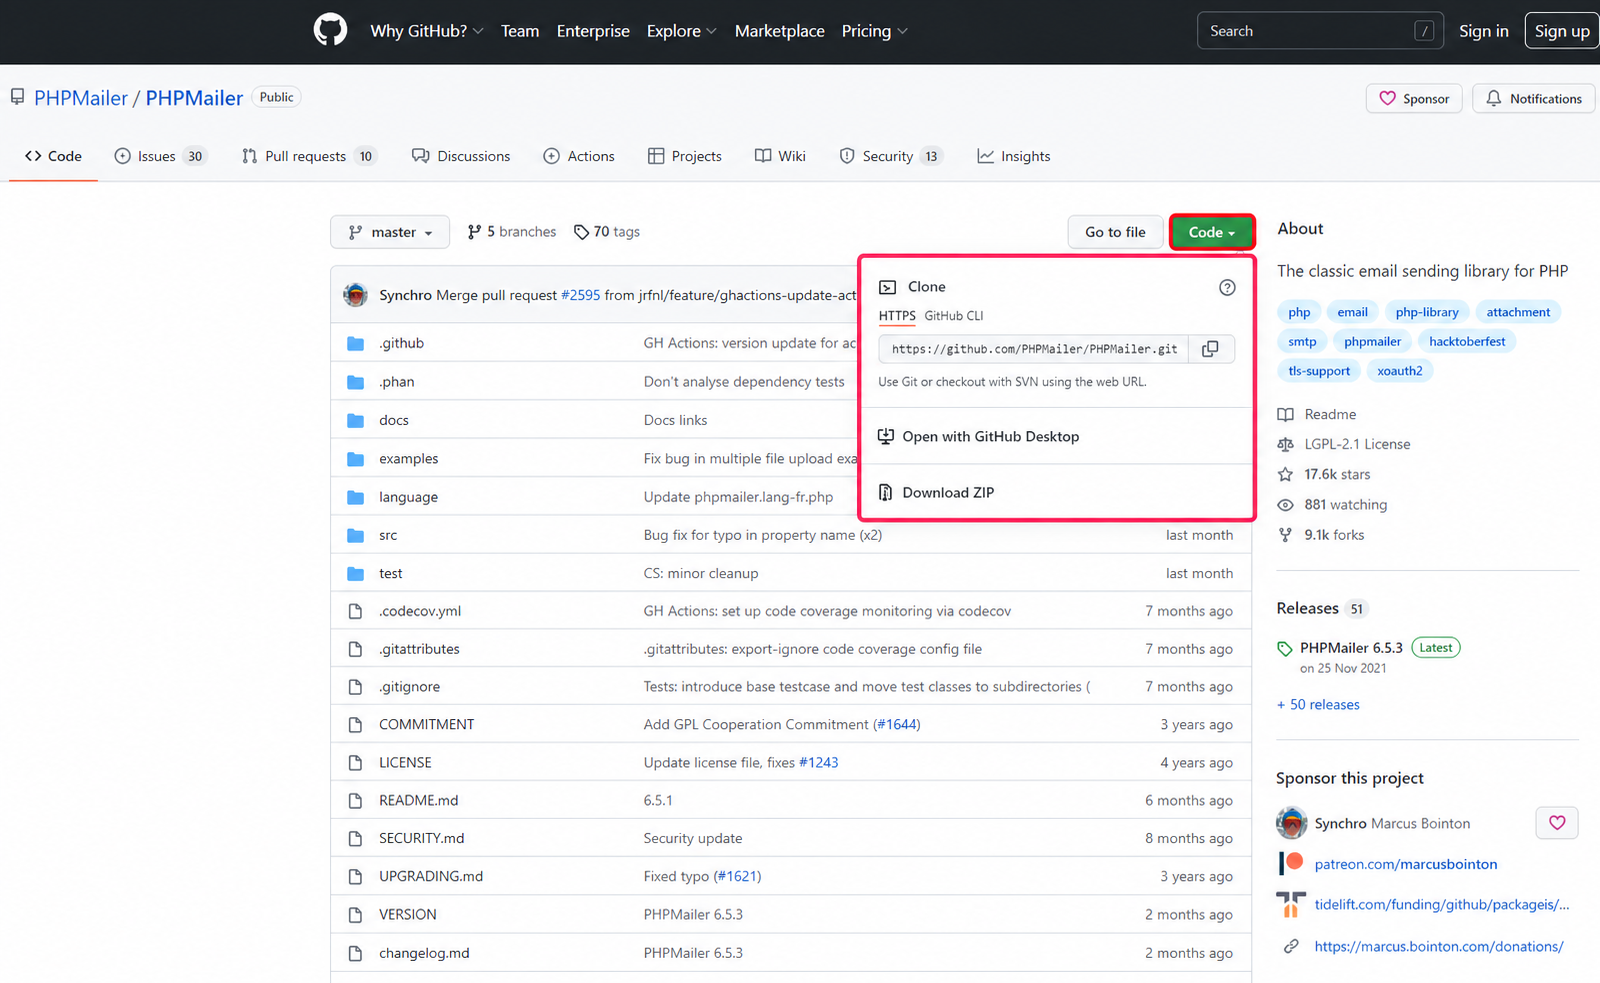
- Unzip the downloaded file “PHPMailer-master.zip” and rename the PHPMailer-master directory to PHPMailer
- Copy the PHPMailer directory into the root of your website (for example public_html). To verify that the paths are correct, there should exist, from the root of our project: /PHPMailer/src/PHPMailer.php
Example configuration
- Save the following code in a file, for example, ejemplo.php
// Some code<?php
// Show PHP errors (Disable in production)
ini_set('display_errors', 1);
ini_set('display_startup_errors', 1);
error_reporting(E_ALL);

// Include the PHPMailer library
use PHPMailer\PHPMailer\PHPMailer;
use PHPMailer\PHPMailer\Exception;
use PHPMailer\PHPMailer\SMTP;

require 'PHPMailer/src/Exception.php';
require 'PHPMailer/src/PHPMailer.php';
require 'PHPMailer/src/SMTP.php';

// Start
$mail = new PHPMailer(true);

try {
    // SMTP configuration
    $mail->SMTPDebug = SMTP::DEBUG_SERVER;                         // Show output (Disable in production)
    $mail->isSMTP();                                               // Enable SMTP
    $mail->Host  = 'CONFIGURAR_SERVIDOR_SMTP';                     // SMTP server
    $mail->SMTPAuth  = true;                                       // SMTP authentication
    $mail->Username  = 'CONFIGURAR_USUARIO_SMTP';                  // SMTP user
    $mail->Password  = 'CONFIGURAR_CONTRASEÑA_SMTP';	          // SMTP password
    $mail->SMTPSecure = PHPMailer::ENCRYPTION_STARTTLS;
    $mail->Port  = 587;
    $mail->setFrom('hola@prueba.com', 'Your name');                // Email sender

    // Recipients
    $mail->addAddress('prueba@midominio.com', 'Recipient Name');  // Recipient email and name

    // Email content
    $mail->isHTML(true);
    $mail->Subject = 'Email subject';
    $mail->Body  = 'Email content <b>in HTML!</b>';
    $mail->AltBody = 'Email content in plain text for mail clients that do not support HTML';
    $mail->send();
    echo 'The message has been sent';
} catch (Exception $e) {
    echo "The message could not be sent. Mailer Error: {$mail->ErrorInfo}";
}
- Modify the connection parameters in this file, the sender email and the recipient where we will send our test email.
Search for the following lines in the script and replace the data with yours.
It is very important to configure these values using a valid mailbox that you can access!
// SMTP configuration
$mail->Host  = 'mail.tudominio.com';   // Configure the SMTP server here
$mail->Username  = 'casilla@tudominio.com';  // This will be the mailbox that sends the mails
$mail->Password  = 'mailbox password';  // Password for your mailbox
$mail->setFrom('casilla@tudominio.com', 'Your name'); // Set your name and the sender mailbox
Below you will see this section to complete with your details:
// Recipients
$mail->addAddress('prueba@otrodominio.com', 'Recipient Name');  // Recipient email and name
And the last section to fill in with your details:
// Email content
$mail->isHTML(true);
$mail->Subject = 'Email subject';  // The subject that the sent email will show
$mail->Body  = 'Email content <b>in HTML!</b>';
- Upload via FTP or, using the File Manager in cPanel, the PHPMailer directory and the ejemplo.php file to the root of the public directory of your website (public_html).
- Run the example from
https://tudominio.com/ejemplo.php.
It will show you the debug output of the process and then you will receive the email:
“The message has been sent”
If it shows any error, either from PHP or SMTP connection, you should debug the source of the problem. The error message you would receive in this case is:
“The message could not be sent. Mailer Error:”
In production, remember to disable PHP and SMTP debugging by changing the first lines of the test code:
ini_set('display_errors', 1);    // Change the 1 to 0
ini_set('display_startup_errors', 1); // Change the 1 to 0
error_reporting(E_ALL); // Change "E_ALL" to 0