
How to Generate Backups in Plesk
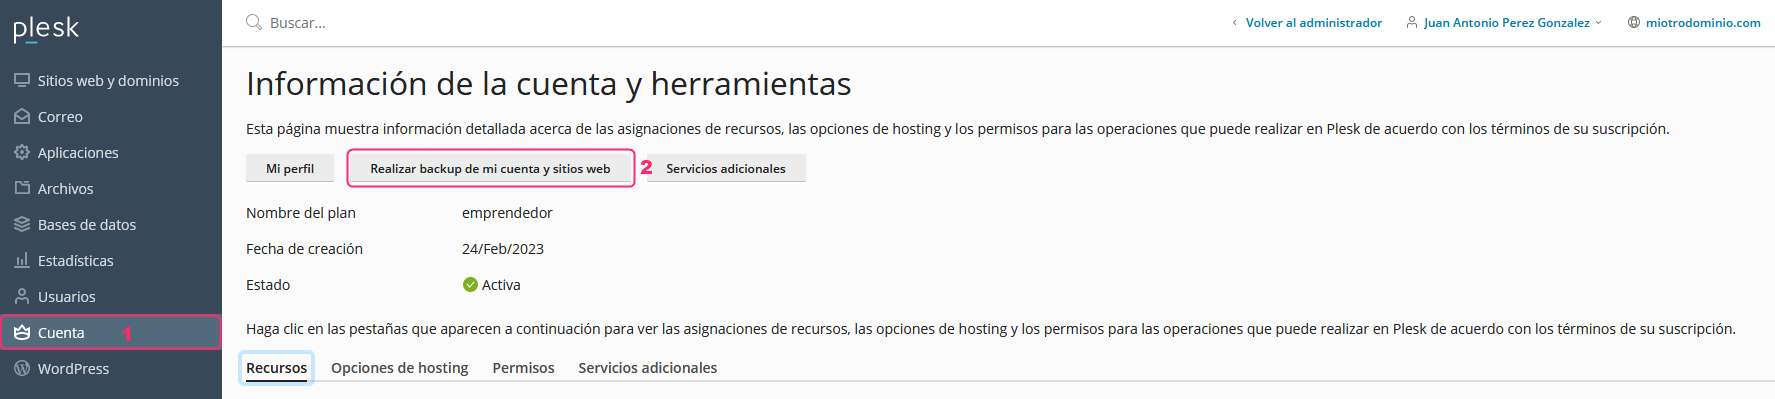
- To generate or download backups of your account, go to Account in the left-hand menu, and then press the Back up my account and websites button.
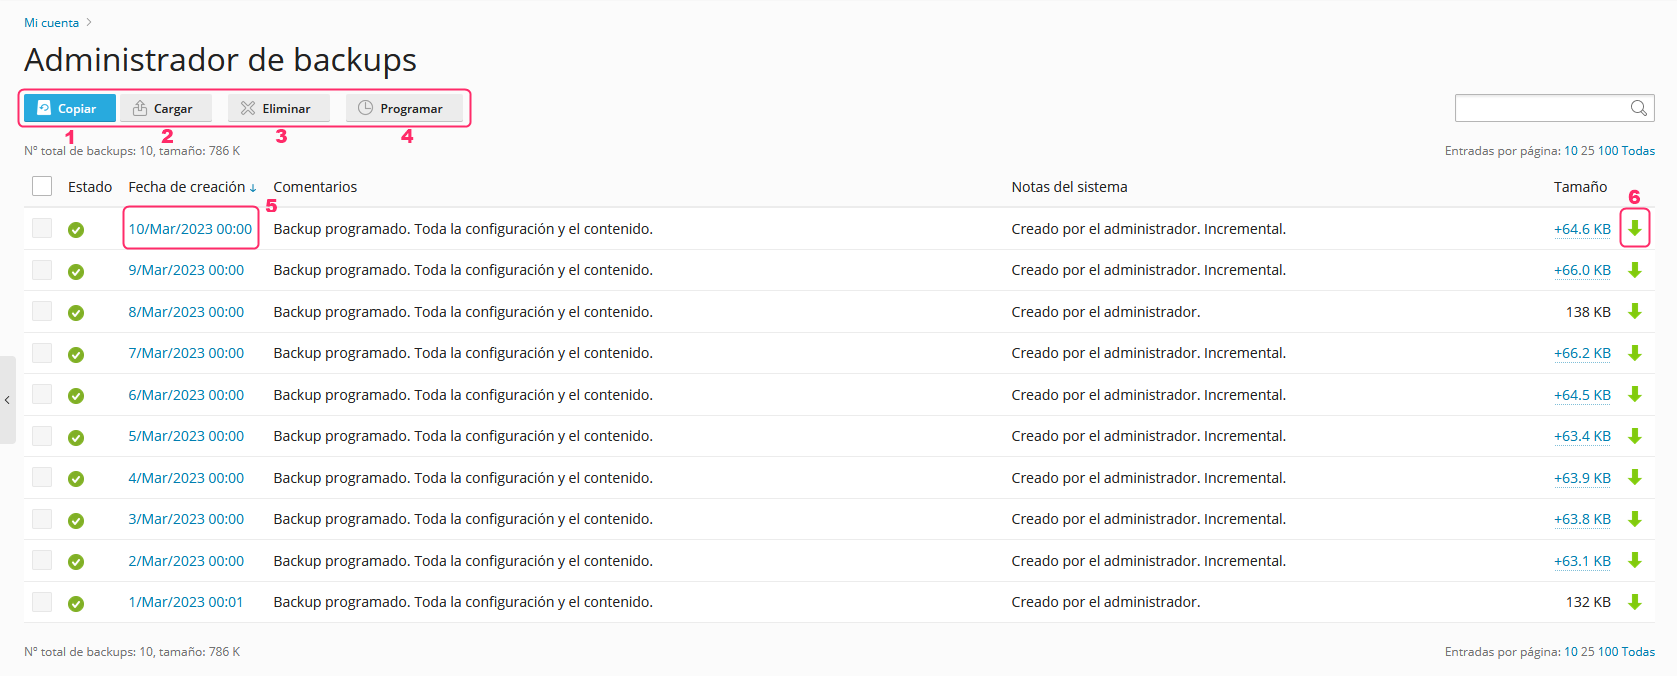
- On the new screen, you will see several buttons and options. We will detail each one and then look at them in more detail:
- With the Copy button you can create a backup. Find the steps here.
- With the Upload button you can upload a backup that you have downloaded to your PC or device. It will appear in the list so it can be restored if necessary.
- With the Remove button you can delete backups that you have checked with the checkboxes to their left.
- With the Schedule button you can configure times when the server will make backups of your account. Plesk already generates periodic backups of accounts so they can be restored.
- If you click on the date of a backup, you can restore it. Find the steps here.
- If you click the green arrow to the right of a backup you can download it to your PC or device.
Create a Backup
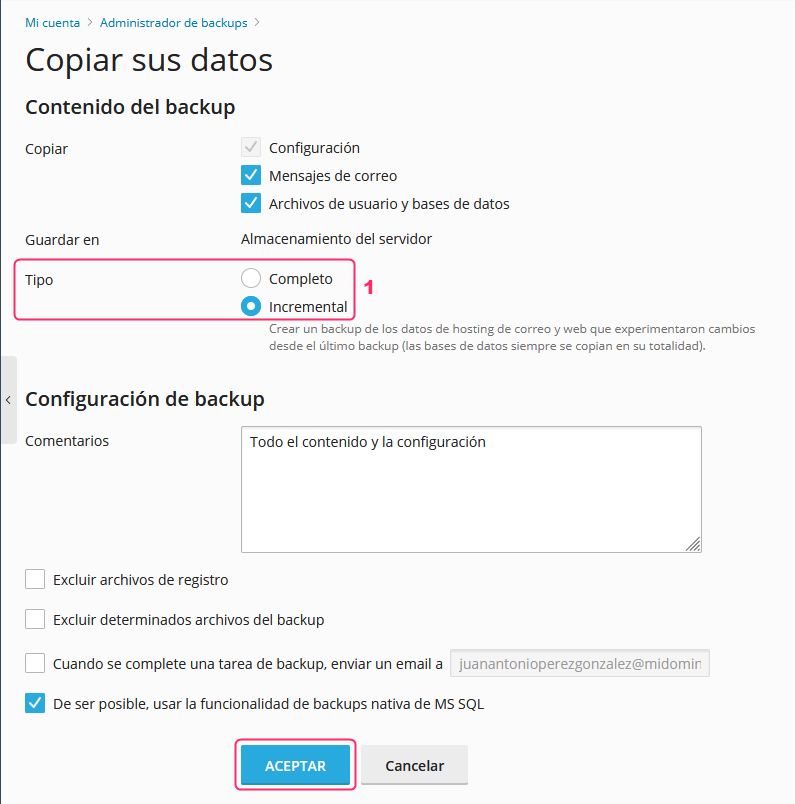
The backup creation screen will ask you for:
- Which types of data to include in the backup.
- The type of backup to create. It can be Full or Incremental.
- A Full backup will copy your entire account.
- An Incremental backup will only include changes made since the last generated backup.
- You can exclude certain files from the backup.
- You can send a notification to an email address when the backup completes.
- It is recommended to leave the native MS SQL backup functionality checkbox enabled.
Clicking Accept will start generating the backup for your account.
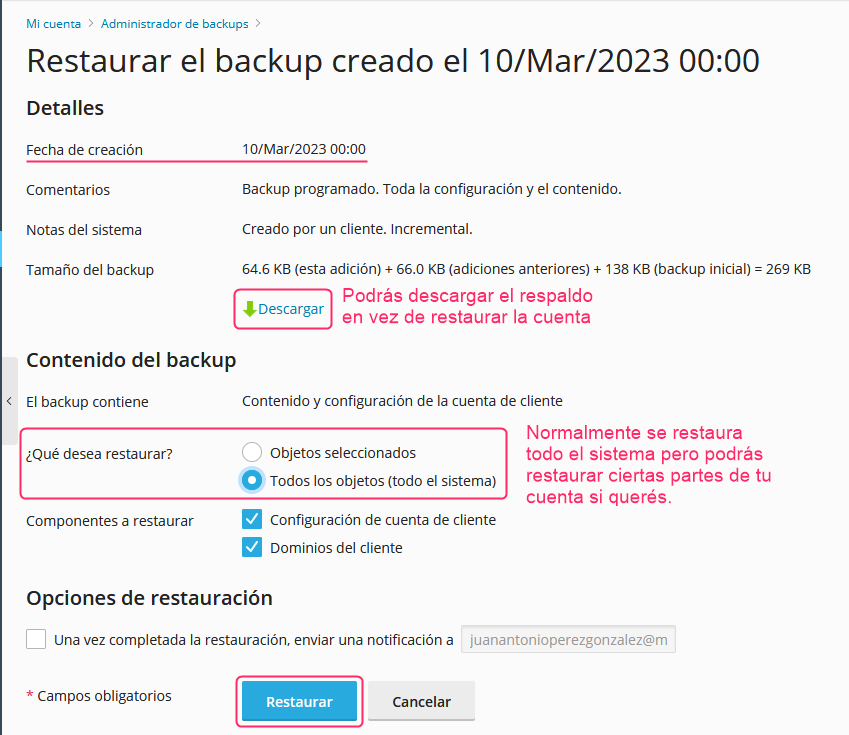
Restore a Backup
The account restoration screen will show information about the selected backup and will give you different options to restore your account:
- You can download the backup to your PC if you want to keep it outside the server.
- You can restore the entire account (recommended) or restore only certain parts.
- You can send an email notification when the restoration completes.
- Clicking the ACCEPT button will start restoring your account.