

How to configure DKIM, SPF and DMARC authentications?
Below we will show you how to configure DKIM, SPF and DMARC authentications.
The email authentication methods DKIM, SPF and DMARC will help you increase the reputation and security of your sent emails.
Accessing the Email Authentication tool:
- Log in to your Client Area and click Services, then My Services.
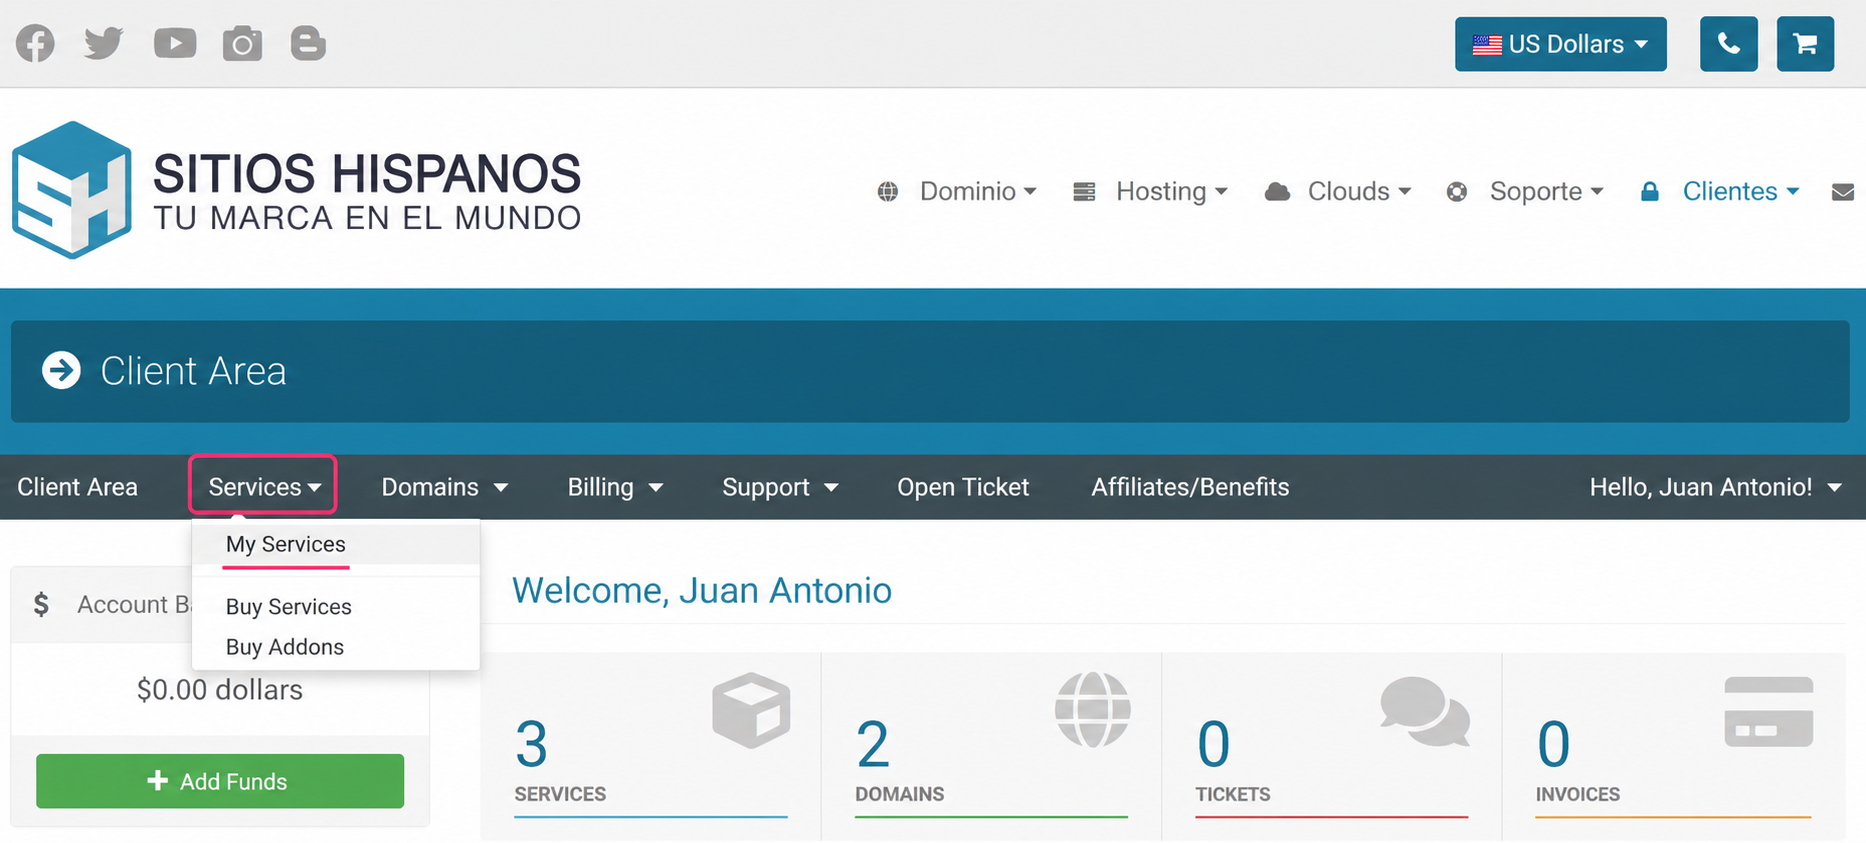
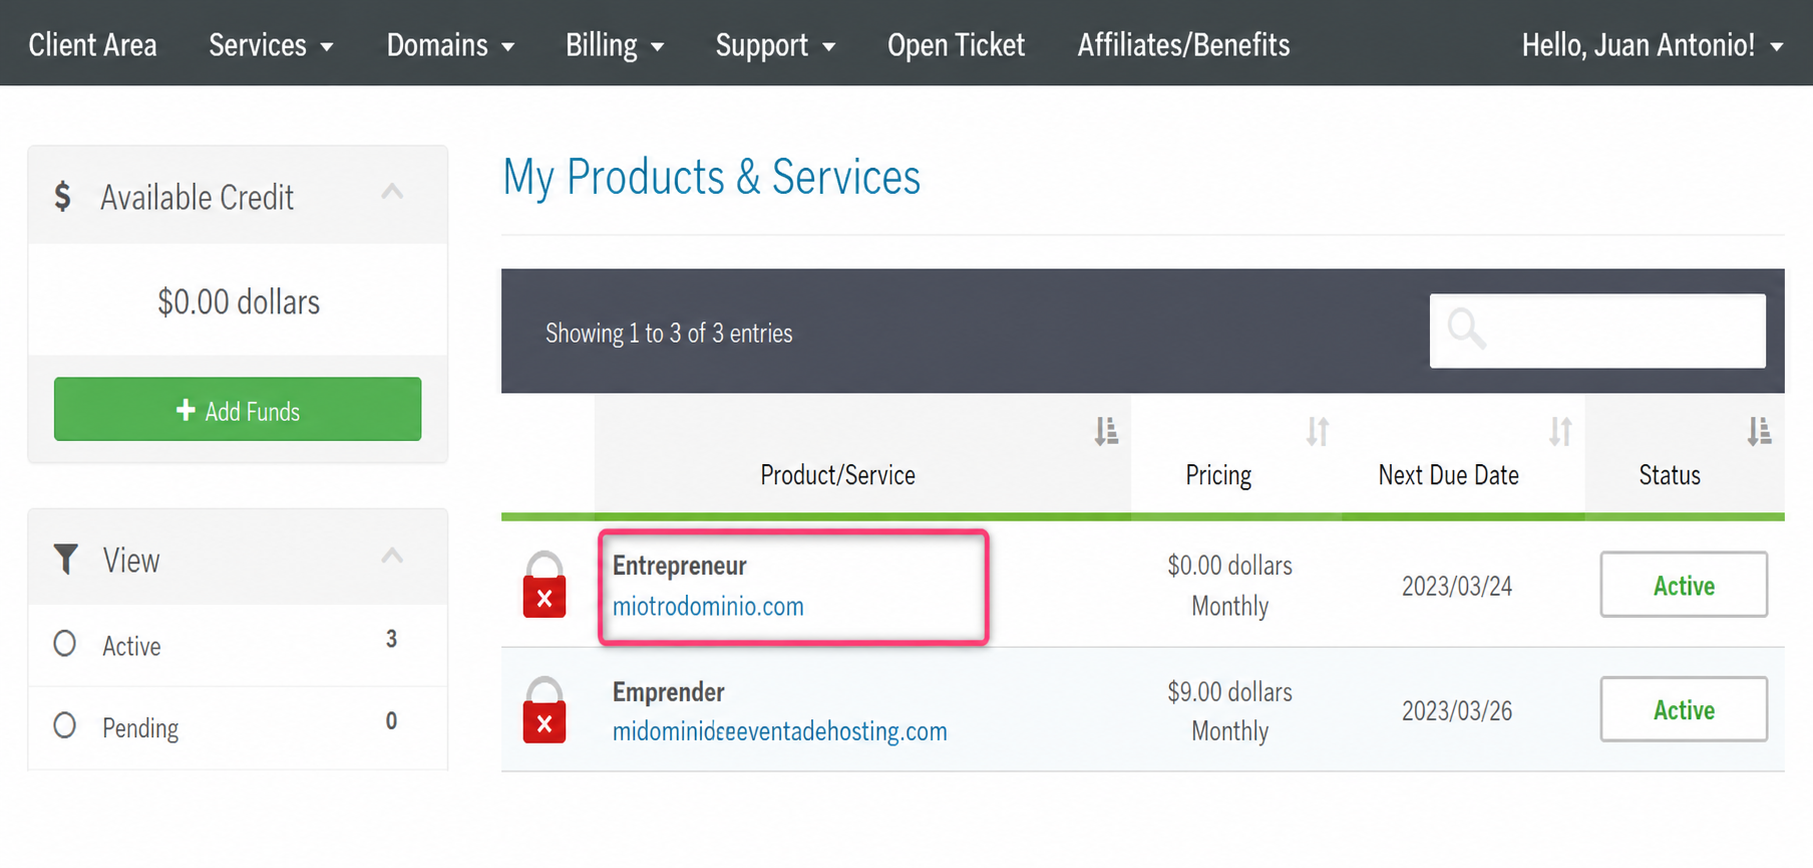
- From the list of hosting plans, access the one where you want to enable Email Authentications.
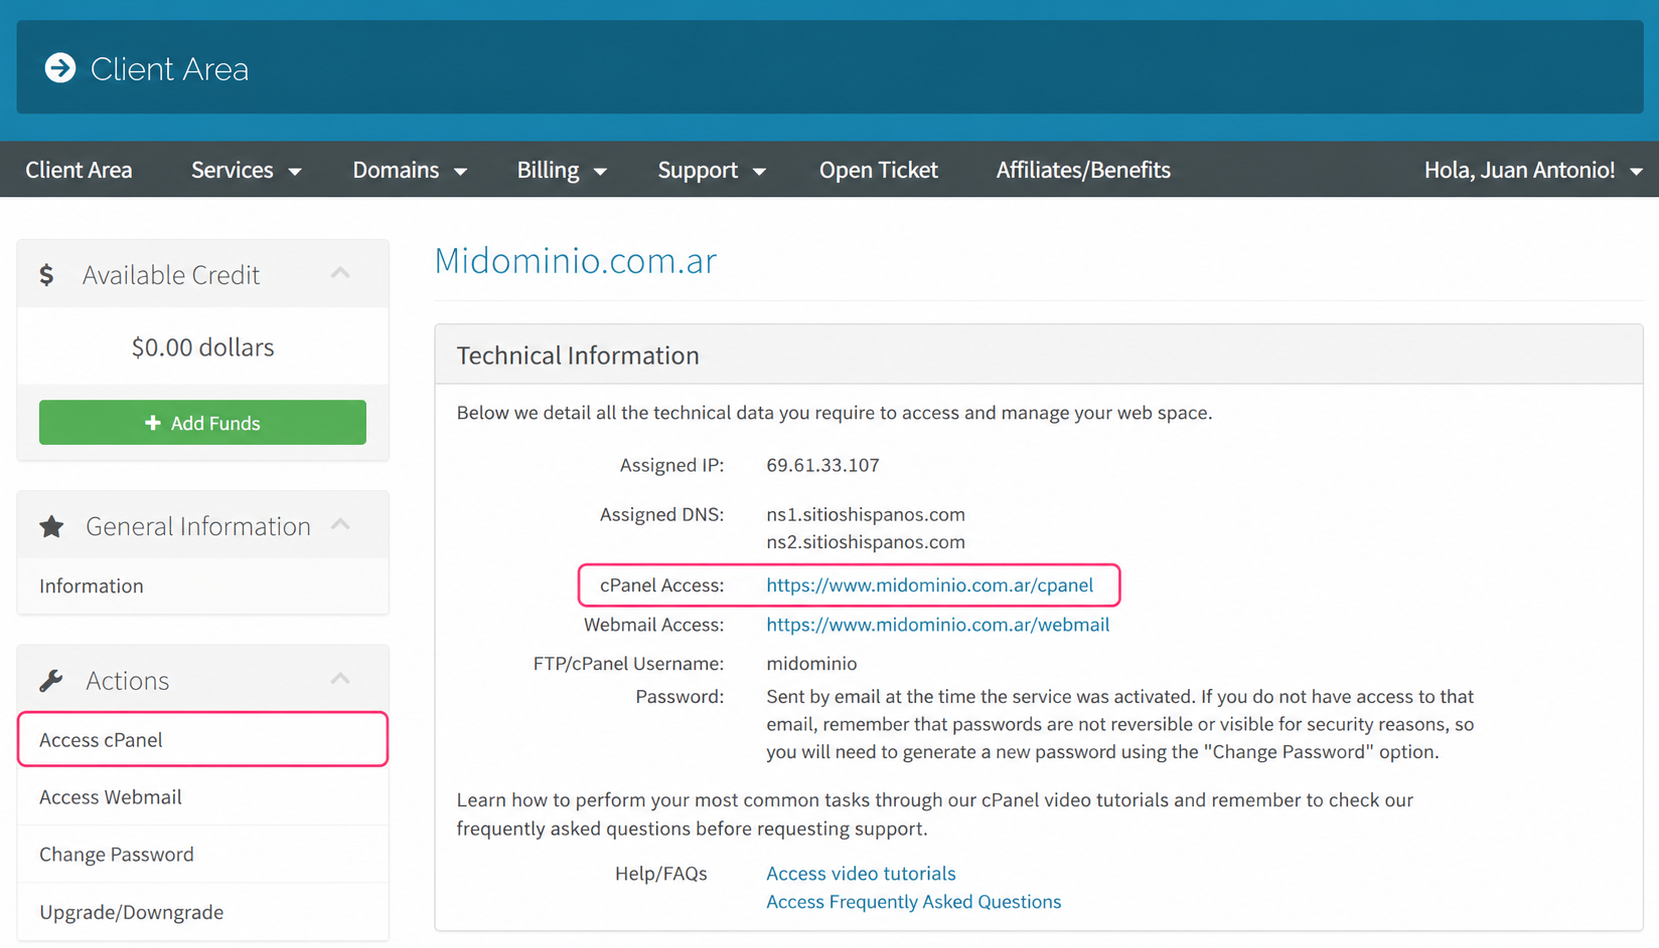
- On the new screen you will find, in the Actions box on the left, the option to enter the cPanel control panel. You will also see, in the central Technical Information box, the direct access to the panel from your browser.
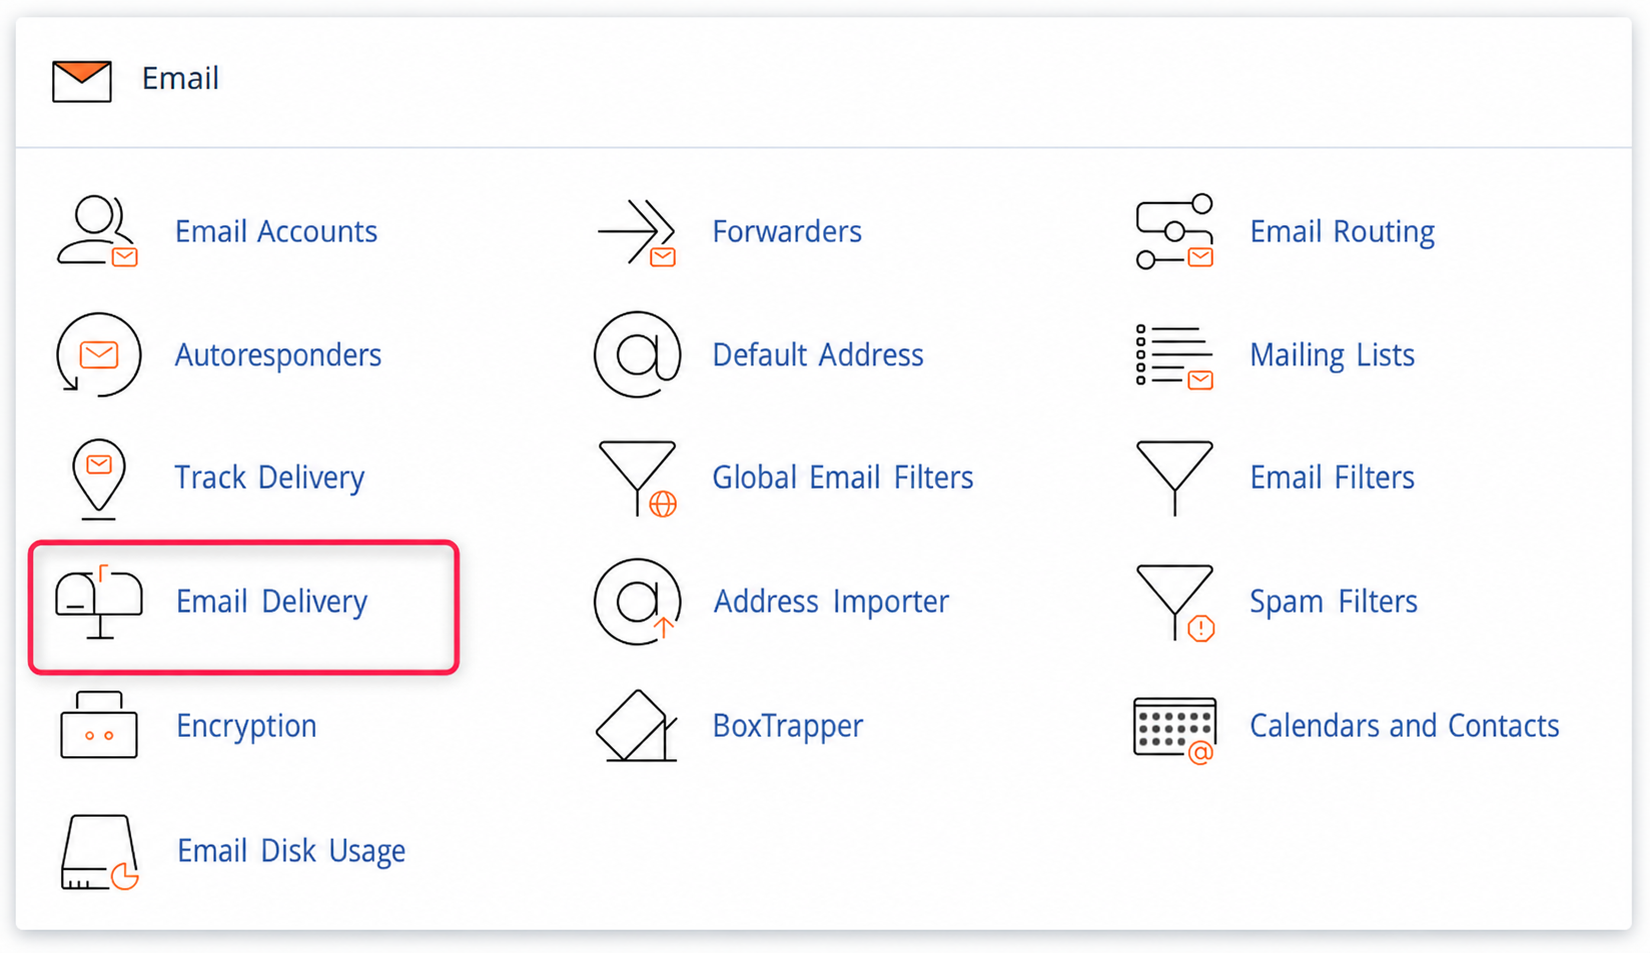
- Once in the cPanel control panel, go to Email Delivery, in the Email box.
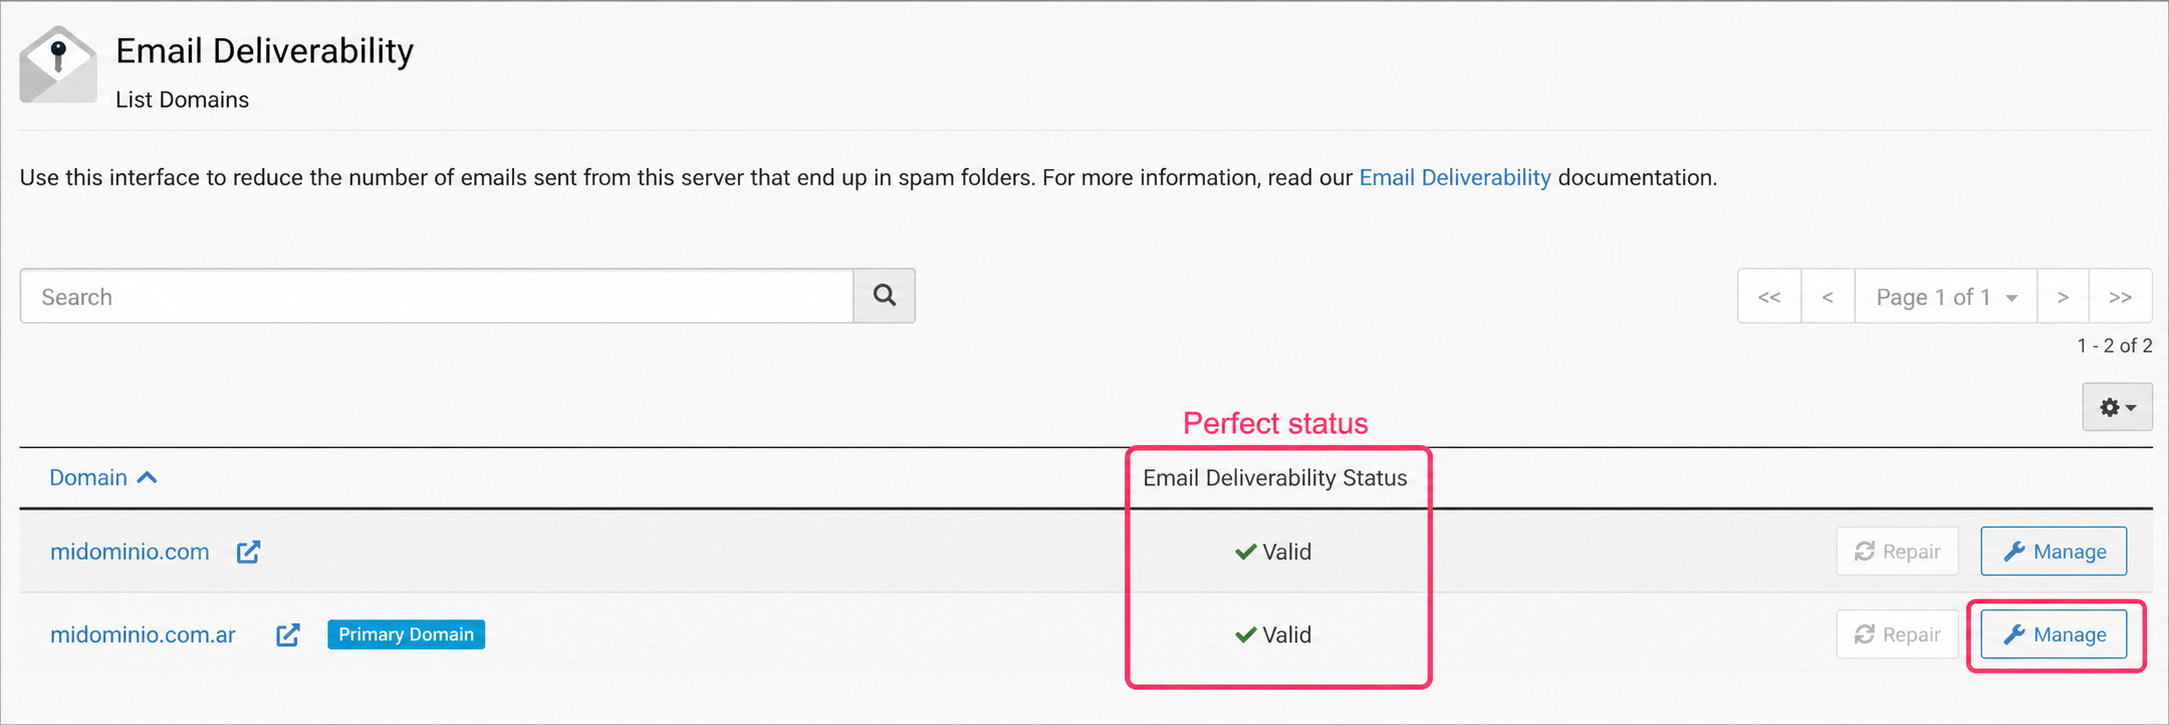
- When you enter the email authentication configuration screen you will see their status. The server will attempt to install DKIM and SPF authentications automatically.
If the DKIM and SPF authentications are installed correctly, the status will appear as Valid.
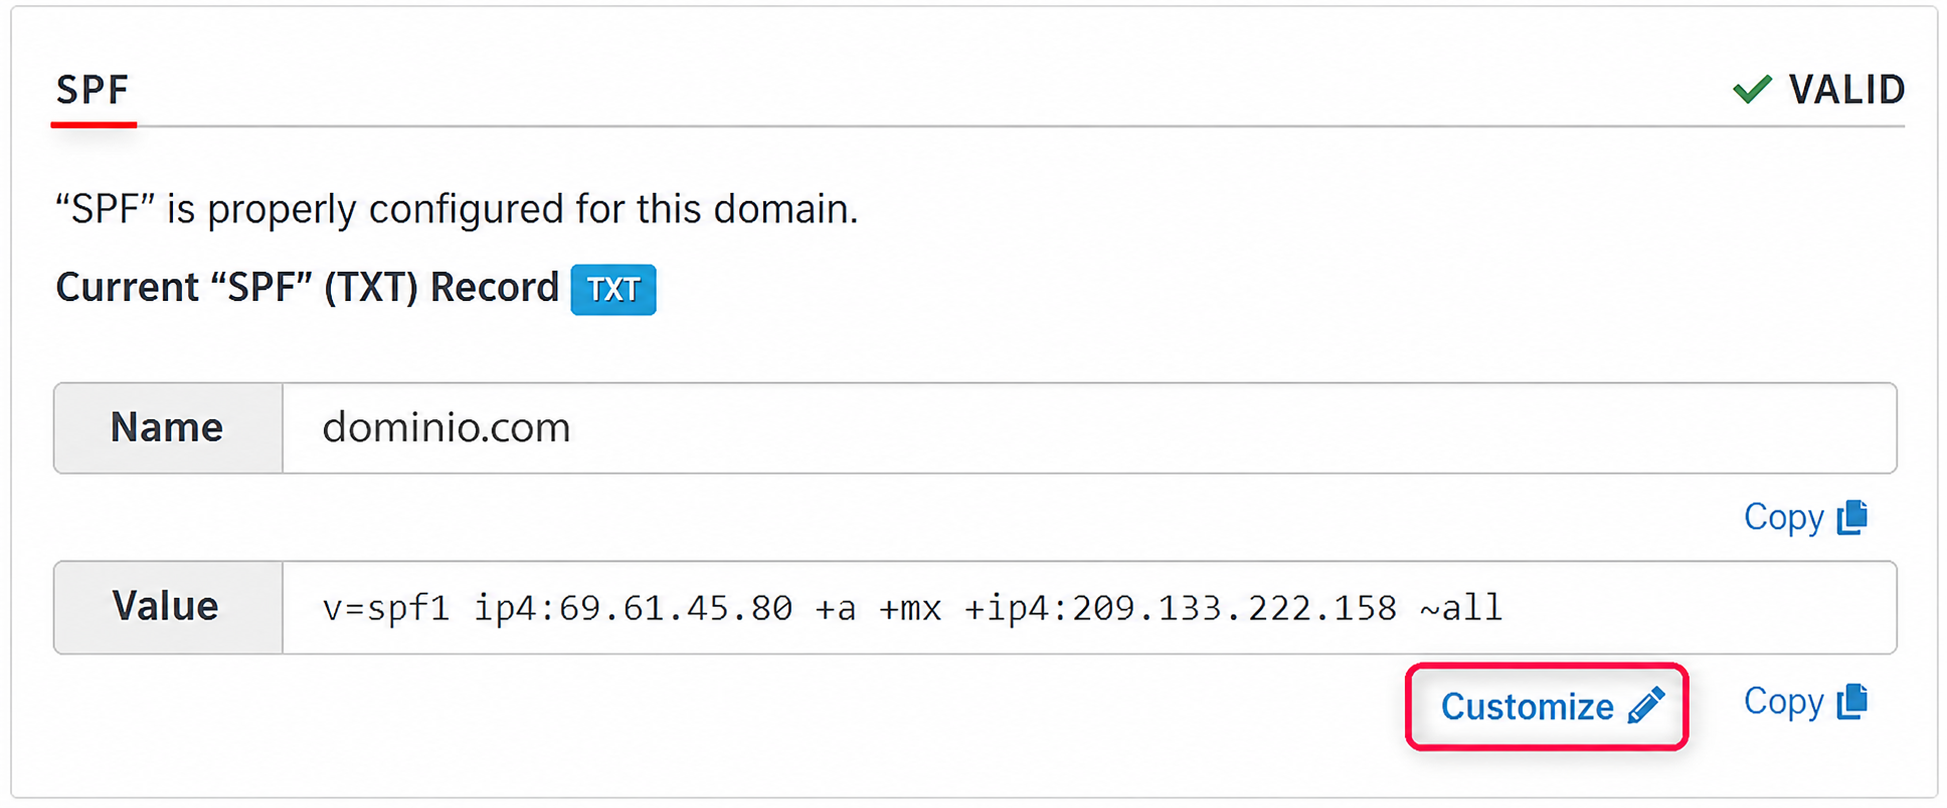
You can always modify the DKIM and SPF records from the Manage button on the right.
For example, you can modify the SPF record from the Customize button. Often different external services will request adding a value to this record.
Repair or install Email Authentications:
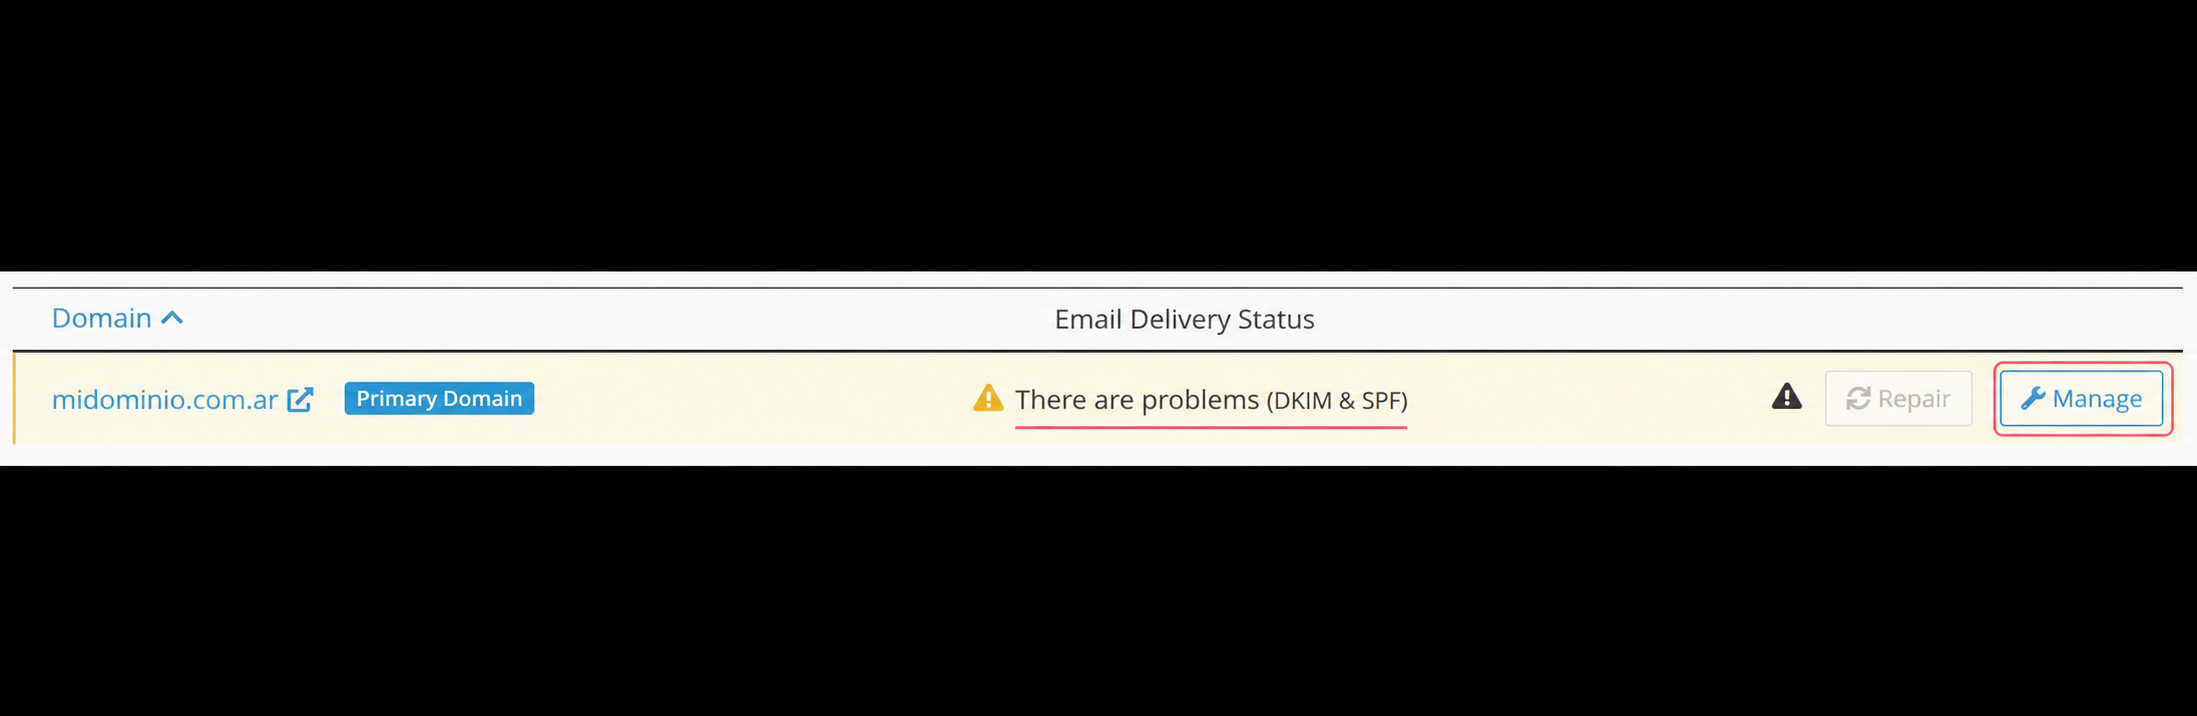
If you find that one or more records (DKIM or SPF) have an issue, you will see it in the Email delivery status.
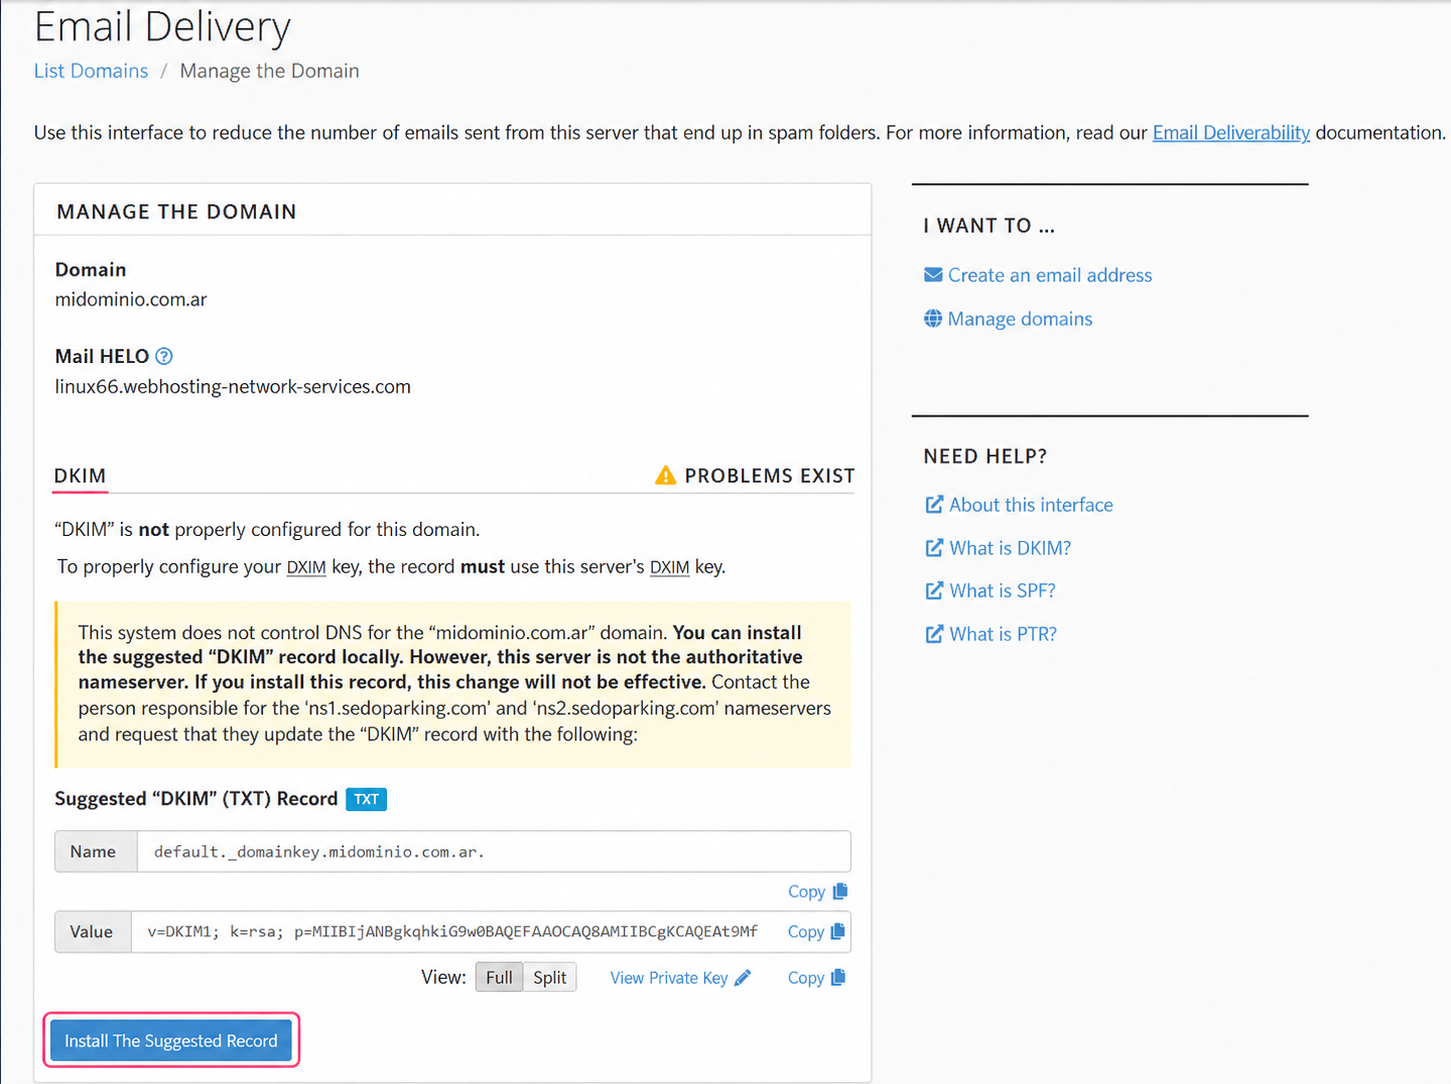
You can repair them automatically, if possible, with the Repair button or you can install them by entering Manage.
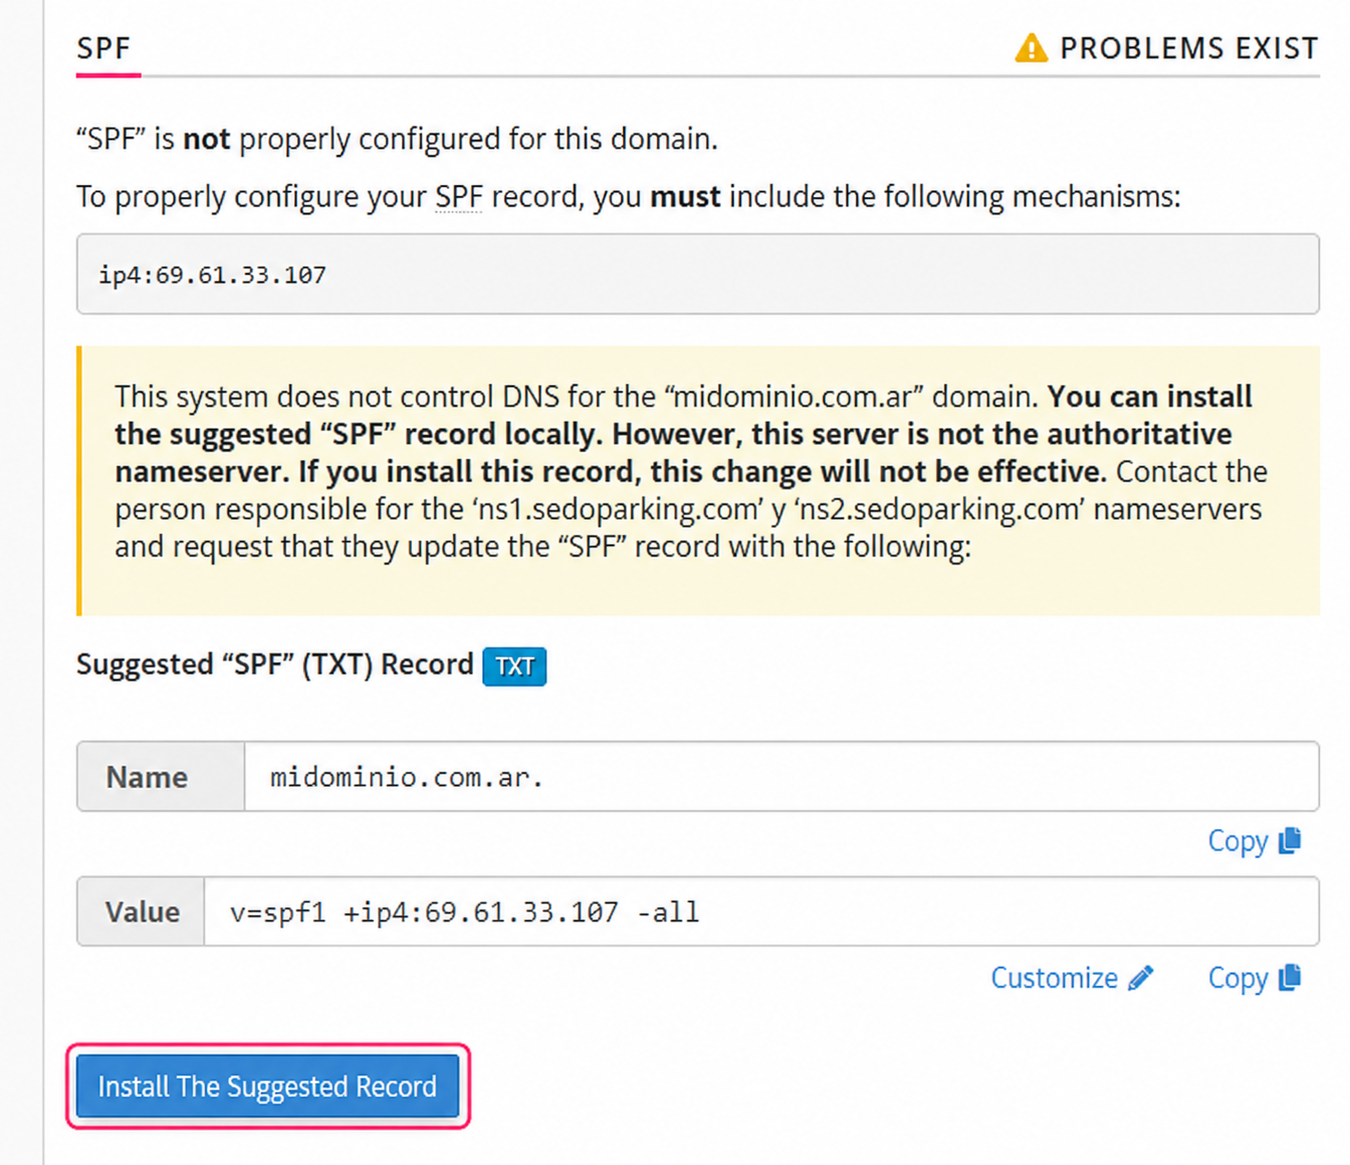
The management of DKIM and SPF records will show you the status of each one and, if necessary, you can install each record with the Install the Suggested Record button.
How to add and configure DMARC authentication
DMARC authentication determines what will be done with an email after it has been checked against the SPF and DKIM records. The DMARC authentication configuration will determine whether failing SPF or DKIM authentications will cause the email to be marked as spam, blocked, or still delivered to its recipient.
The DMARC authentication must be added from another tool in the control panel.
- In the Domains box, go to Zone Editor.
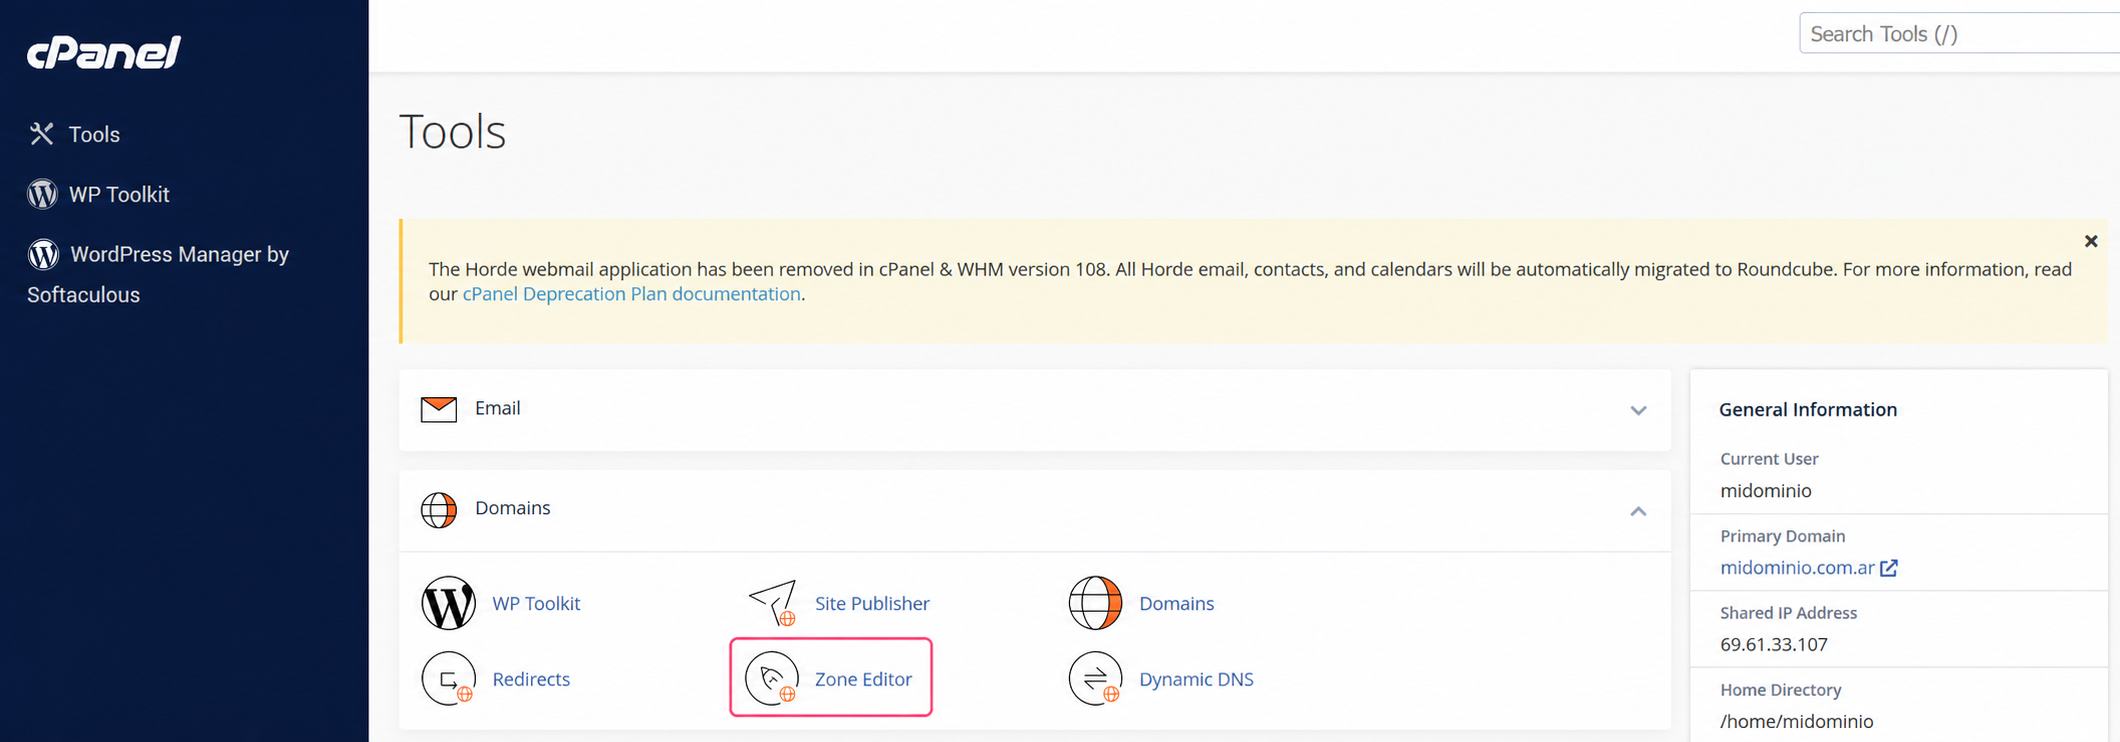
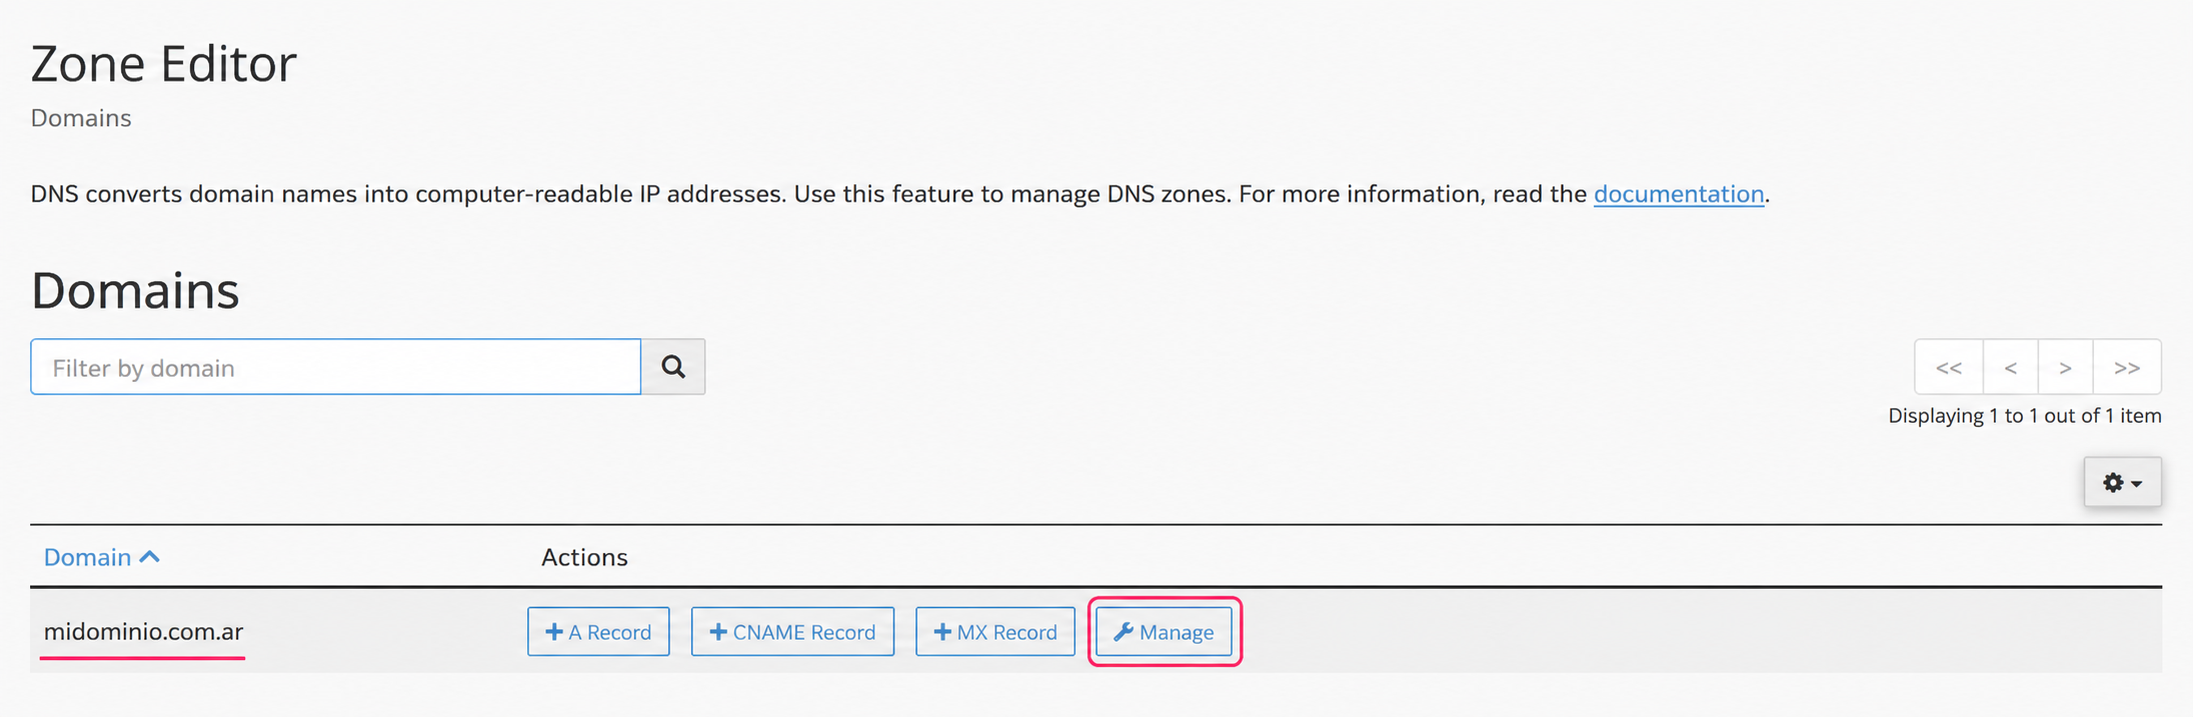
- On the Zone editing screen click Manage for the domain you want to configure.
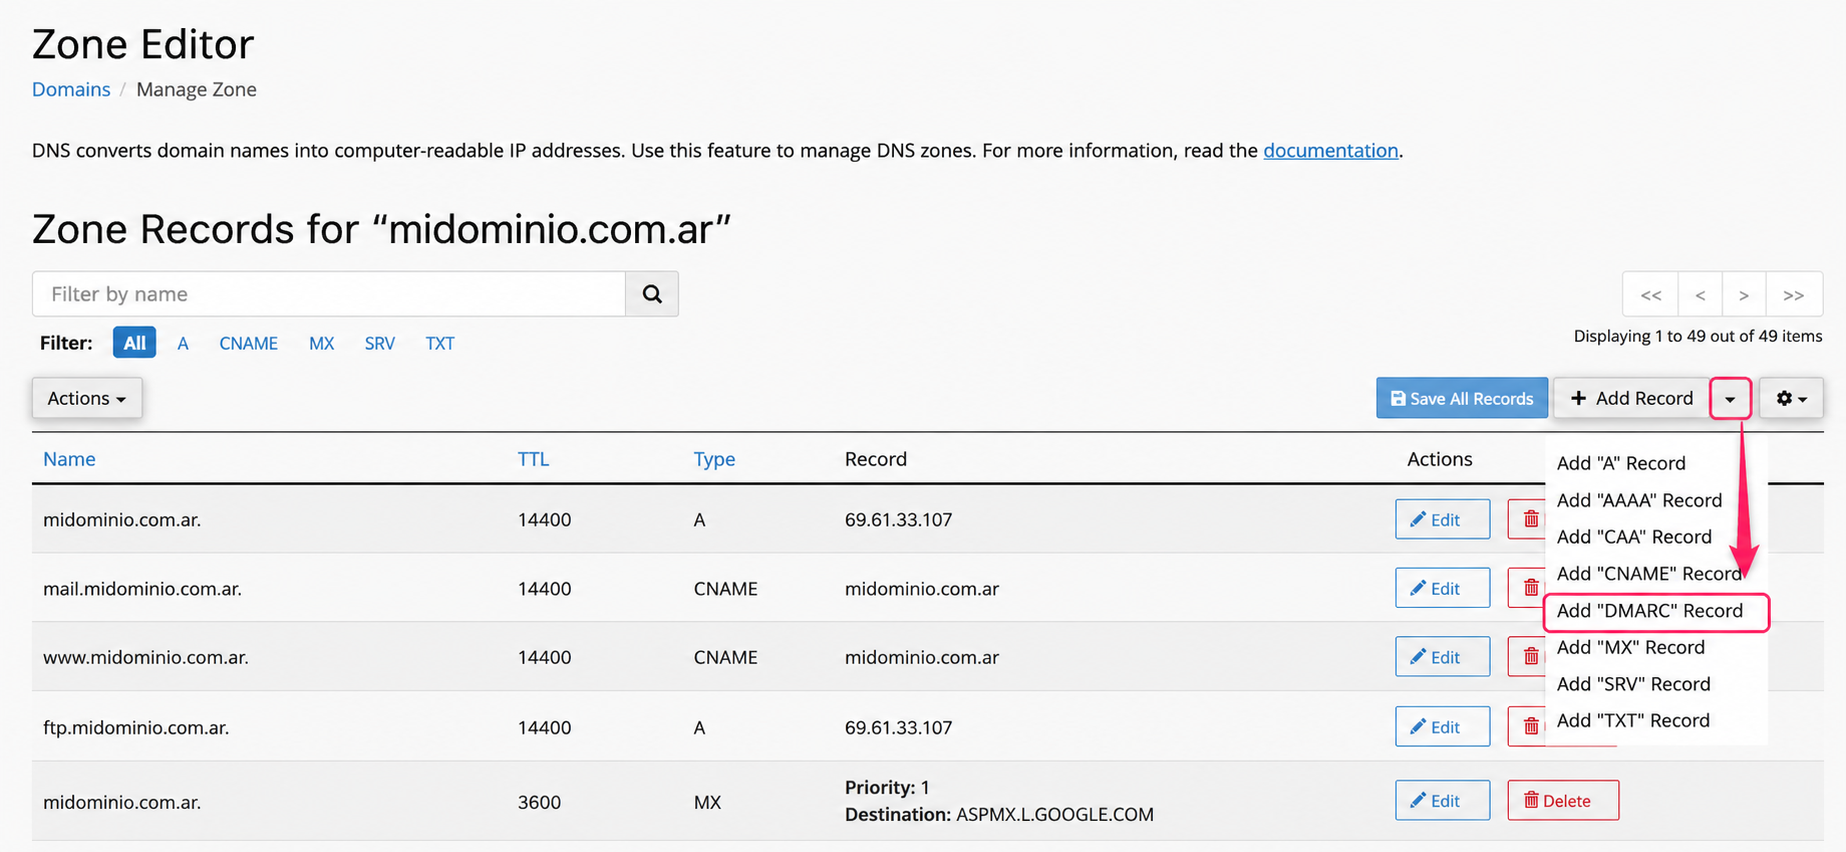
- You will see the DNS Zone screen for your domain. Click the arrow on the Add Record menu, which is on the right. In the dropdown menu choose the Add “DMARC” Record option.
The DMARC record will be generated with the default configuration. You can save this configuration directly with the Save the Record button or you can configure the different options of this authentication.
The three main configurations of this authentication are None, Quarantine and Reject.
- None: allows emails that do not pass DKIM and SPF authentications to continue being sent.
- Quarantine: instructs the mail server to “quarantine” emails that fail DKIM and SPF authentications, treating them as potential spam.
- Reject: instructs the mail server to block emails that do not pass DKIM and SPF authentications.
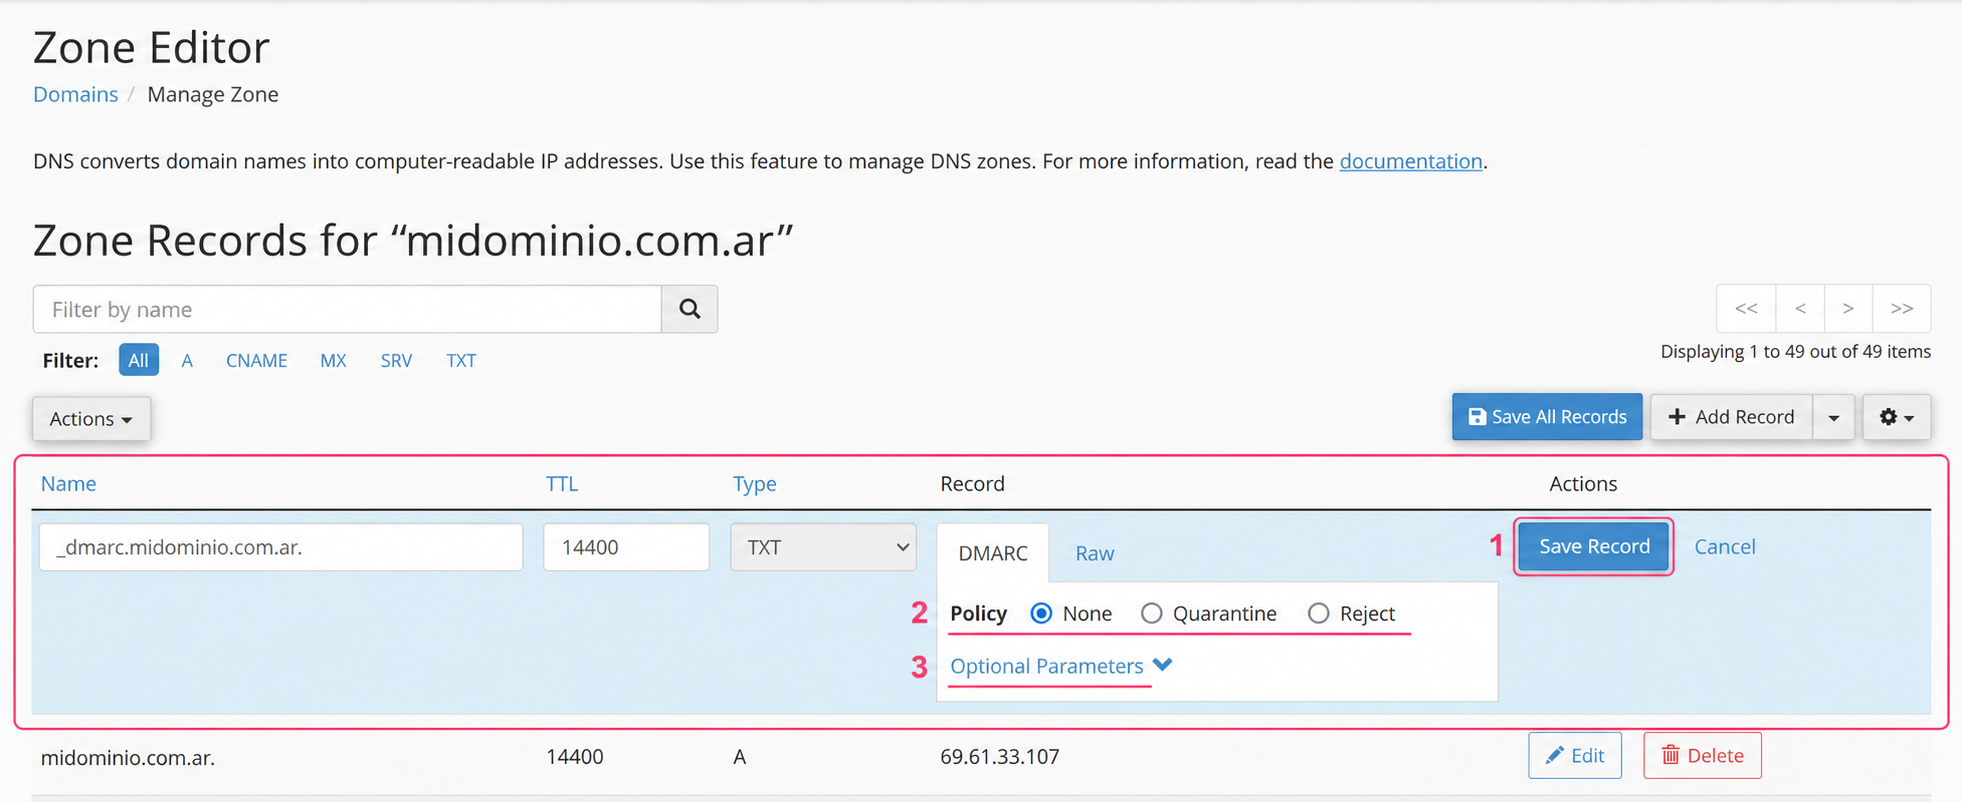
- You can also continue configuring the behavior of the DMARC authentication by opening Optional Parameters. You will see these options to configure this authentication:
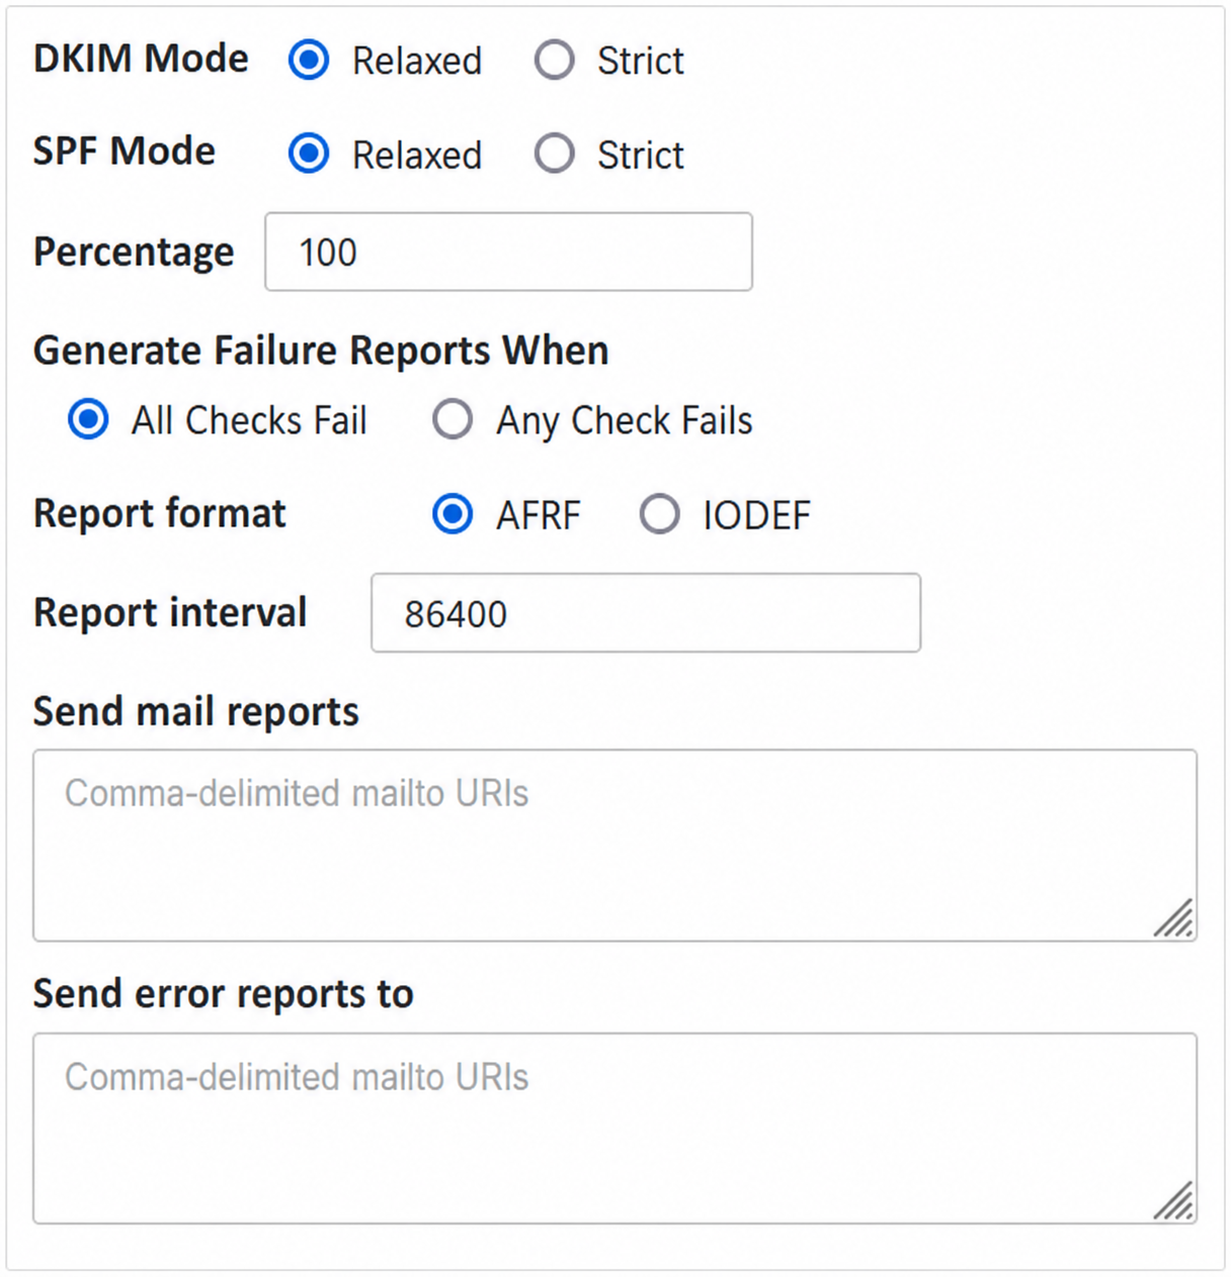
- Once the DMARC authentication is configured you must save the changes with the Save the Record button.