
How do I create plans for my hosting accounts?
To create hosting plans, which will define the resources that an account will have, we must follow these steps:
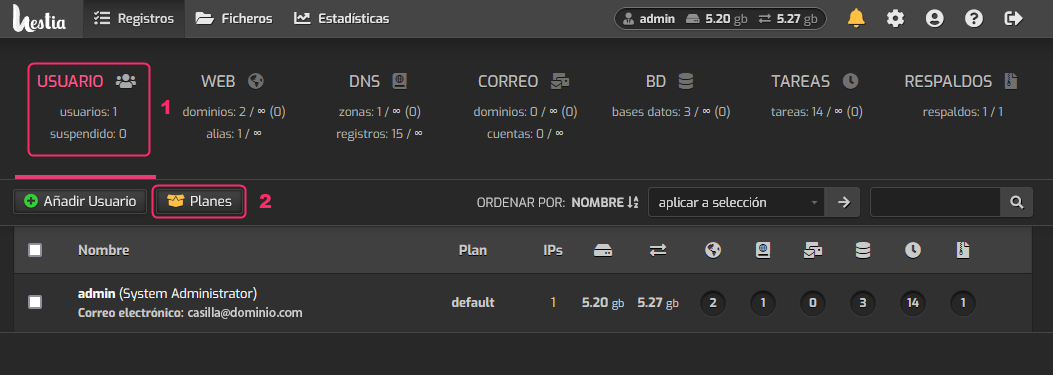
- Position yourself in the USER box.
- Go to Plans.
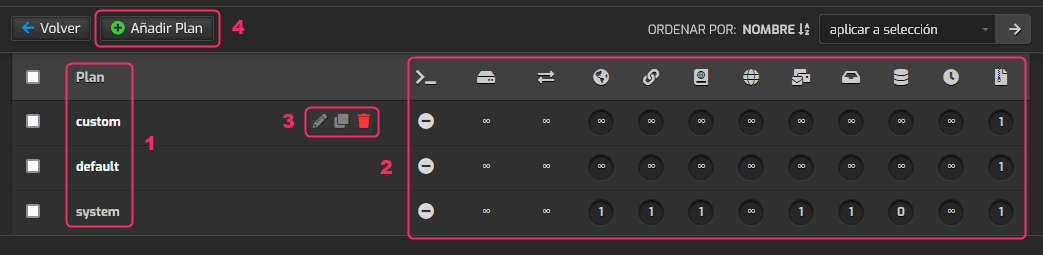
On the Plans screen you’ll find the following information:
- You will see the plans that have been created.
- To the right of each plan you’ll see the various resources and options provided. Hovering the mouse over each option for a few seconds will show its description.
- These floating options will allow us to delete, copy, or edit a plan.
- With Add Plan we can create a new hosting plan.
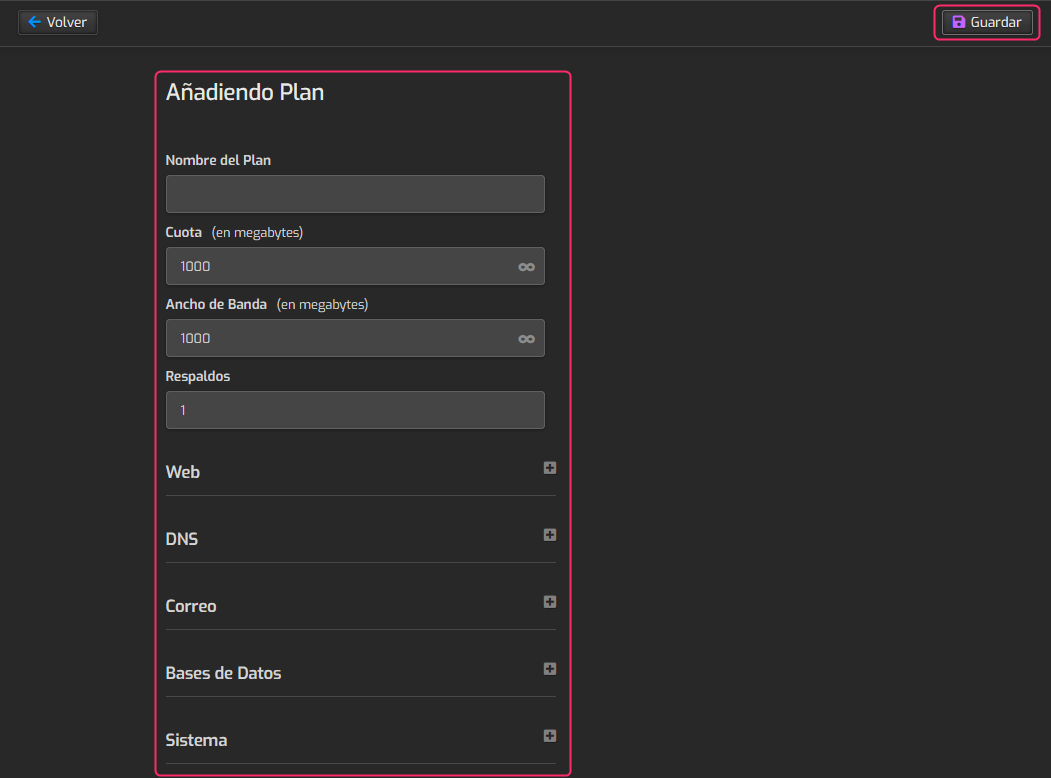
When creating a new package you will see the options to configure.
The main fields are:
- The name of the plan
- Disk space
- The monthly bandwidth limit
- Number of backups allowed.
Once you have defined the hosting plan you can save it with the Save button located at the top right.