

How to use WP Toolkit in cPanel?
To easily install and manage WordPress using WP Toolkit follow these steps:
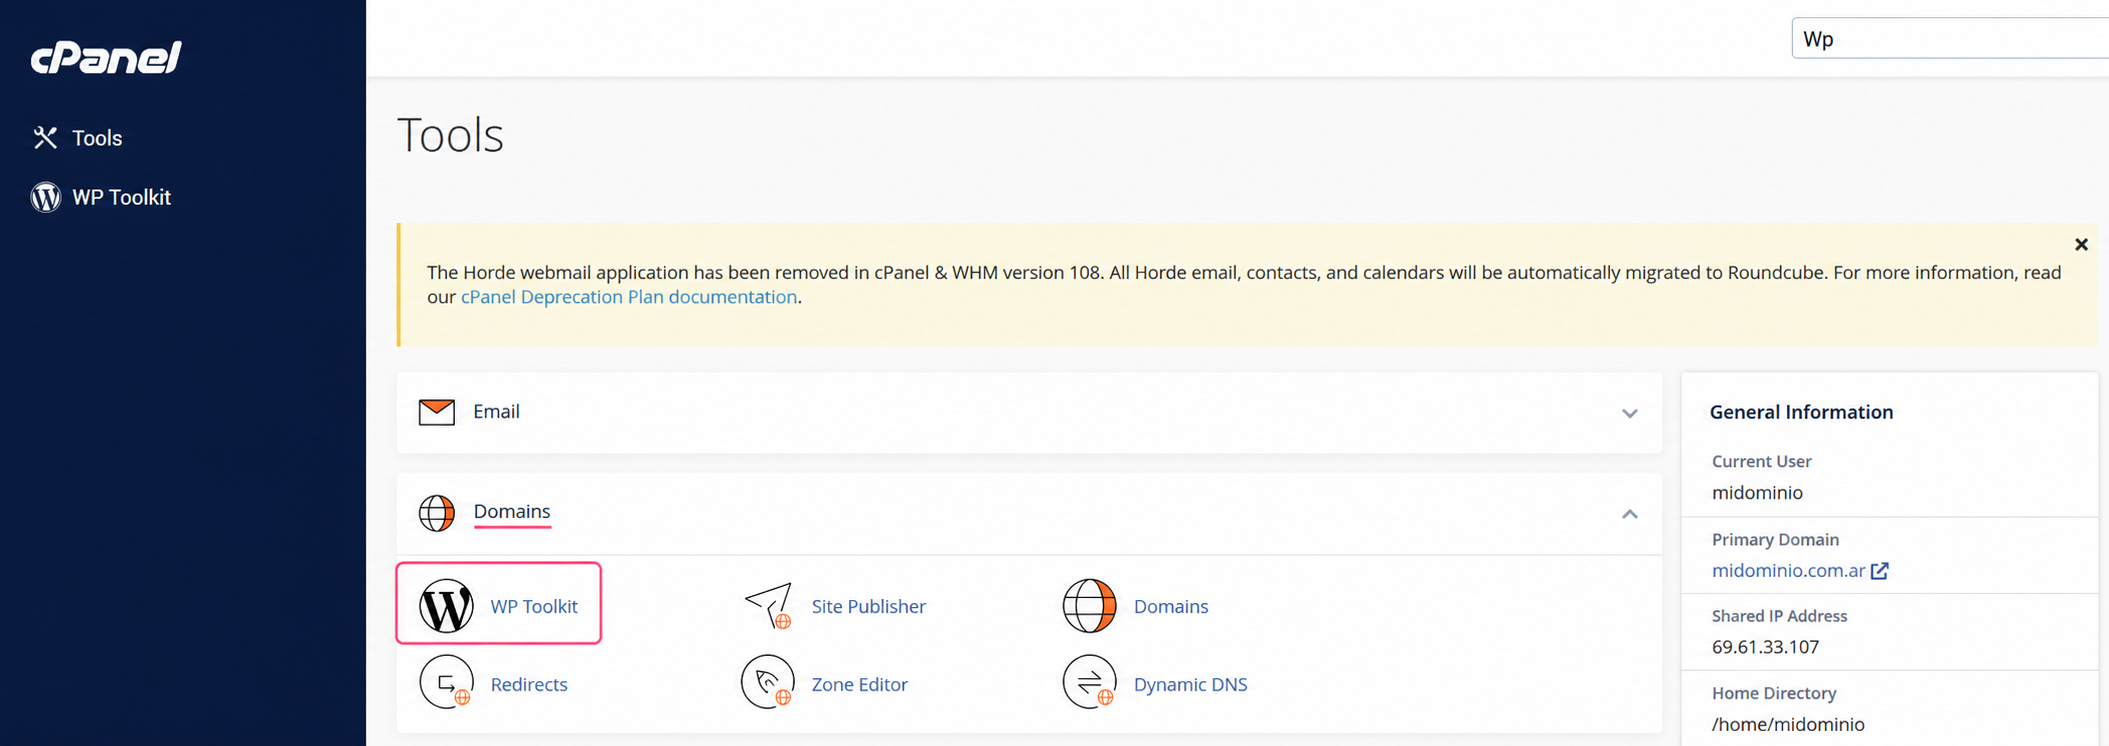
- In the control panel go to WP Toolkit, in the Domains box.
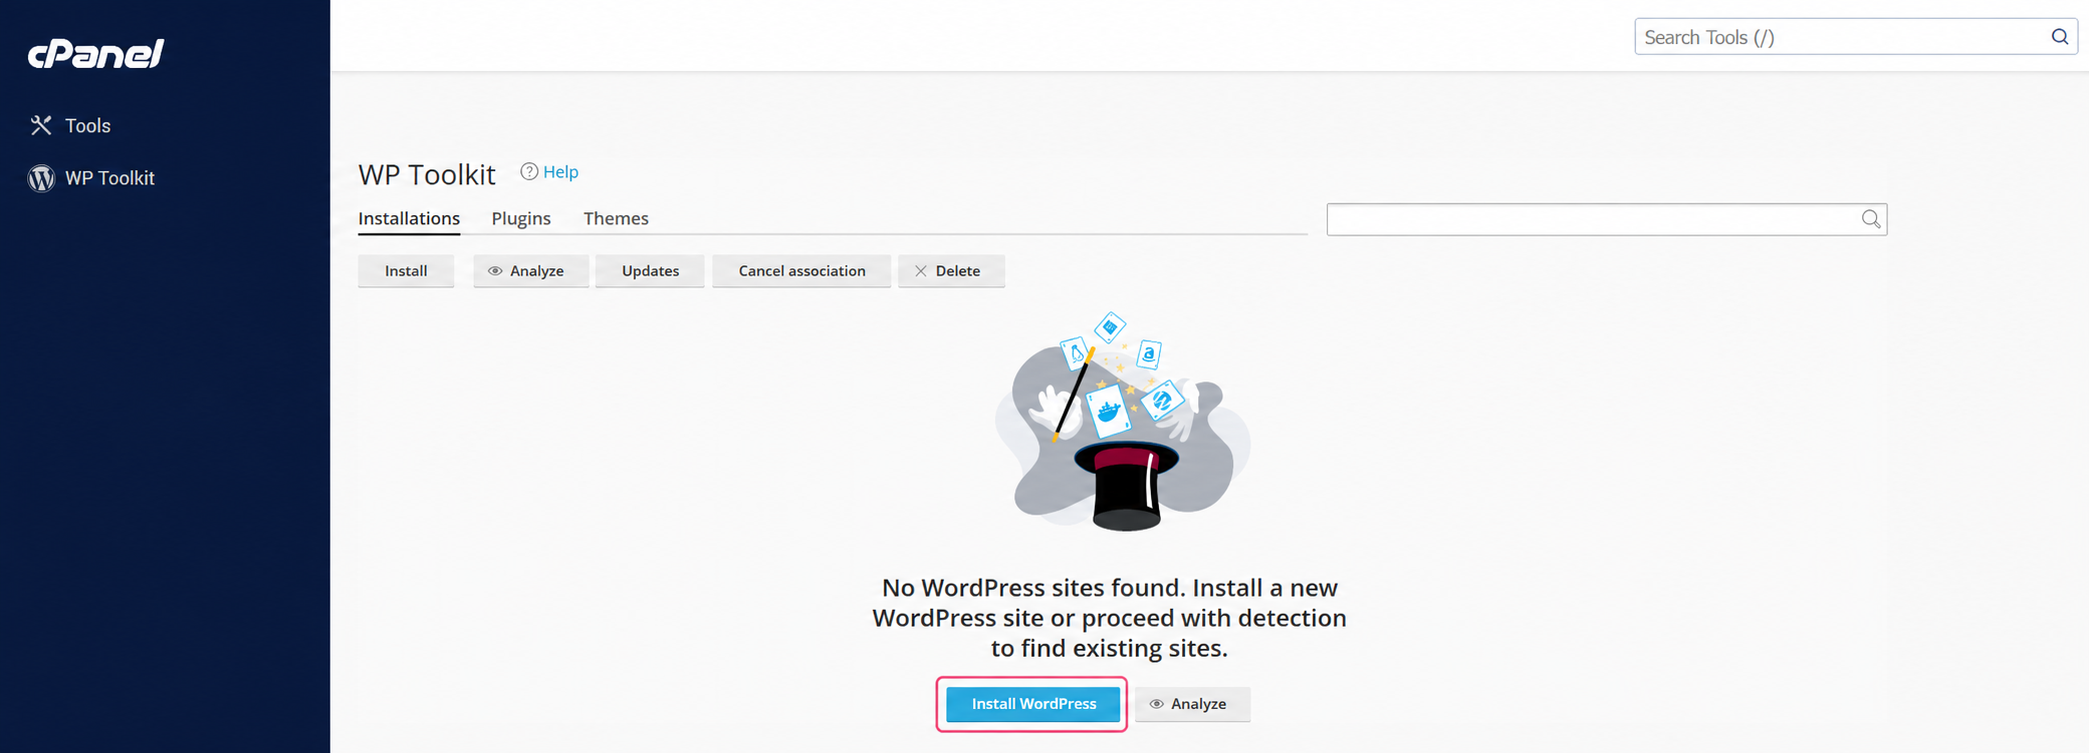
- If this is your first installation you’ll see this screen, where you can start the installation.
- On the installation screen you’ll see several options you need to complete.
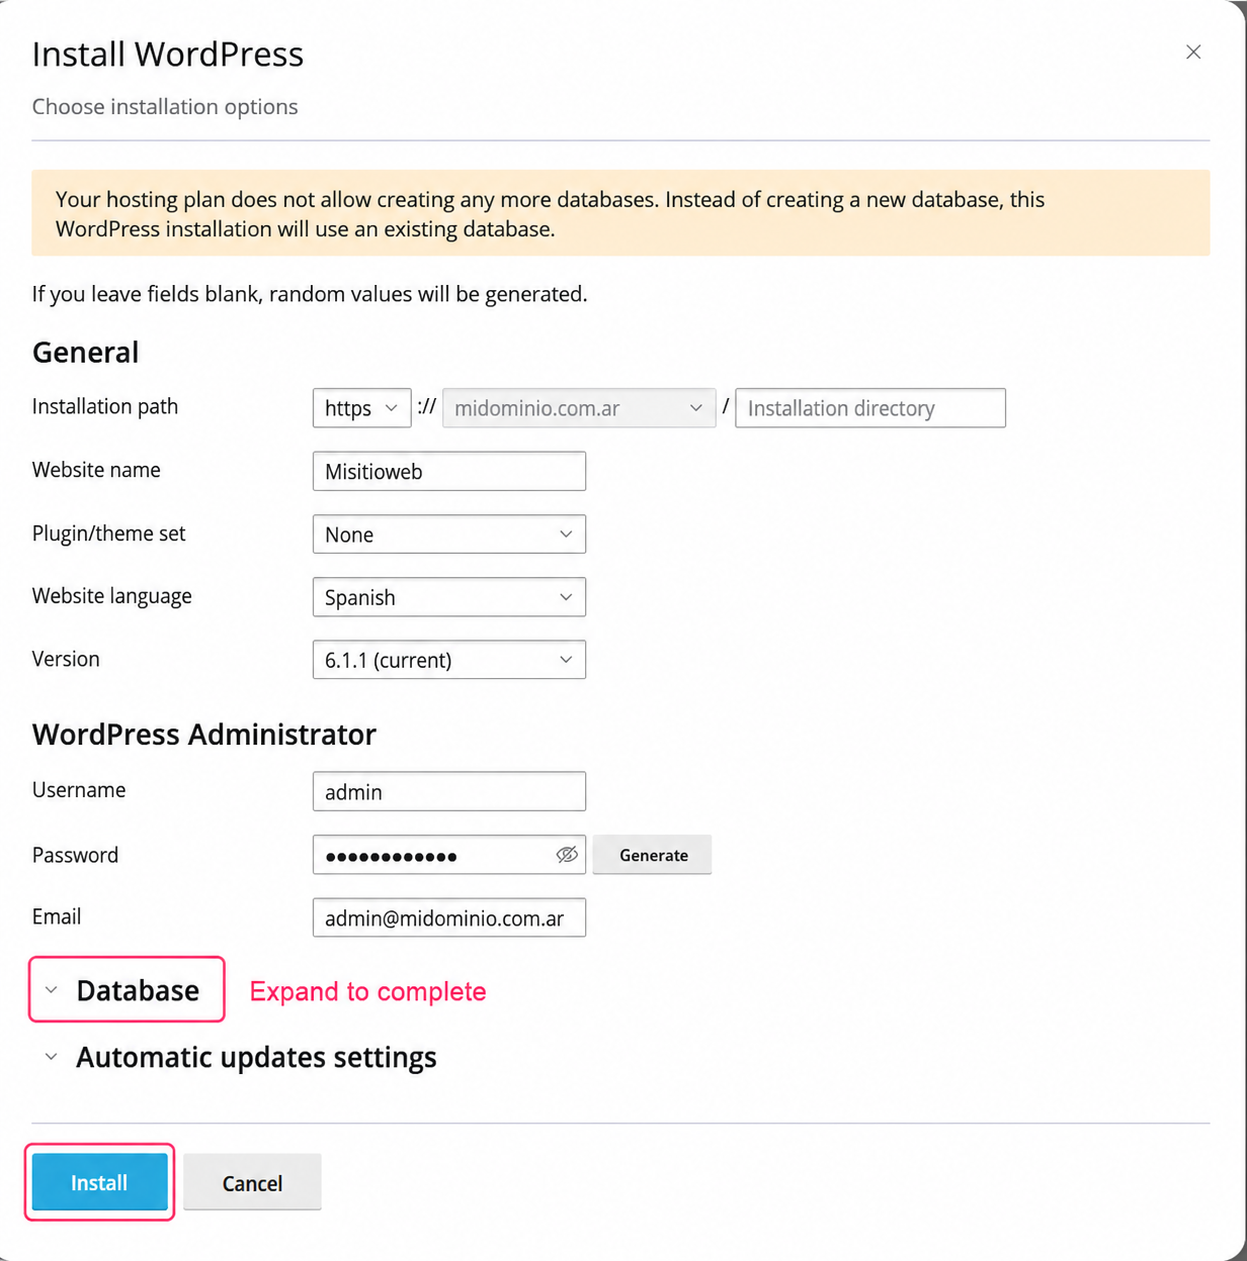
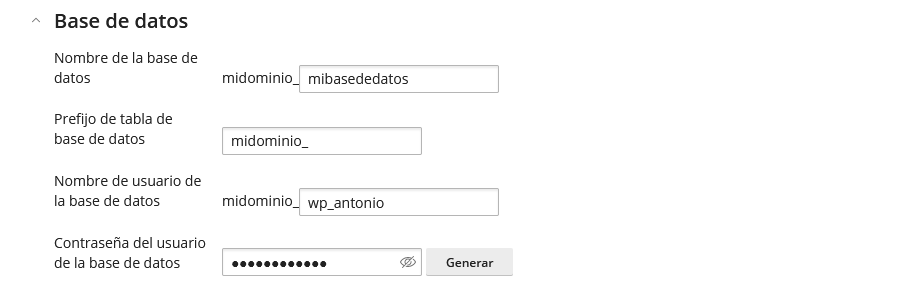
Expanding the Database menu you can fill in the database details you will use. Then, with the Install button, a WordPress installation will be created on your hosting plan.
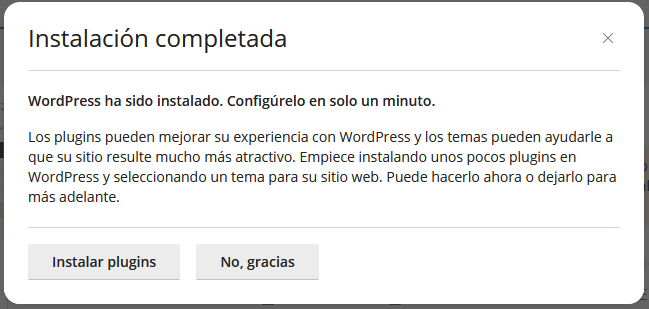
- When the installation is complete you’ll see this screen, from where you can enter the WP Toolkit admin to install plugins or close the window.
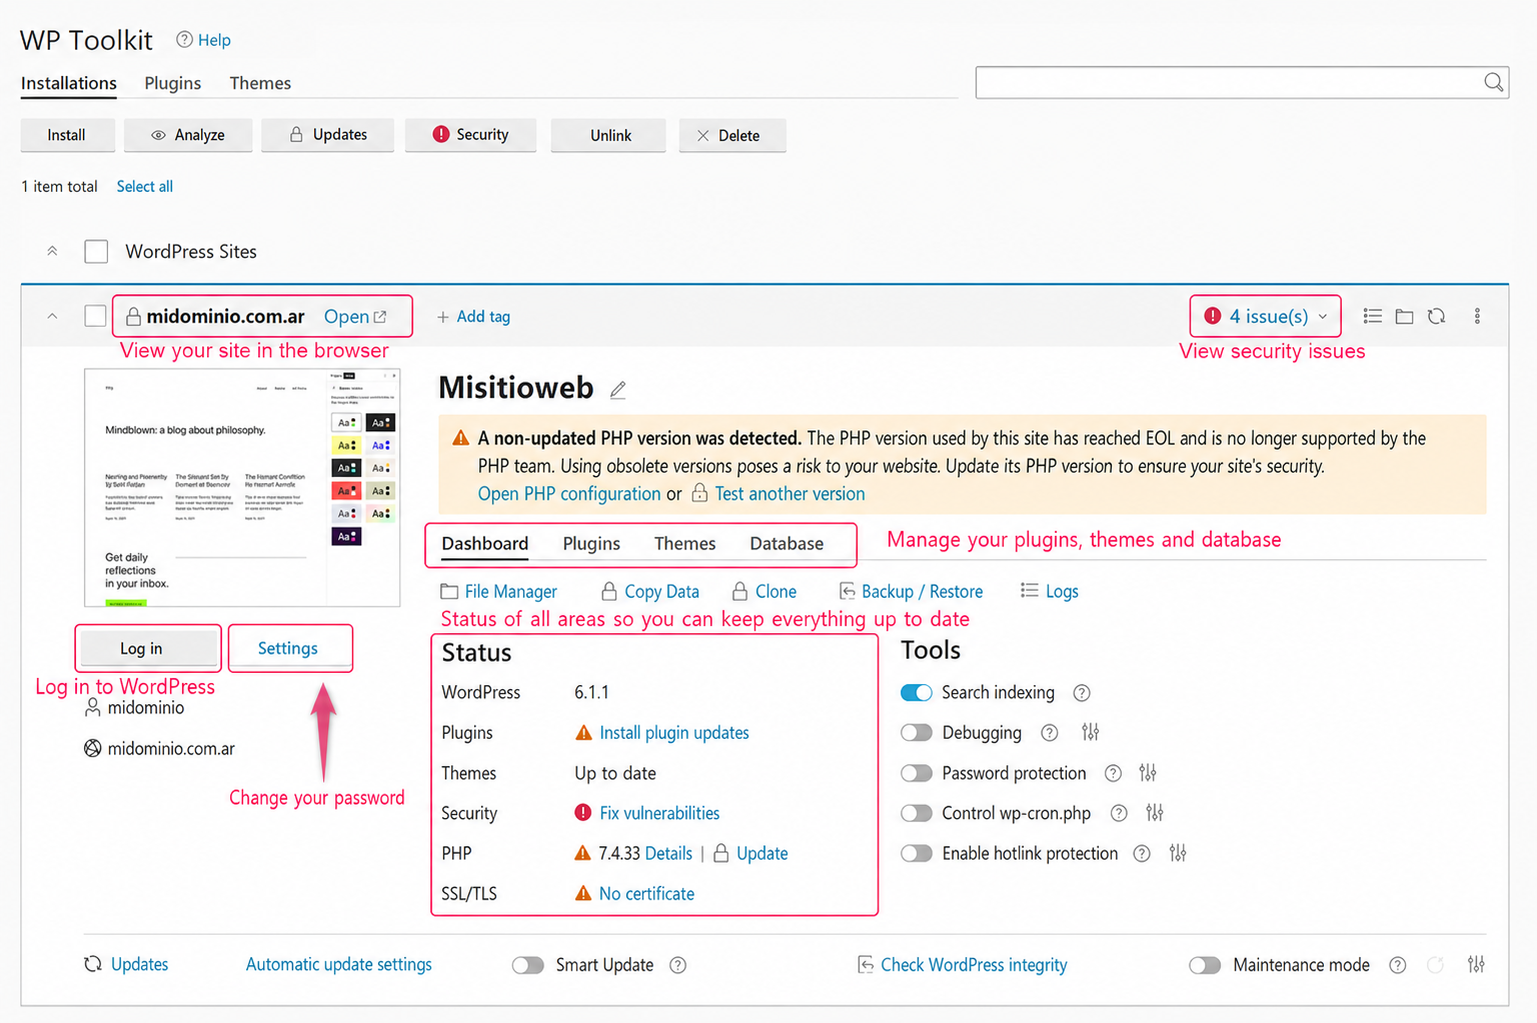
- If you enter WP Toolkit from the control panel you’ll see your installation. You will find many options and tools to make WordPress administration easier.
You will see options to:
- Change the password for the WordPress Dashboard.
- Log in to the WordPress Dashboard.
- Install and modify Plugins, Themes, and your Database details.
- View Security issues to keep your installation protected.
- View the Status of each area to keep everything up to date.
Explore WP Toolkit to make the most of all its features. Below we provide a video tutorial.